
The world is a strange place to be in at the minute. Between legislation being passed retracting the rights of pregnant people to data leaks and selling of personal information its not unreasonable to want to keep private information to yourself. However, that’s not always possible to do.
For people who are chronically ill or disabled like myself, sometimes we need to keep records of our daily intakes, our pain measurements or our symptoms. Just like how for people with diabetes need to keep an eye on their blood sugar levels. These things are important to keep a track on for noticing long term care and sharing this data with our medical teams or those who may need to know that information.
Tracking health stats isn’t a new phenomenon, in fact, your phone does it every day. From how many steps you’ve taken, to how many steps you’ve climbed it’s all there for you in your pocket. So how do you keep your information safe and record it easily without using a specific app to do it when you’re unsure if that app will sell your data or worse.
Well, today I’ll walk you through how to create a tracking system using Google Forms. Yes. Google Forms.
It’s free, pretty simple to set up and customizable to your needs and desires. From period tracking to work out sessions and everything in between. You can record your stats with privacy and security.
-
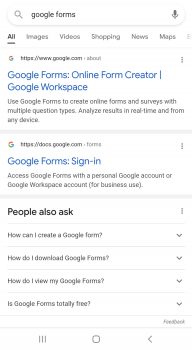
- First things first, you need to get Google Forms. You can do this by searching Google Forms on Google Search
- You may be prompted to sign in, if you are, just follow the instructions
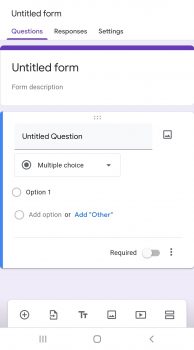
- When you open Google Forms you’ll be brought to a blank form for you to fill out.
- You can fill this in with anything you like, but for the purposes of this example; I have a prefilled in link with ideas for what you could use for tracking your period.
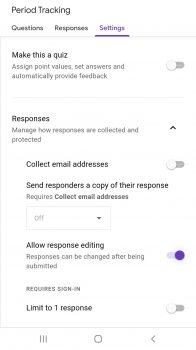
- After you’re happy with the questions you’ve put in and things you’d like to track, go to the settings icon and be sure to toggle edit responses. This way, if you make a mistake or need to change something you can do so without resubmitting the entire day.
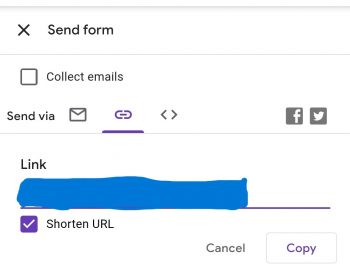
- Now we work on filling in the form for daily use. You want to head to send form, which will be in the top right hand corner of your screen. From there you’ll have the choice to send it by email, link or embed it. We want to copy the link. So press copy when you’re ready.
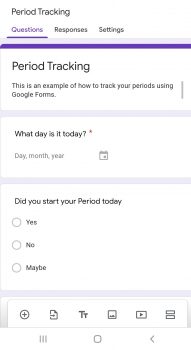
- Once you’ve copied your link, you’re going to want to paste it into your mobile browser. The form should look something like this
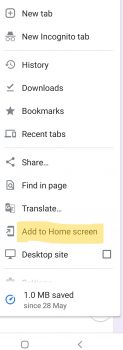
- From here we want to add it to our home screen. Using Chrome you will be looking for the 3 dots in the top right hand corner. Towards the bottom of the list you’ll see Add to Home screen.
- On my Samsung I’m prompted to give a nickname to the sheet. So for this example, I simply named it Period Tracker. But you could use whatever you wish.
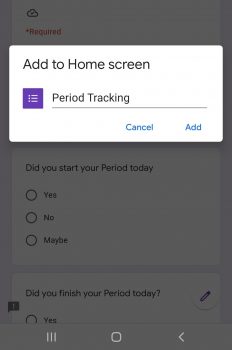
- Once you’ve confirmed the nickname, you’ll be prompted to add it to your home screen. Press Yes for it to be added to your main screen.
![]()
Voila! You now have a tracker, tailored to your needs and accessible right on your home screen.
![]()
![]()
The best bit about it is that even at a glance when you log into Google Forms, you can see your results and the major data points. For those who are a bit more techy or who know how to code this can be easily transferred into a Google Sheets file where you can fiddle around with the macros to your hearts content.
It can be a little bit tricky knowing what to put into a form in order to track the things that are important to you. But if you need any help or ideas on what to put into your form and what you’d like to capture. Let me know in the comments below and I’d love to help you come up with some ideas!


Comments