
The smartphone camera is such a fickle beast. In one situation your photos can look darn near professional. In another, you feel shame at the thought of even sharing the blurry, dull results on Facebook or Instagram. When you do, your handwork is typically masked by a thick layer of filters applied haphazardly via your favorite app. Stop that. Stop that right now.
Taking the best smartphone photo possible doesn’t start with a 40MP camera. It doesn’t start when you begin swiping through those filters. It starts before, with a bit of thoughtful planning based on some basic concepts even movie photographers can keep in their tool belt. We’re here to show you how to get the most out of your Android phone’s camera, regardless of its DxOMark rating, with a few helpful tips, tricks, and apps.
Take better photos
Getting better shots with your Android phone starts before you even tap the shutter button. To get the perfect photo, it helps to have a basic understanding of some photographic principles that can make your images look great no matter what the megapixel rating of your smartphone’s camera is. Let’s take a minute to talk about lighting and photo composition.
1. Use lighting to your advantage
In most situations you won’t have a pro lighting rig to illuminate your subject and boost the color and clarity of your final shot. That doesn’t mean you can’t use environmental lighting to your advantage, however. When setting up a shot, first consider the light sources in the surrounding area — these include natural light from the sun as well as any artificial light from lamps and other fixtures. In almost all cases, rely on natural light as much as possible. It plays much nicer with nearly every camera and provides light at a color temperature that looks, well, more natural.

An example of an image with poor lighting showing both underexposed and overexposed areas.
Artificial environmental lighting can often have a negative impact on your photo. Incandescent bulbs can give off a dull, yellowish hue while fluorescent lighting can at times be a bit too harsh and bright. Natural light sources typically provide a warm light that won’t tint your final photo or wash out your subject. Pro tip: Whenever possible, avoid using your camera’s LED flash!
Once you have established the best light source for your photo, position your subject (or your camera) in a manner that best utilizes the light. In nearly every case you want the source of light to be shining at your subject — not behind your subject and directly into your camera’s lens. Framing a shot with a light source facing the camera will flood the sensor with too much light and overexpose the entire image. Lighting from the side could result in awkward shadows or underexposed areas in your shot.
Once you have gotten the hang of how to use light to your advantage, you can begin experimenting with how you frame photos in regards to a light source. For instance, getting the right lighting from behind a subject can result in an interesting silhouette effect but the subject itself will be dark and hidden in shadow. A good rule of thumb: keep your back to the light source and your subject facing the light whether it’s a window, lamp, or sunset.
2. Understand exposure

An (artificially exaggerated) example of underexposure.
Exposure, by its most basic definition, relates to the amount of light that enters the camera sensor and its effect on overall image brightness. In a standard digital camera exposure is adjusted with a combination of aperture, shutter speed, and ISO. The three combine to dictate how much light enters the camera and how sensitive the camera is to that light. In a well-lit situation, a low light sensitivity is suitable for capturing the scene in plenty of detail. In low-light situations a higher sensitivity is required, though it can result in a “noisier” (i.e. grainier) image.

An (artificially exaggerated) example of overexposure.
For the typical Android smartphone’s stock camera software, users are not provided with much in the way of manual exposure adjustments. Aperture and shutter speed are usually locked in and overall exposure is determined automatically based on the camera’s focus. If anything, a manual adjustment simply labeled “Exposure” might be available. This control in most cases operates similarly to a manual ISO adjustment. The Exposure control takes the form of a simple slider that can be moved to adjust the overall brightness of an image before a photo is taken.

A more optimal (but not quite perfect) exposure.
Third party camera apps (typically the more expensive ones) offer a greater range of manual control, and many even allow the user to pinpoint an area of the image from which to base auto-exposure parameters independently of the camera’s focus.
3. Set the white balance
Most Android camera apps offer some form of white balance adjustment, though the level of manual adjustability varies. White balance is an important parameter for capturing colors accurately, determining the baseline temperature for white given the light source. Users are typically able to pick from a variety of preset white balance options based on various lighting conditions in addition to an auto mode that will adjust white balance dynamically.
If you’re lucky (or if you have purchased an advanced camera app) you will be able to manually set white balance to better suit your scene. White balance is typically manually adjusted by focusing on a white object subjected to the same lighting conditions you will be shooting in.
4. Keep it focused

Keep the camera steady and make sure your subject is in focus.
Perfect lighting and exposure settings don’t count for much if your image is out of focus. Take that extra second before firing off the shutter to make sure the subject of your photo is in focus. Nearly every Android smartphone offers autofocus, but most will take a second to settle after tapping the shutter and before capturing a photo. It is important to keep your hand steady and hold the image in focus until the camera’s shutter fires.
Most Android cameras also offer the ability to manually and dynamically focus on different areas of an image by tapping on your smartphone’s display. This reorients the focus and can often be deployed to create interesting effects. The popular “bokeh” effect is created when the subject of a photo is in focus while the background is artistically blurred. True bokeh images are hard to capture with smartphone camera hardware, but some phones have special capabilities built-in to simulate the trendy look.
5. A note on image composition
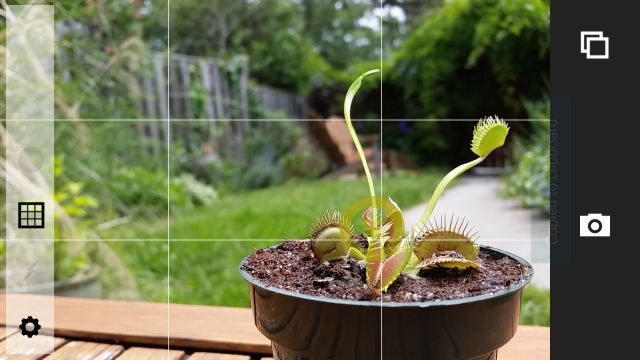
All things considered, an image is ultimately only as good as its overall composition. One of the most basic principles of photography is the “Rule of Thirds,” which breaks down the plane of an image into nine quadrants based on equal horizontal and vertical divisions. There’s a good chance that your smartphone camera app includes the option to show a grid overlay that acts as a visual representation of this division by thirds.
The basic concept of the Rule of Thirds is to place your subject or subjects at the points where these quadrants intersect or along the grid lines. Doing so creates a visually balanced composition. The Rule of Thirds can further be employed, bent, and manipulated to create intriguing photographs that capture the viewers attention and draw the eyes toward the image’s most interesting aspects.
With all of the above said, the reality is that not every situation presents the perfect opportunity to capture a photo. Often lighting conditions will be poor, the subject will be moving fast, or the entire moment could be too fleeting to worry about the finer aspects of composition. In these cases sometimes you might have to settle for capturing the memory rather than the perfectly executed shot. Luckily, plenty of options exist for improving all photos after the fact.
6. Shoot and edit your photos with these apps
Now that we understand the basics of taking a better photo, how do we capture and edit it? No, we don’t mean cropping it, slapping on an Instagram filter, and calling it a day. We want to dive a little bit deeper than that in order to get the most out of your final photograph.
Here are some great apps to consider when shooting and editing with your Android device along with tips on how to use them. Looking for more camera apps to take your shooting to the next level? Check out the 10 Best Camera Apps for Android.
Open Camera
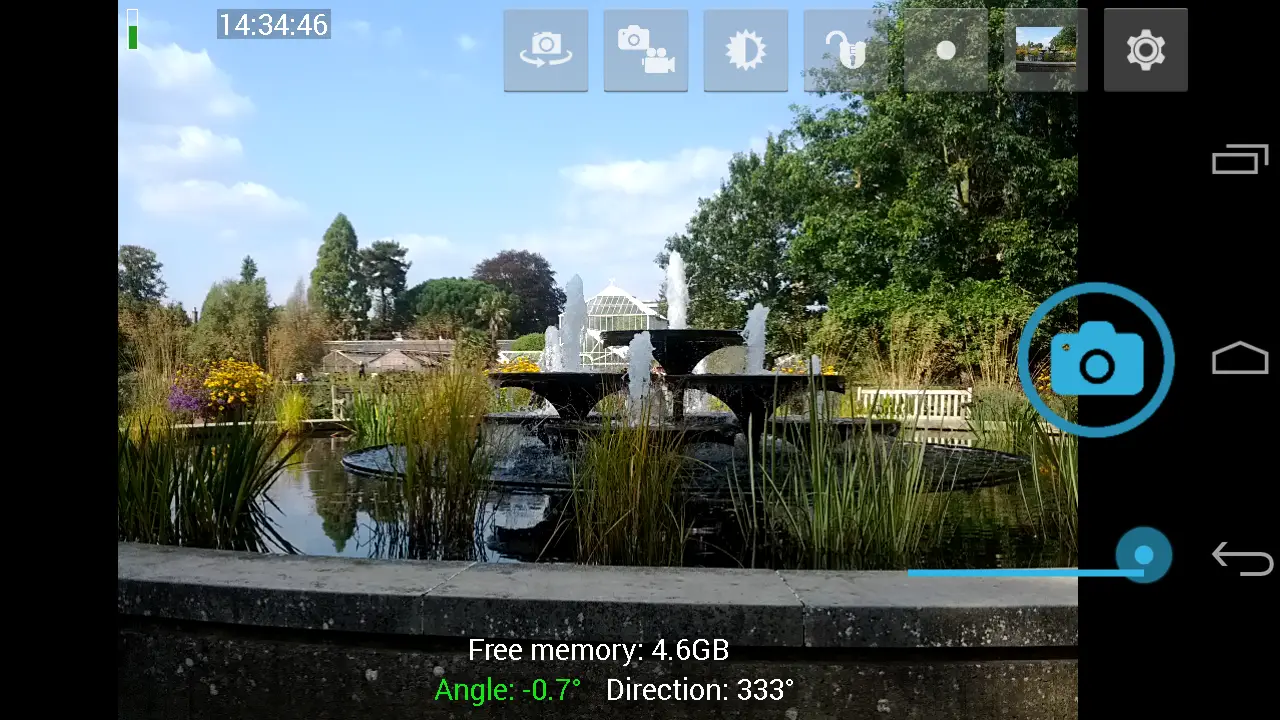
Our favorite 3rd-party camera app is the free and open sourced Open Camera. This camera app has everything you could possibly need. It features auto-stabilization and manual controls for everything from white balance, ISO, and exposure. If you’re looking for a camera with more controls, it’s hard to get better than this. Did we mention it’s free?
Camera FV-5
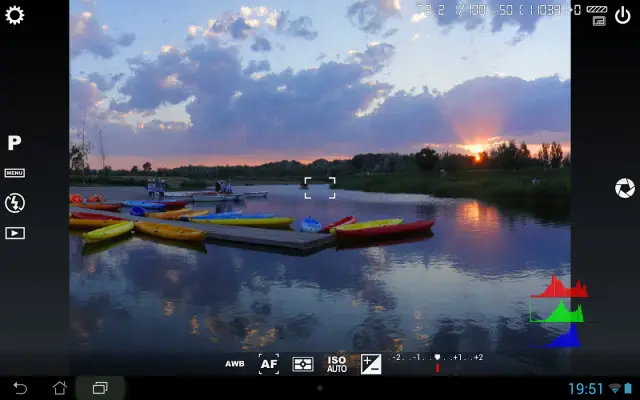
If you want the power of a DSLR in your Android device, Camera FV-5 might just be the solution. It offers tons of pre-shot camera adjustments that you just won’t find in any other app for Android, bringing a manual photo experience unlike any other.
With Camera FV-5 you can manually tweak exposure, ISO, focus mode, white balance and more all in a user interface that graphically mimics what you would find on the back of an expensive pro camera rig.
Camera FV-5 also brings shooting modes not available in most stock Android cameras. These include long exposure for night shots and the ability to capture HDR time-lapse photos. A self timer is available in case you want to jump into one of your perfectly framed shots (tripod recommended).
All that power is going to cost you, though not as much as the DSLR this app practically replaces. $4 couldn’t be better spent.
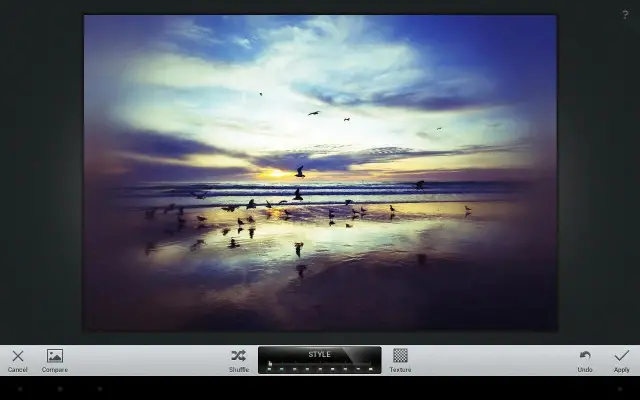
VSCO Cam
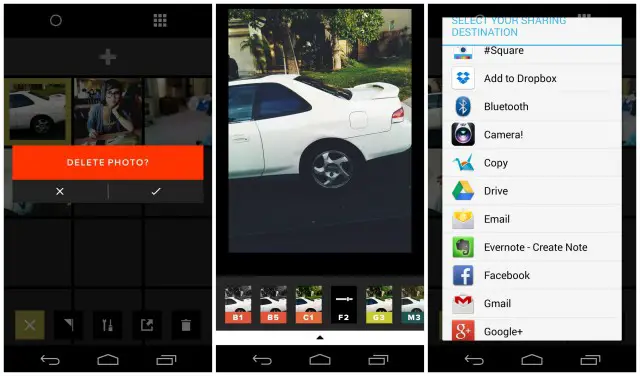
Hands down our favorite photo app for Android. Before snapping the shot, VSCO Cam’s camera mode provides several grid options for framing and composition, a white balance lock, and the ability to set exposure and focus independently. That will make fairly easy work of the steps we described above, but VSCO Cam’s real power comes in editing photos after the fact.
The first elements you will want to mess around with are exposure, color temperature, and tint. These three parameters, all easily adjustable via sliders in VSCO Cam, should help you dial in the brightness and color of your image to better reflect the scene you aimed to capture. A variety of cropping options can help get your image ready for social sharing or otherwise tidy up an image for tighter composition.
After that the sky is the limit with a handful of other helpful tools. We particularly like VSCO Cam’s ability to independently adjust the shadows and highlights of your images. This allows finer control over brightness by targeting only specific areas of the image. Adding highlight and shadow tints can flavor a photo in unexpected ways, but we suggest doing so subtly. Pro tip: long-press the image in edit mode to get a before and after preview.
VSCO Cam also includes filters and advertises them as a main aspect of the app. We don’t blame them, the filters are indeed great (and you can purchase dozens beyond what come included with the app), but wait to apply a filter until after you have made some finer image adjustments as described above. One great aspect of VSCO Cam’s filters is the ability to adjust how they flavor a photo via the filter level slider. Again, subtlety is key here. Sometimes just the lightest touch of a filter can do wonders for your photo, producing a look that is less auto-generated and more artistic.
Snapseed
Snapseed is another fine photo editing app to consider. It offers many of the same features as VSCO Cam in addition to a few helpful tools for photography newbs and experts alike.
If you have no idea where to start with editing a photo, simply use Snapseed’s Auto Correct function. This will crunch some data about your photo and apply tweaks to reign in brightness and color while offering other enhancements. In many cases, this might be enough to produce a pretty stellar final product. If you’re not happy with the final outcome or want to take your photo in a different direction, Tune Image provides an array of manual adjustments to experiment with further.
The prerequisite array of photo filters are here as well, providing even more options if you have yet to track down the perfect vintage effect in another photo app. Another nifty feature is Snapseed’s Selective Adjust, which allows you to tweak only a specific area of an image, letting you leave the good parts of a shot untouched while sprucing up the regions that need some work. This tool can also be deployed creatively for some pretty sweet results.
As an Android user you already have access to some of these functions, though you might not know it. Google acquired Snapseed developer Nik Software back in 2012 and has since integrated many features of the photo editing app into Google+. On the flip side, Snapseed offers excellent integration with Google-powered social network, making sharing and backing up your images easier than ever.
Photoshop Express
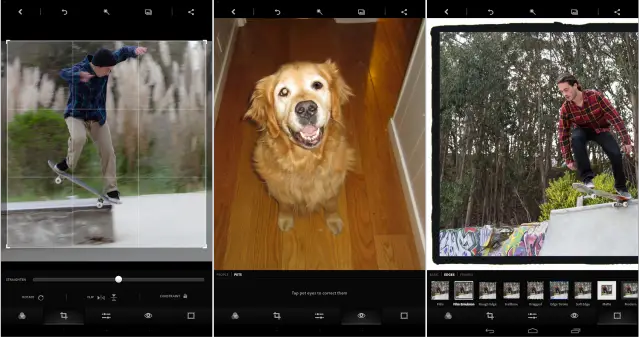
When it comes to photo editing, perhaps no name is more recognizable than Photoshop. Photoshop Express gives you a taste of that editing power without the price tag, offering a free app to tweak and refine images on your mobile device.
Basic tools allow you to rotate, crop, and straighten your photos as well as remove red eye, while Auto-Fix will correct for contrast, exposure and white balance with one touch. Deeper editing abilities can further adjust color, clarity, highlights, shadows, and more.
Of course you get filters, as if we should even have to mention that at this point. But again: do not rely on filters alone to make your photos great. A great #nofilter shot can oftentimes be more appealing than a faded, sepia-toned version of the same.
Alright, no excuses. You now have everything you need to take your Android photography to the next level. From planning the shot to polishing it up, it’s that little extra that will take your photos from ordinary to extraordinary.


Comments