
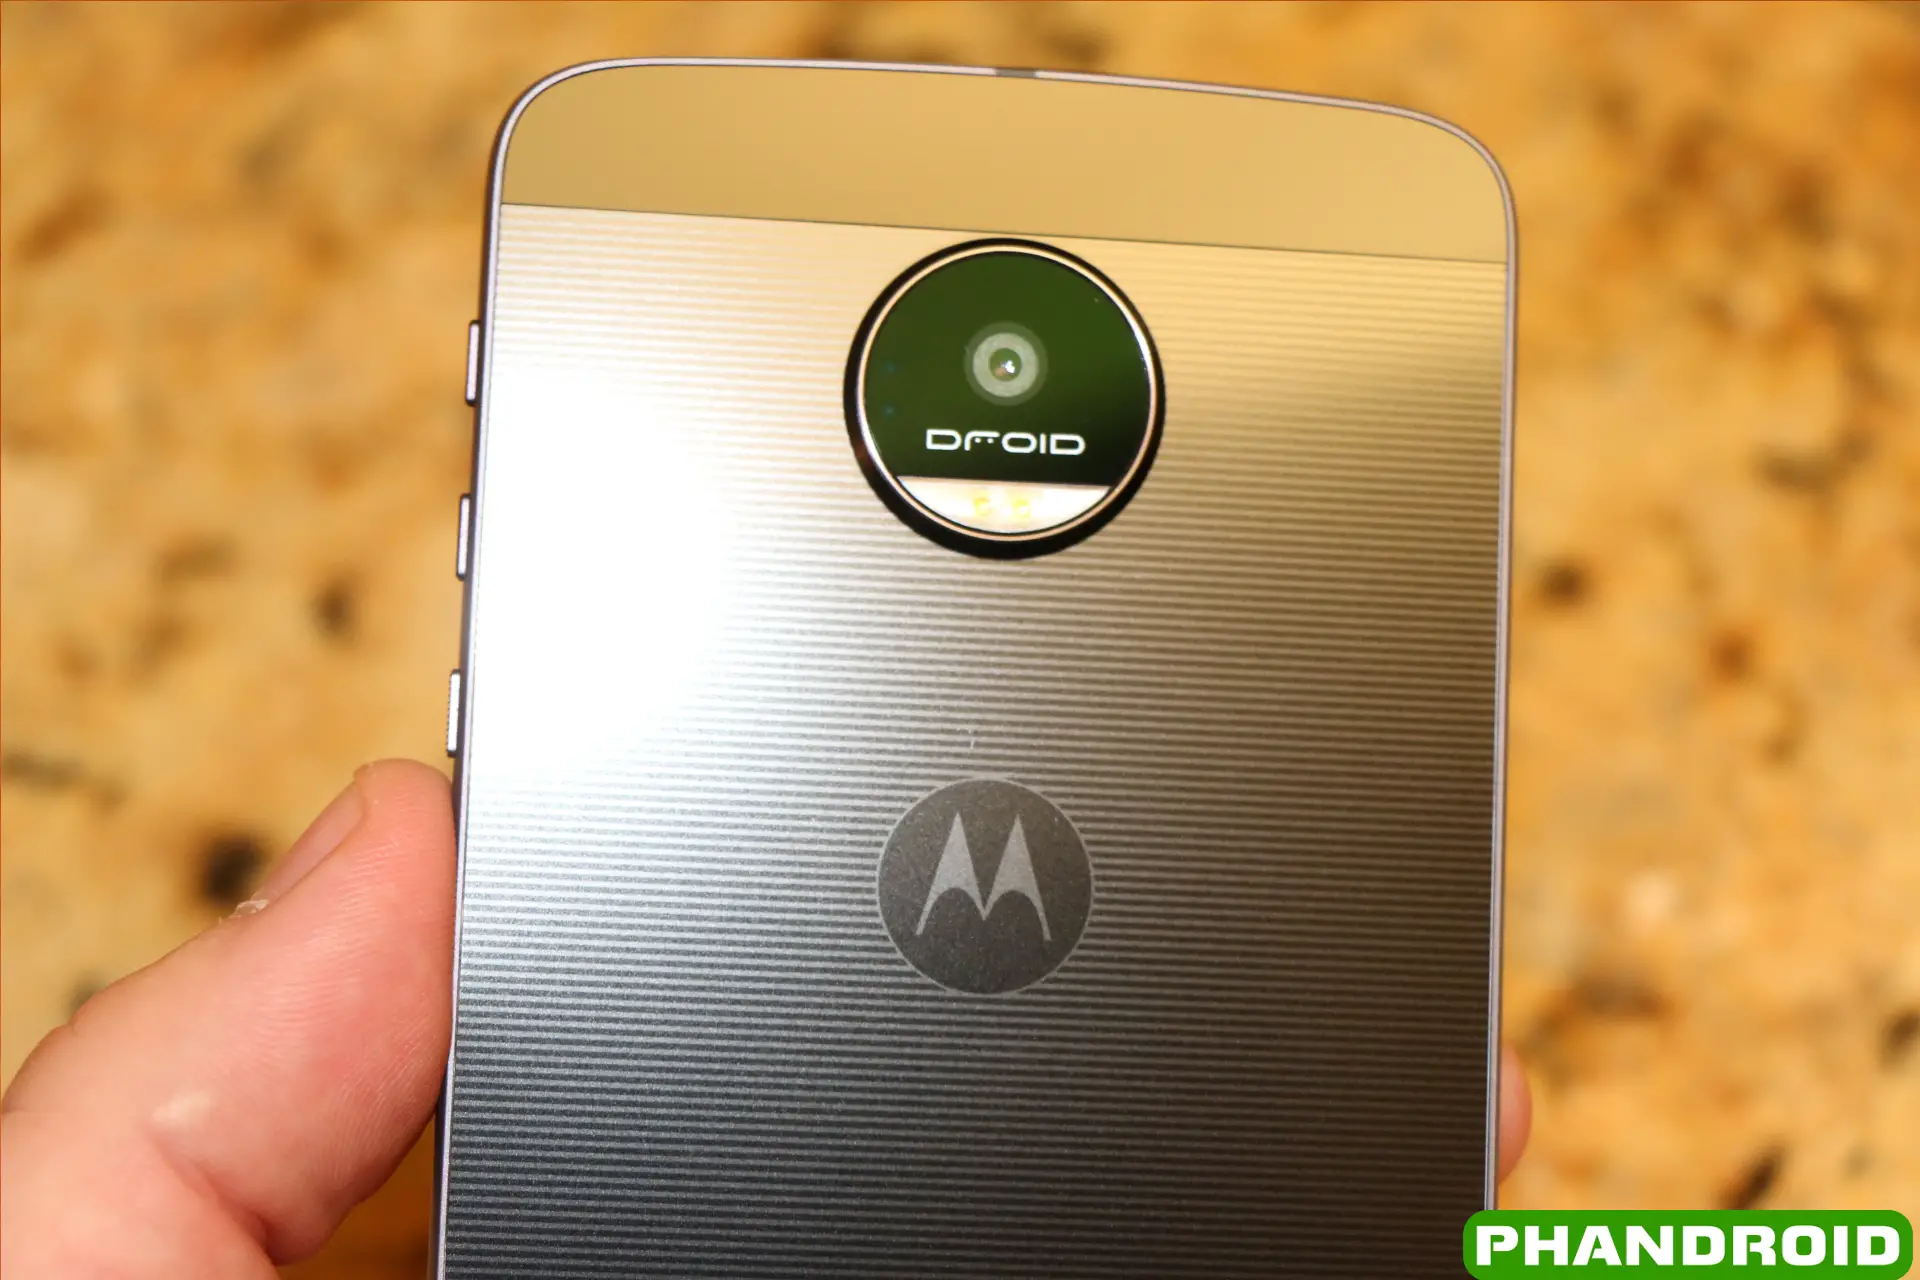
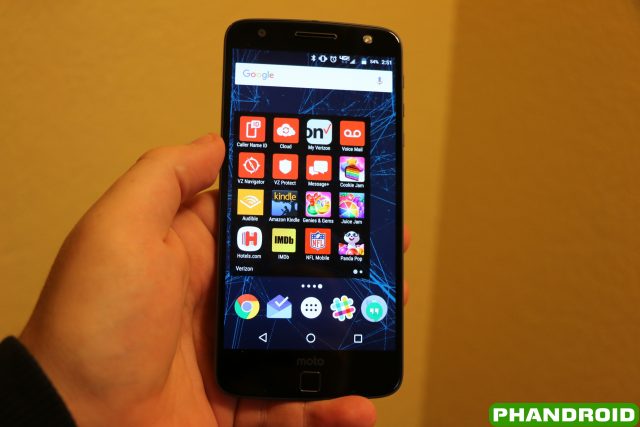
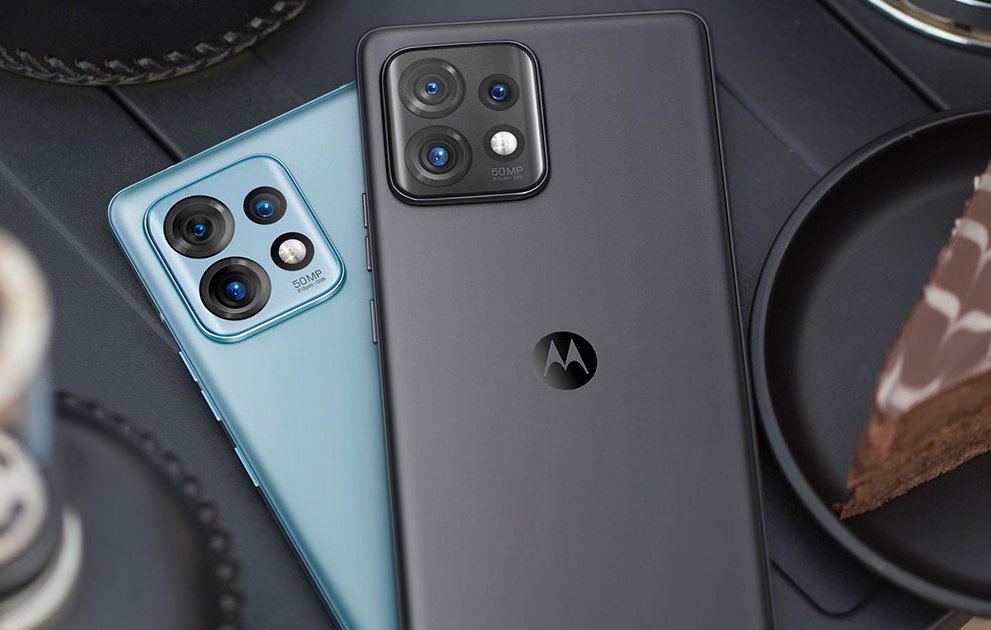
Motorola and Lenovo have officially made their entrance into the 2016 flagship smartphone race with the Moto Z and Moto Z Force. These two devices will becoming later this year, with Verizon getting first dibs with the Moto Z Droid and Moto Z Force Droid. We’ve already taken a look at how these two devices perform in their full reviews, but we’re back with the first things every owner of one of these devices should do.
1. Move Content from your old phone
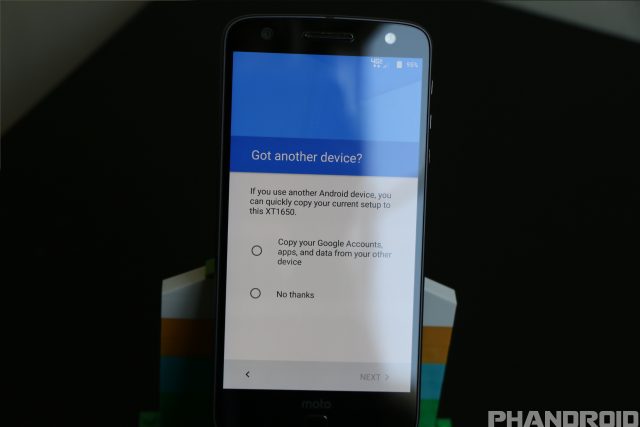
With a new device, you don’t want to leave behind all those applications or information that were found on your old device. Luckily, Google has built-in the ability to easily restore all your apps during the set up process on just about every new device.
With the Moto Z Droid and Moto Z Force Droid, there are actually two ways for users to get all of their information from their previous devices, onto the new ones. The first method requires NFC to be available on both devices, then once the devices are tapped together, the old phone will use Bluetooth to transfer all the necessary files.
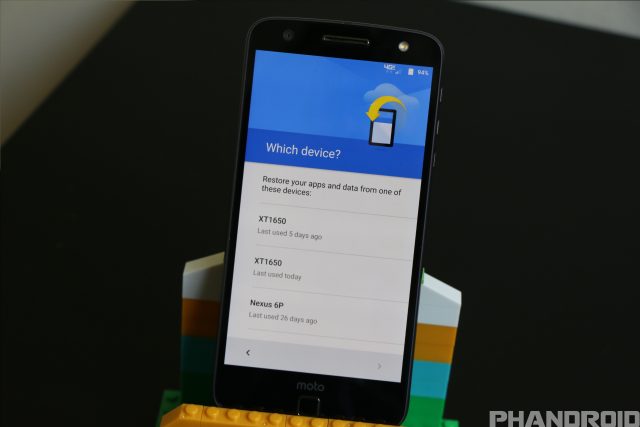
The second method takes advantage of Google’s ability to automatically backup all your applications and login information onto servers, which can then be pulled from the cloud and loaded onto your device. Once you have signed in with your Google account, you will then be presented with a drop-down menu which shows all the device back ups, then you just need to select the most recent one.
The device will then load all of your favorite apps and data onto the new device, making for a seamless transition. It’s important to remember that the apps will have to be downloaded again, so make sure you are connected to a Wi-Fi network so that you don’t eat through all of your data.
2. Make sure you’re prepared for disaster
Set up the fingerprint scanner

Both the Moto Z and Moto Z Force include fingerprint scanners on the front of the devices. This marks the first time that a Motorola flagship device includes this functionality, and setting it up is an absolute breeze, and here’s how to make it happen:
- Open Settings > Security > Fingerprint
- Select Add Fingerprint > Continue
- If you haven’t already set up a lock screen pattern, PIN, or password, you’ll be directed to set that up now.
- Tap Next
- Choose which finger to use, touch the scanner until it vibrates, then life your finger.
- Continue to repeatedly touch the scanner until the fingerprint has been successfully recorded, while making sure to not use the same area on your finger.
- Once the fingerprint has been successfully recorded, tap Done.
Once completed, you can always decide to head back to this Settings menu if you want to add more fingerprints, and you can ever add the same fingerprint twice. This may come in handy if you’re experiencing issues with the fingerprint scanner recognizing your various fingers.
Use Android Device Manager to locate your lost phone
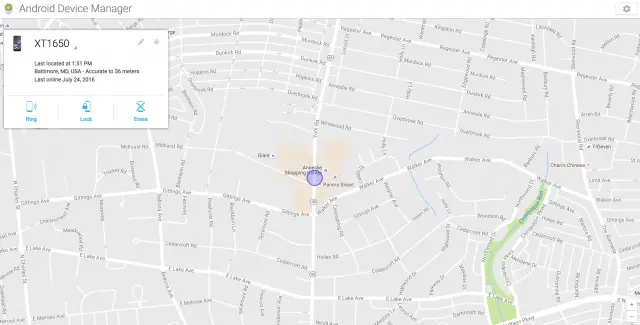
There’s always the potential for us to get clumsy and leave our precious devices behind somewhere, or be subject to a thief taking them from us. That’s where Android Device Manager comes into play. This is a service provided by Google which shows you the last known GPS location of your device. Once located, you can also sound an alarm, lock the device or even factory reset the device remotely in case you’re positive the device is unretrievable.
This feature is included with just about every Android phone nowadays, but must be activated on your smartphone before you can take advantage of Android Device Manager.
- Go to Settings > Security
- Scroll down to Device Administrators
- Make sure that the Android Device Manager checkbox is marked
Once turned on, you can head over to the Android Device Manager webpage to locate, ring, lock, or wipe your device remotely.
3. Keep your favorite settings just a swipe and a tap away
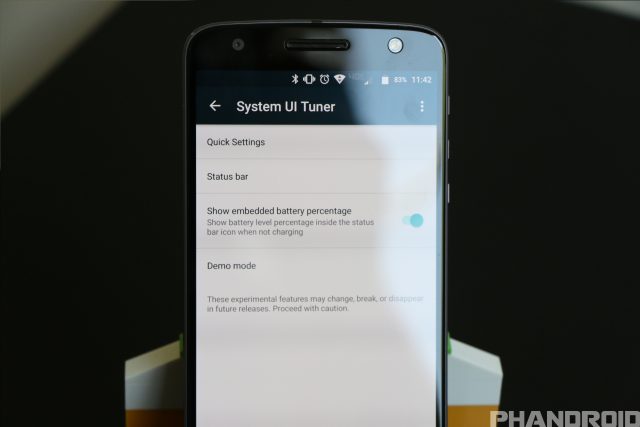
Within the notification shade on our devices, is a panel of quick-setting toggles that can turn or turn off various features on our devices. While handy, these toggles may not be in the best order for us to get to them, or may not be necessary at all. There’s an easy way to change around what toggles are shown, but it requires us to access another hidden settings panel known as the System UI Tuner.
In order to activate the System UI Tuner:
- Swipe down with two fingers from the status bar
- Press and hold the Gear icon in the top right hand corner
- After holding for about 10 seconds, let go
- Once released, you’ll see a message which states: “Congrats! System UI Tuner has been added to Settings”
From here, users can change a few different options that aren’t found elsewhere such as customizing the Quick Settings panel, what icons are found in the Status bar, as well as showing the battery percentage level. Here’s what we need to do to customize what is found when accessing the Quick Settings panel:
- Open the Settings app
- Scroll down and select System UI Tuner
- Tap Quick Settings
- If rearranging a toggle, press and hold the icon then move or delete
- If adding a toggle, tap the Add tile button and select the new tile
4. Disable and uninstall bloatware
Considering these two devices are exclusive to Verizon, it’s a known fact that there will be applications pre-installed that will never be used. There are a few that can quickly be uninstalled, but the Verizon suite of applications will need to be disabled. Out of the box, these devices come packed with 18 pre-loaded applications and here’s how you can disable the ones you won’t use
- Go to Settings > Apps
- Select an app from the list
- Tap the Disable or Uninstall button
This may not work for every application, as some applications are required for the device to function regularly. However, if you notice that something’s acting a bit wonky, simple tap the disabled application and select Enable.
5. Never run out of storage
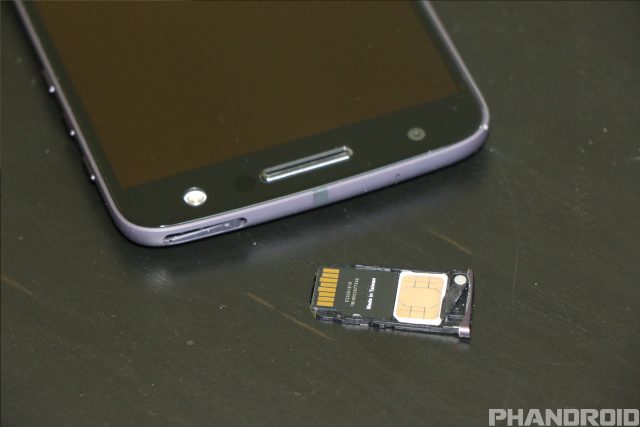
The Moto Z Force and Moto Z Force Droid are offered in either 32GB or 64GB storage capacities, but they also feature a MicroSD card slot to make sure you have the content you want on your device. With support up to 2TB, you can throw pictures and videos on the MicroSD card and be ready to go for days. Obviously, there has yet to be a 2TB microSD card actually made available for mobile devices, so check out these other options to up your storage game:
6. Make sure to keep your internal storage open

With the ability to add storage to the Moto Z Droid and Moto Z Force Droid, it would only make sense for Motorola to allow users to save their pictures directly to the expandable storage option. Although not enabled right out of the box, the ability to save your pictures directly to the microSD card is easy to set up:
- Open the Camera app
- Slide left from the screen to show the settings
- Select Storage
- Pick Phone or Memory card
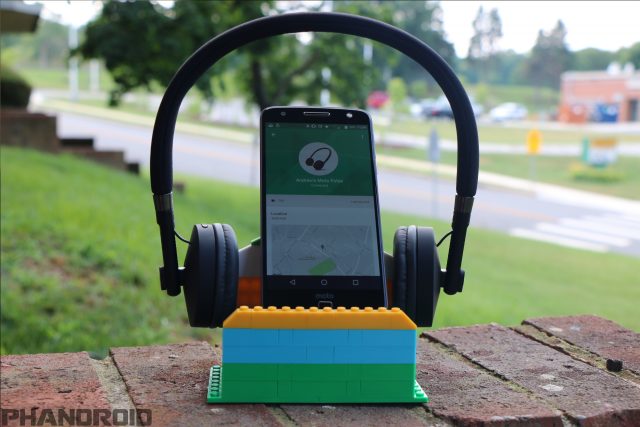
7. Backup photos and videos
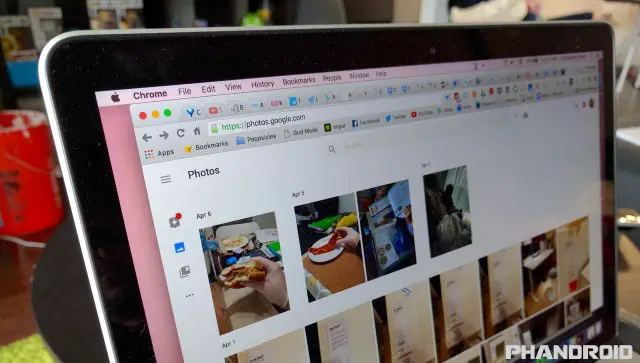
You definitely don’t want to lose those pictures of your friends birthday party, or that memorable night at the ball game. In order to make sure that doesn’t happen, be sure to open up Google Photos and back up all the pertinent folders so that your favorite moments don’t disappear. Just as a reminder, Google Photos offers unlimited high-quality picture and video backups (up to 1080p), so you’ll never run out of space.
- Open Google Photos
- Open the slide-out menu by swiping from the left
- Select Settings
- Select Back up & sync
- Toggle the On switch
8. Take the best pictures and videos
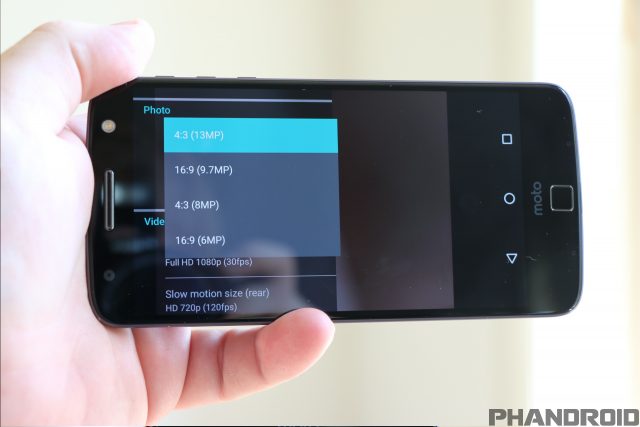
In an effort to save space on your devices, Motorola has not enable the best picture and video quality within the camera application. In order to make sure that you’re taking full advantage of the 13MP camera in the Moto Z Droid and the 21MP camera within the Moto Z Force Droid, here’s what you’ll need to do:
- Open the Camera app
- Swipe from the left
- Scroll down and select Photo size (rear)
- Pick the best option for you
Then..
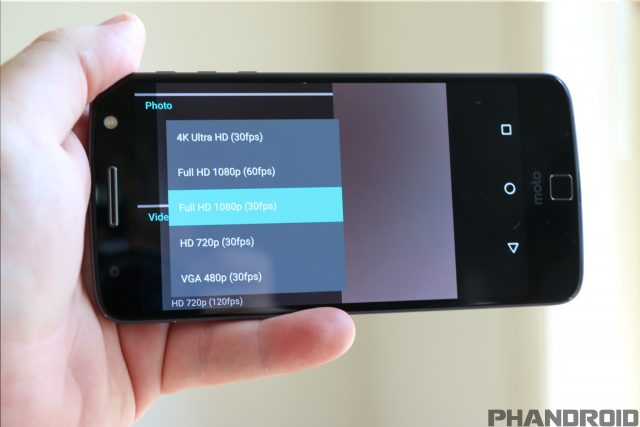
- Scroll down and select to Video size (rear)
- Pick the best option for you
Although the Moto Z Force Droid has the ability to take higher resolution photos (21MP), both devices have the ability to shoot video in 4K. As a reminder, if you’re looking to keep 4K videos backed up via Google Photos, this will take away from the data storage limit within your Drive account. If you want to freely back up any amounts of video, you’ll need to switch to Full HD 1080p within the Camera app.
9. Set up Moto Apps
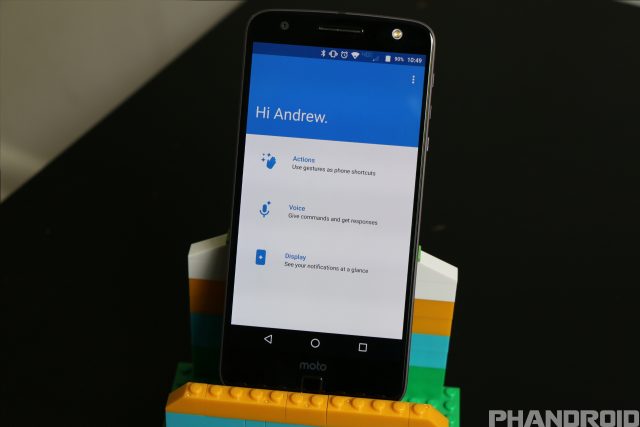
Ever since the release of the original Moto X, Motorola has been packing in a few extra features on top of an already awesome software experience. The pre-installed Moto app (formerly Moto Assist) gives users a few different ways to personalize and interact with their newest devices with the help of Moto Display, Moto Voice and Moto Actions.
- Actions – activate or customize specific gestures to easily interact with the camera, display, flashlight, or phone calls.
- Voice – use a personalized launch phase to activate hands-free interactions with your device.
- Display – shows notifications on the lock screen, without unlocking the device, and allows to easily open or dismiss anything while “peaking” at the content.
10. Activate Google’s secret menu and speed up your device

The Moto Z Droid and Moto Z Force Droid feature flagship specs in a compact package, making them two of the fastest devices on the market. Unfortunately, things may not feel that way once you’ve unboxed them and have started getting everything set up. The animations may seem a bit slow, and the UI experience isn’t all that mind-blowing.
However, there’s a secret menu that changes the speed of the animations, which will make you feel like you’re flying through every app and menu while playing around.
- Open the Settings app
- Scroll down and select About phone
- Scroll down and tap Build Number 7 times
- “You are now a developer” message will appear
- Go back to the Settings app and Developer Options will now appear
Once you’re a developer…
- Select Developer Options
- Scroll down and select Window animation scale and choose .5x
- Select Transition animation scale and choose .5x
- Select Animation duration scale and choose .5x
Once finished, exit the Settings application and lock your device using the power button or fingerprint scanner. Once you unlock the device again, you’ll notice a HUGE difference in the speed of the UI, and opening apps will feel faster than ever.
11. Make your display POP!
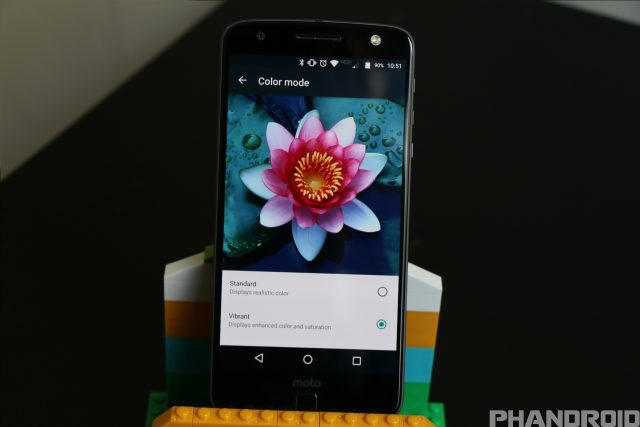
When it comes to adjusting the screen color mode, this is a feature you would expect to see on an LCD display, not necessarily on an AMOLED display. An AMOLED display already features deeper color contrast and saturation, as well as being essential for features like Moto Display. However, hidden with the Display settings on these devices is the ability to switch between “Standard” and “Vibrant”
- Open Settings
- Select Display
- Tap Color Mode
- Select Standard or Vibrant
When selecting Standard, the colors on the device feel a bit more muted and washed out when compared to the Vibrant option. Seemingly, this is the reason why “Vibrant” is the default option out of the box, but may not be everyone’s favorite.
12. Determine which Moto Mod is for you
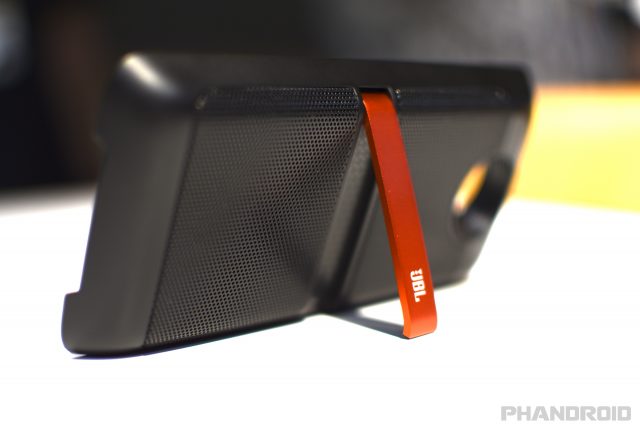
One of the most compelling reasons to get either the Moto Z Droid or Moto Z Force Droid is the ability to add functionality with the help of Moto Mods. These are add-on accessories which can either provide extra battery life, pump up the volume of the speaker, or project your screen onto a wall. Being able to figure out which option is best will be reliant upon you determining your daily usage and which Moto Mod would seem the most useful.
In case you’re wondering where to start, here’s a look at the Moto Mods that will be available when these devices launch:
- Incipio offGRID Power Pack
- JBL SoundBoost
- Moto Insta-Share Projector
- Kate Spade New York Power Pack
- TUMI Power Pack
- Motorola Style Mods
Additionally, we are expecting more manufacturers to release new Moto Mods once the devices themselves have been made available for everyone to purchase.
13. Master all the Tips & Tricks
With new devices, its next to impossible to keep up with all the various features and quirky ins and outs of every device. Well, that’s where we come in as we have compiled a list of over X tips & tricks for you to get acclimated to your new devices
Moto Z Droid & Moto Z Force Droid Tips & Tricks
14. Best Apps and Games
Chances are, when you get a new device, you already know what apps and games you are going to be putting back onto your device. This is especially true if you choose to restore your device from a previous backup and will have all your favorite apps in their rightful place. However, there are new apps that are coming out weekly, and you sure don’t want to miss out, so be sure to check out the following apps and lists:
Start here: 100 Best Android Apps of 2016
- Earlybird – News for Android
- Channels – Forums for Android
- 30+ Android Apps for August
- Phan Favs – best apps selected by readers
15. Android Forums
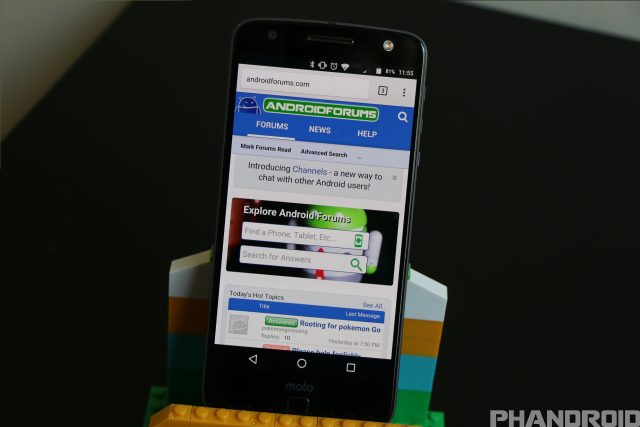
The Moto Z Droid and Moto Z Force Droid are two great device options that are now competing to take over as your main device. Their unlocked counterparts will be coming sometime in the fall, but in the mean time, everyone should check out AndroidForums.com where you can mingle with other potential owners of the devices.


Comments