
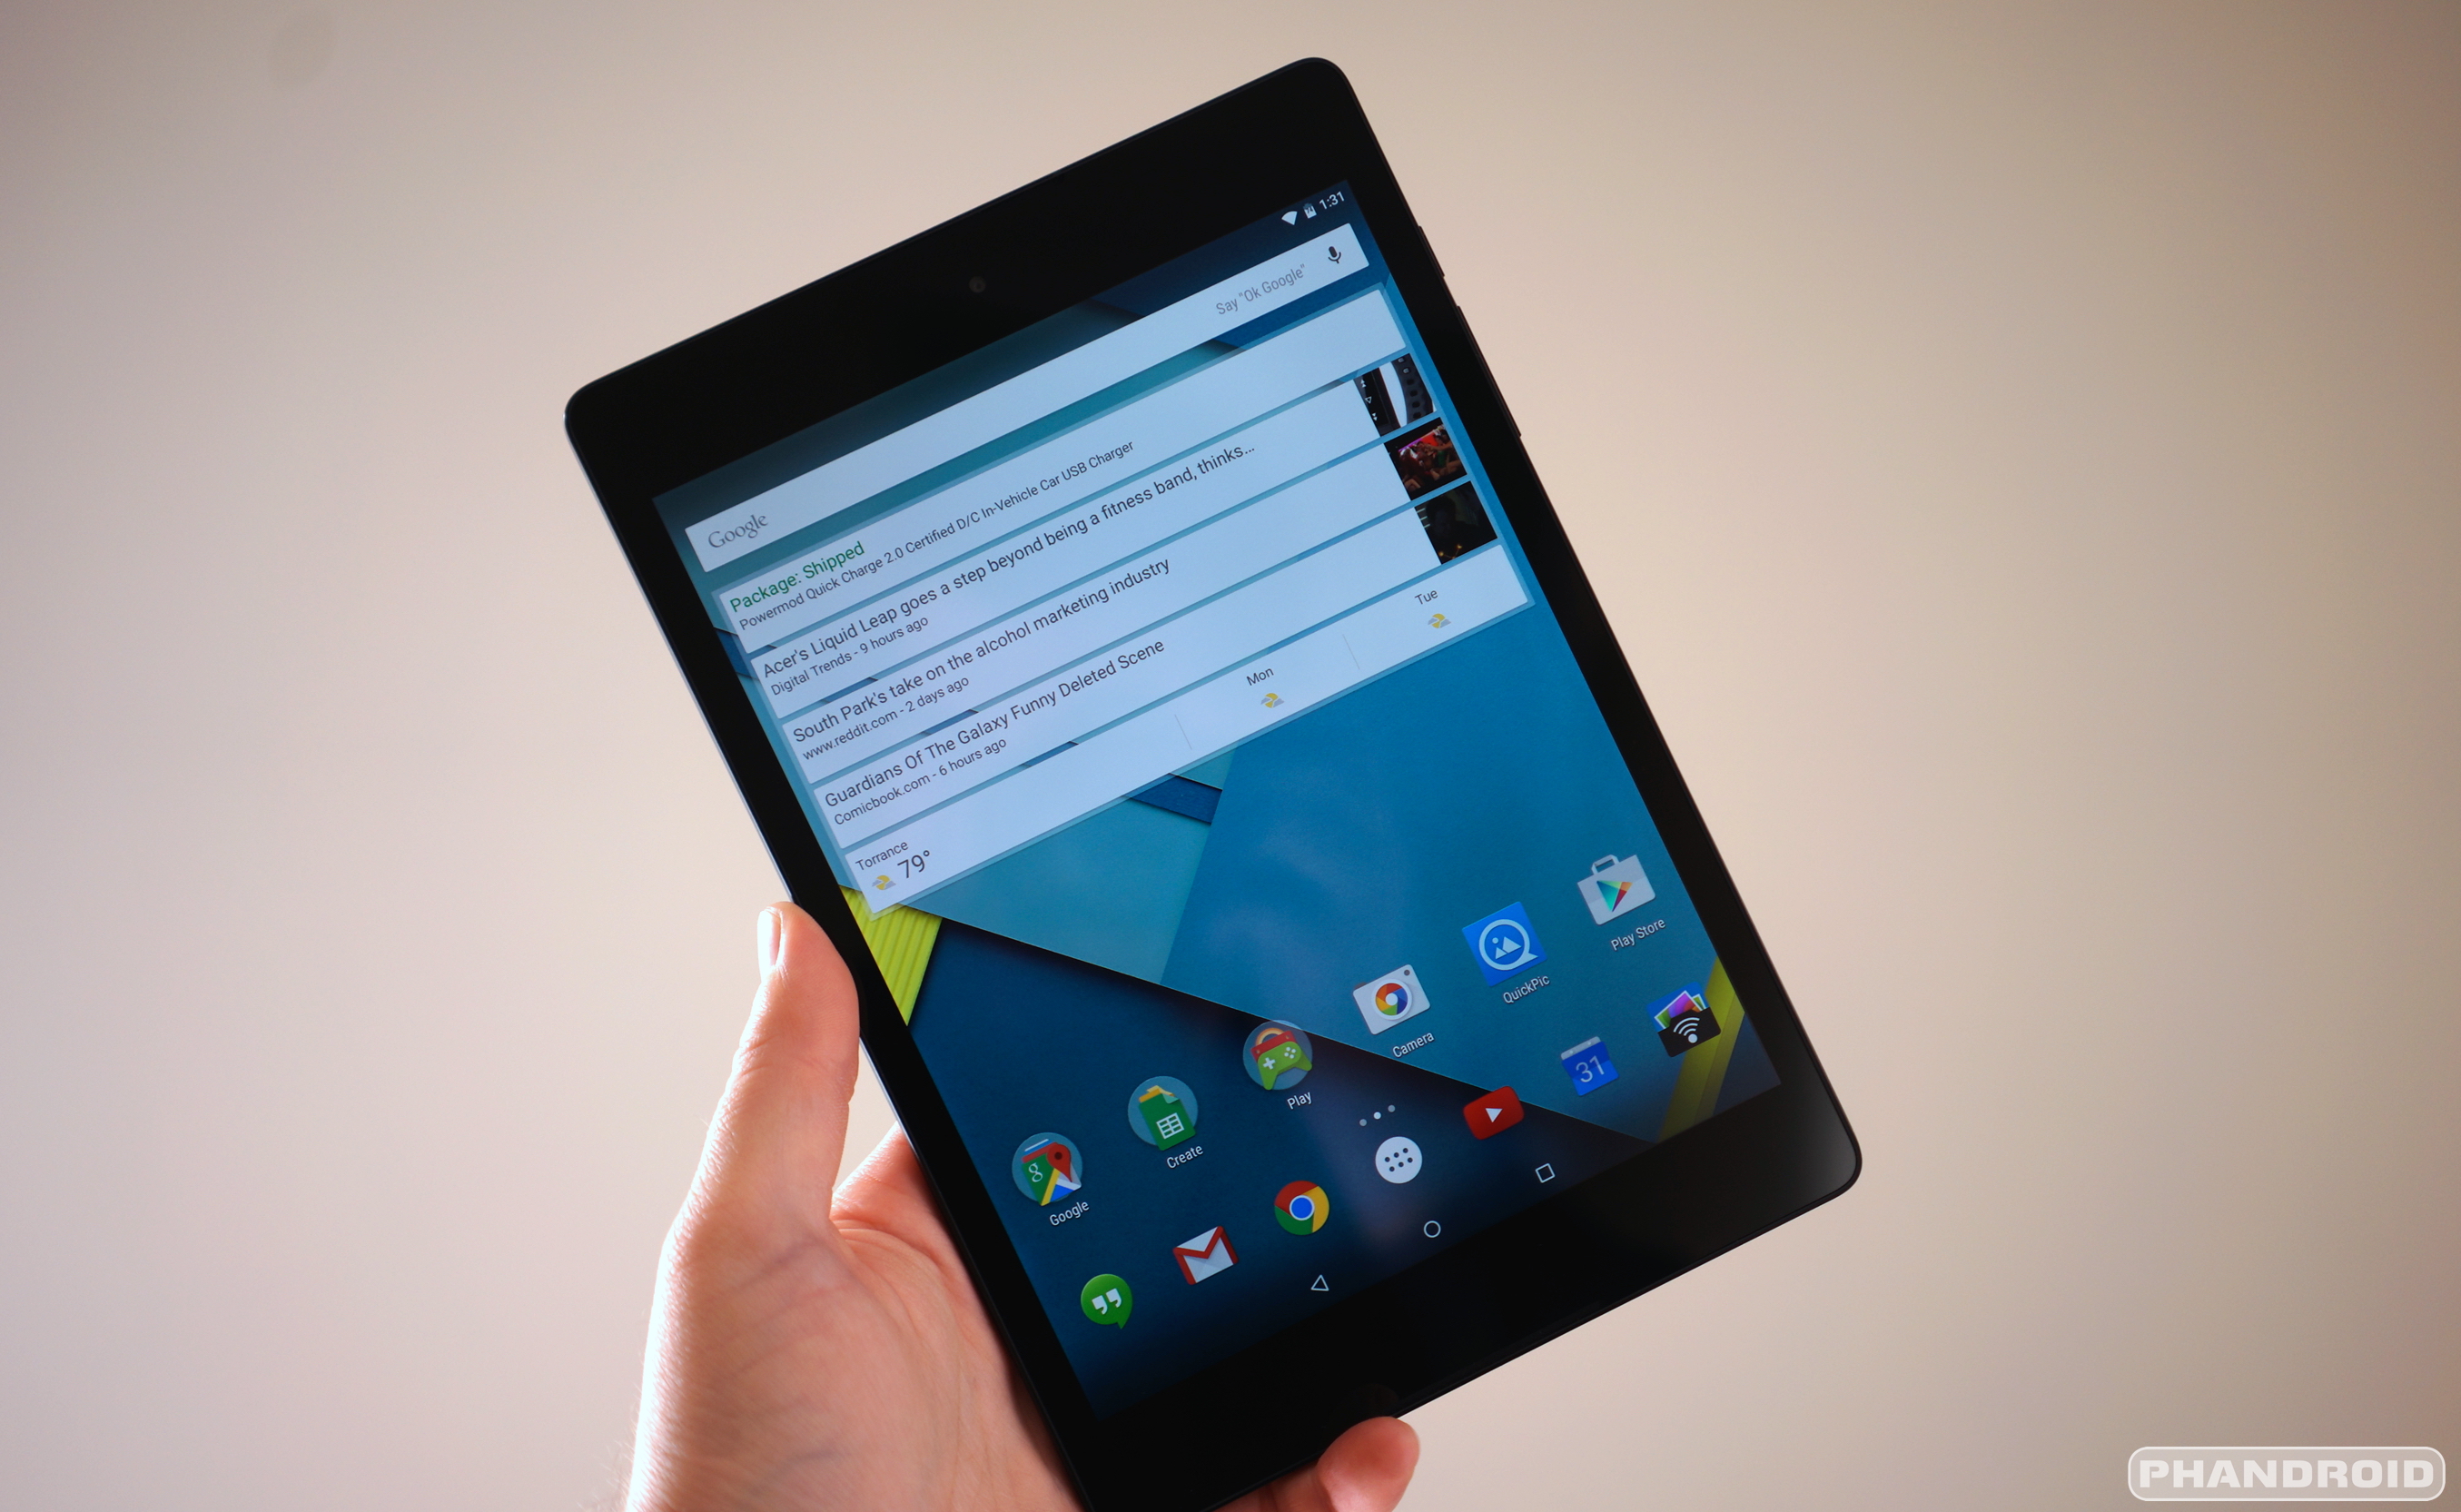
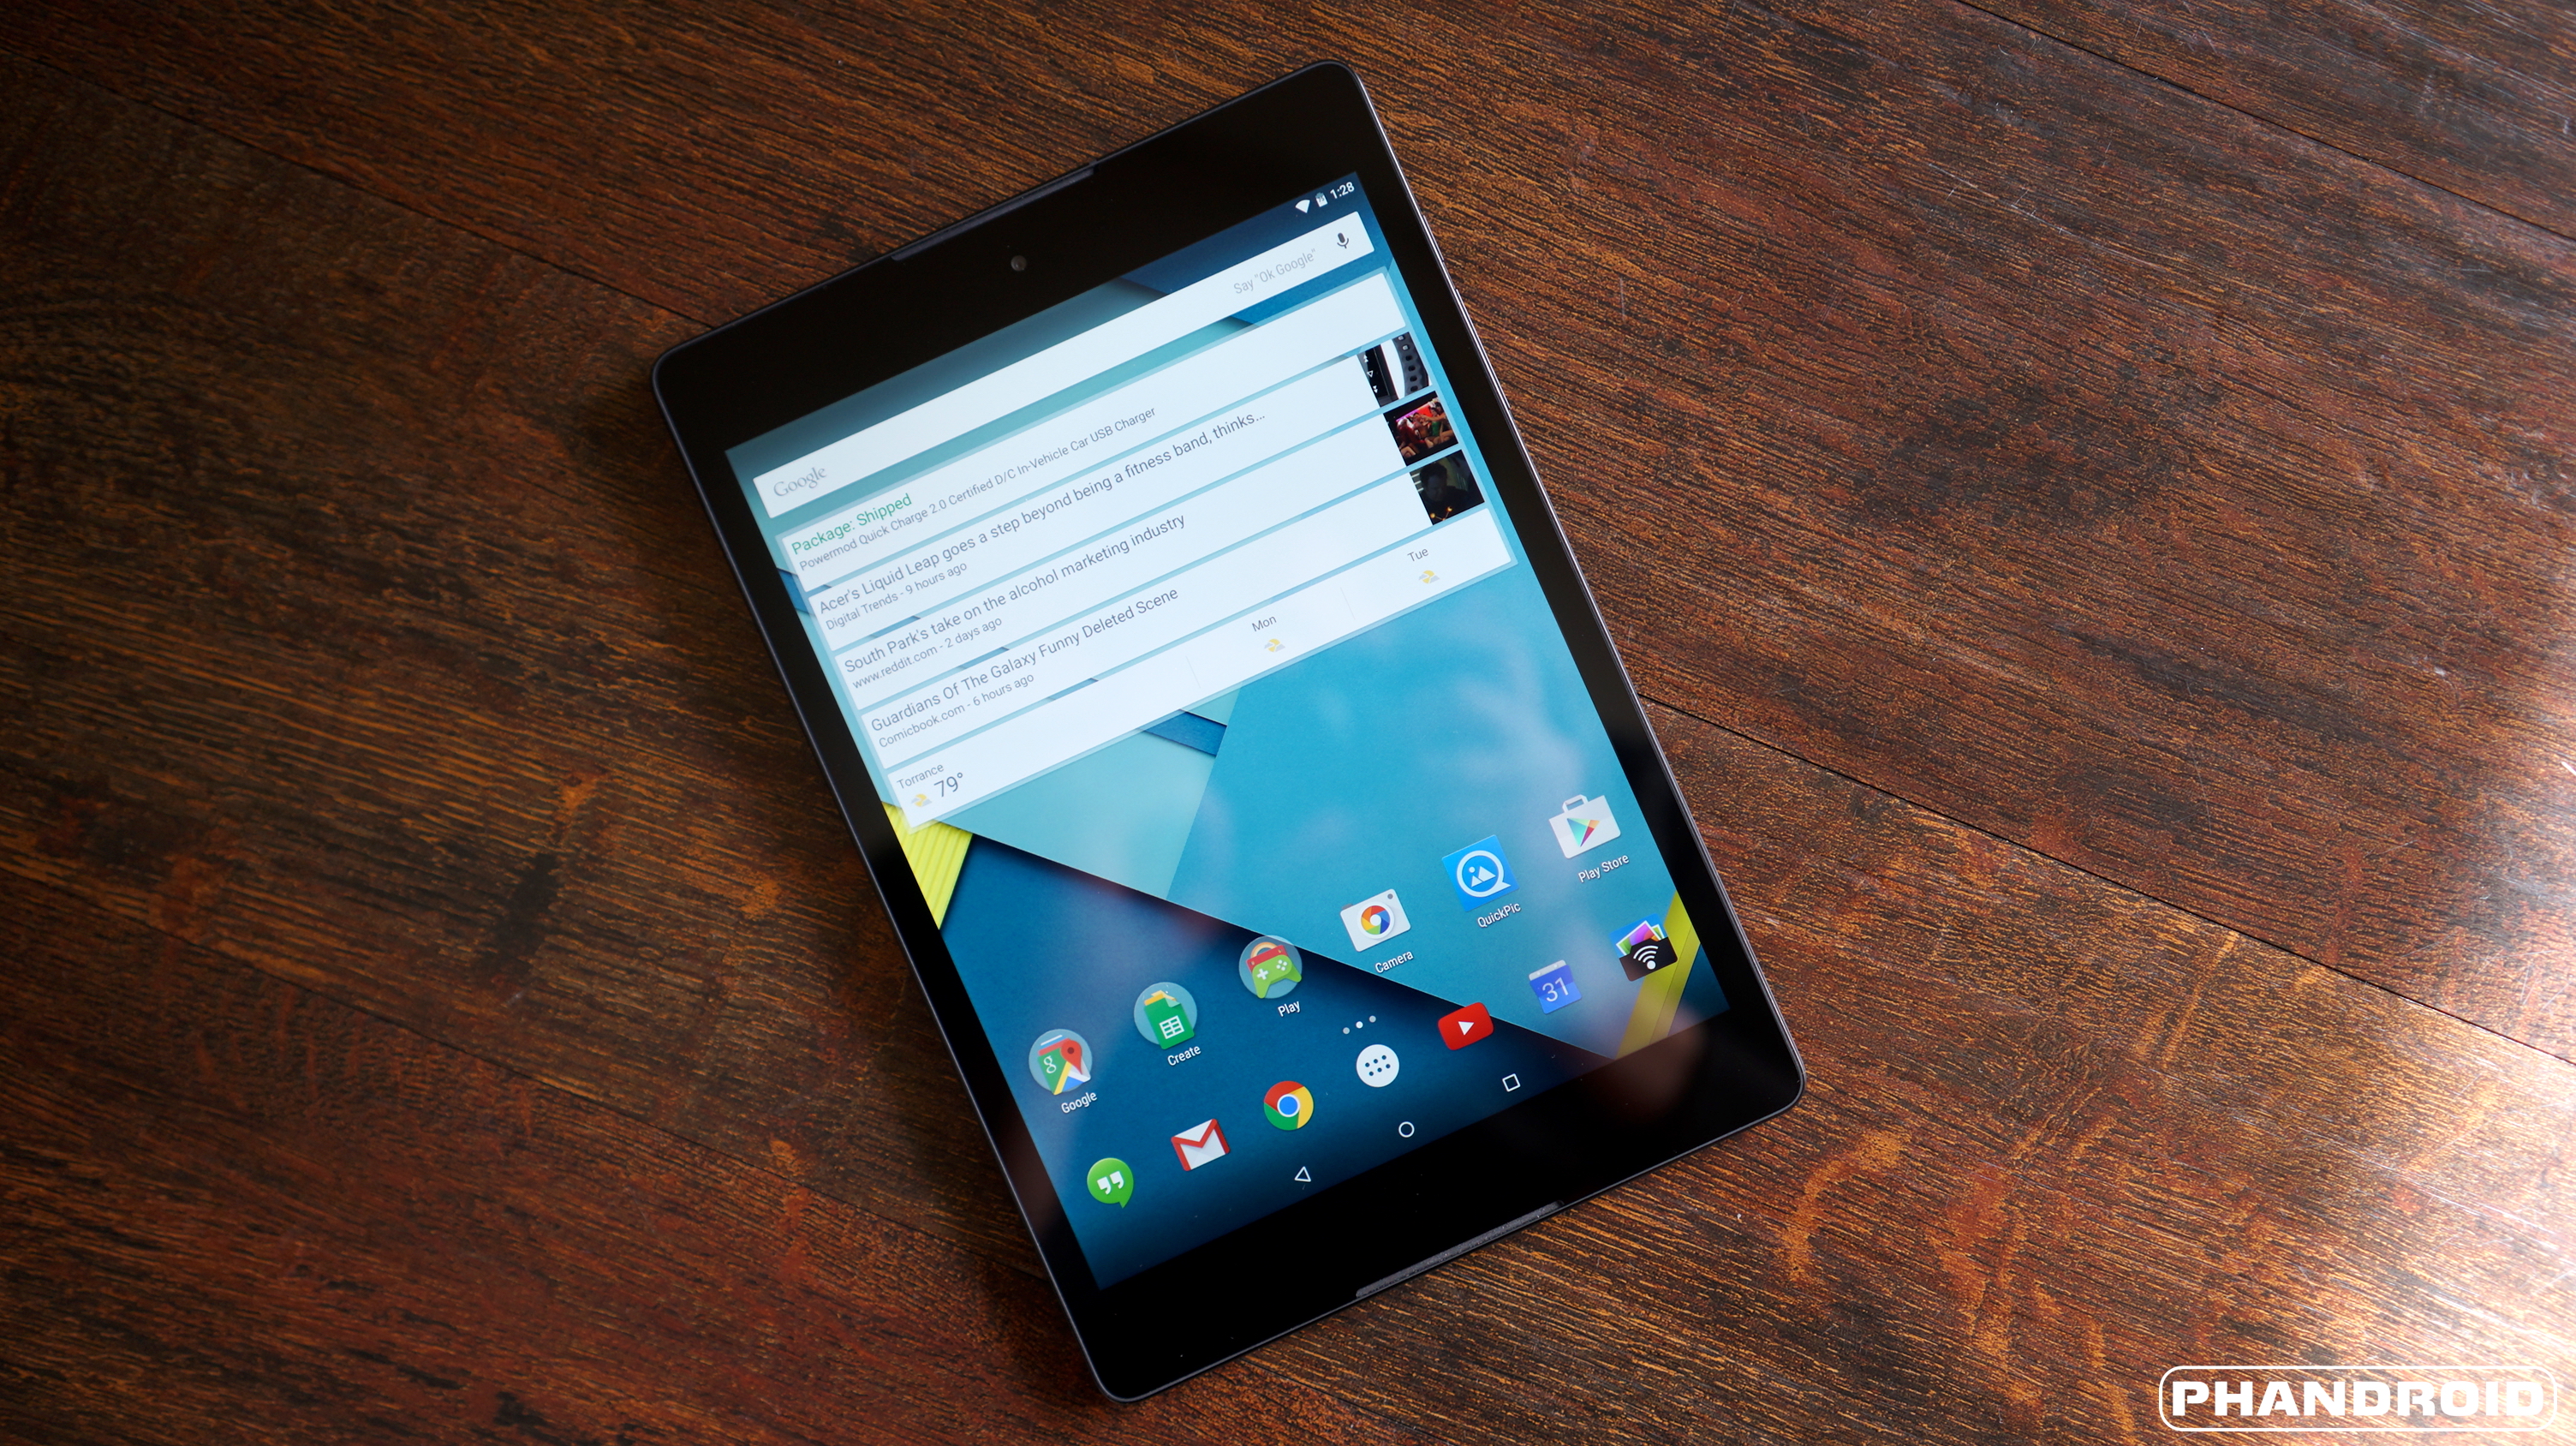
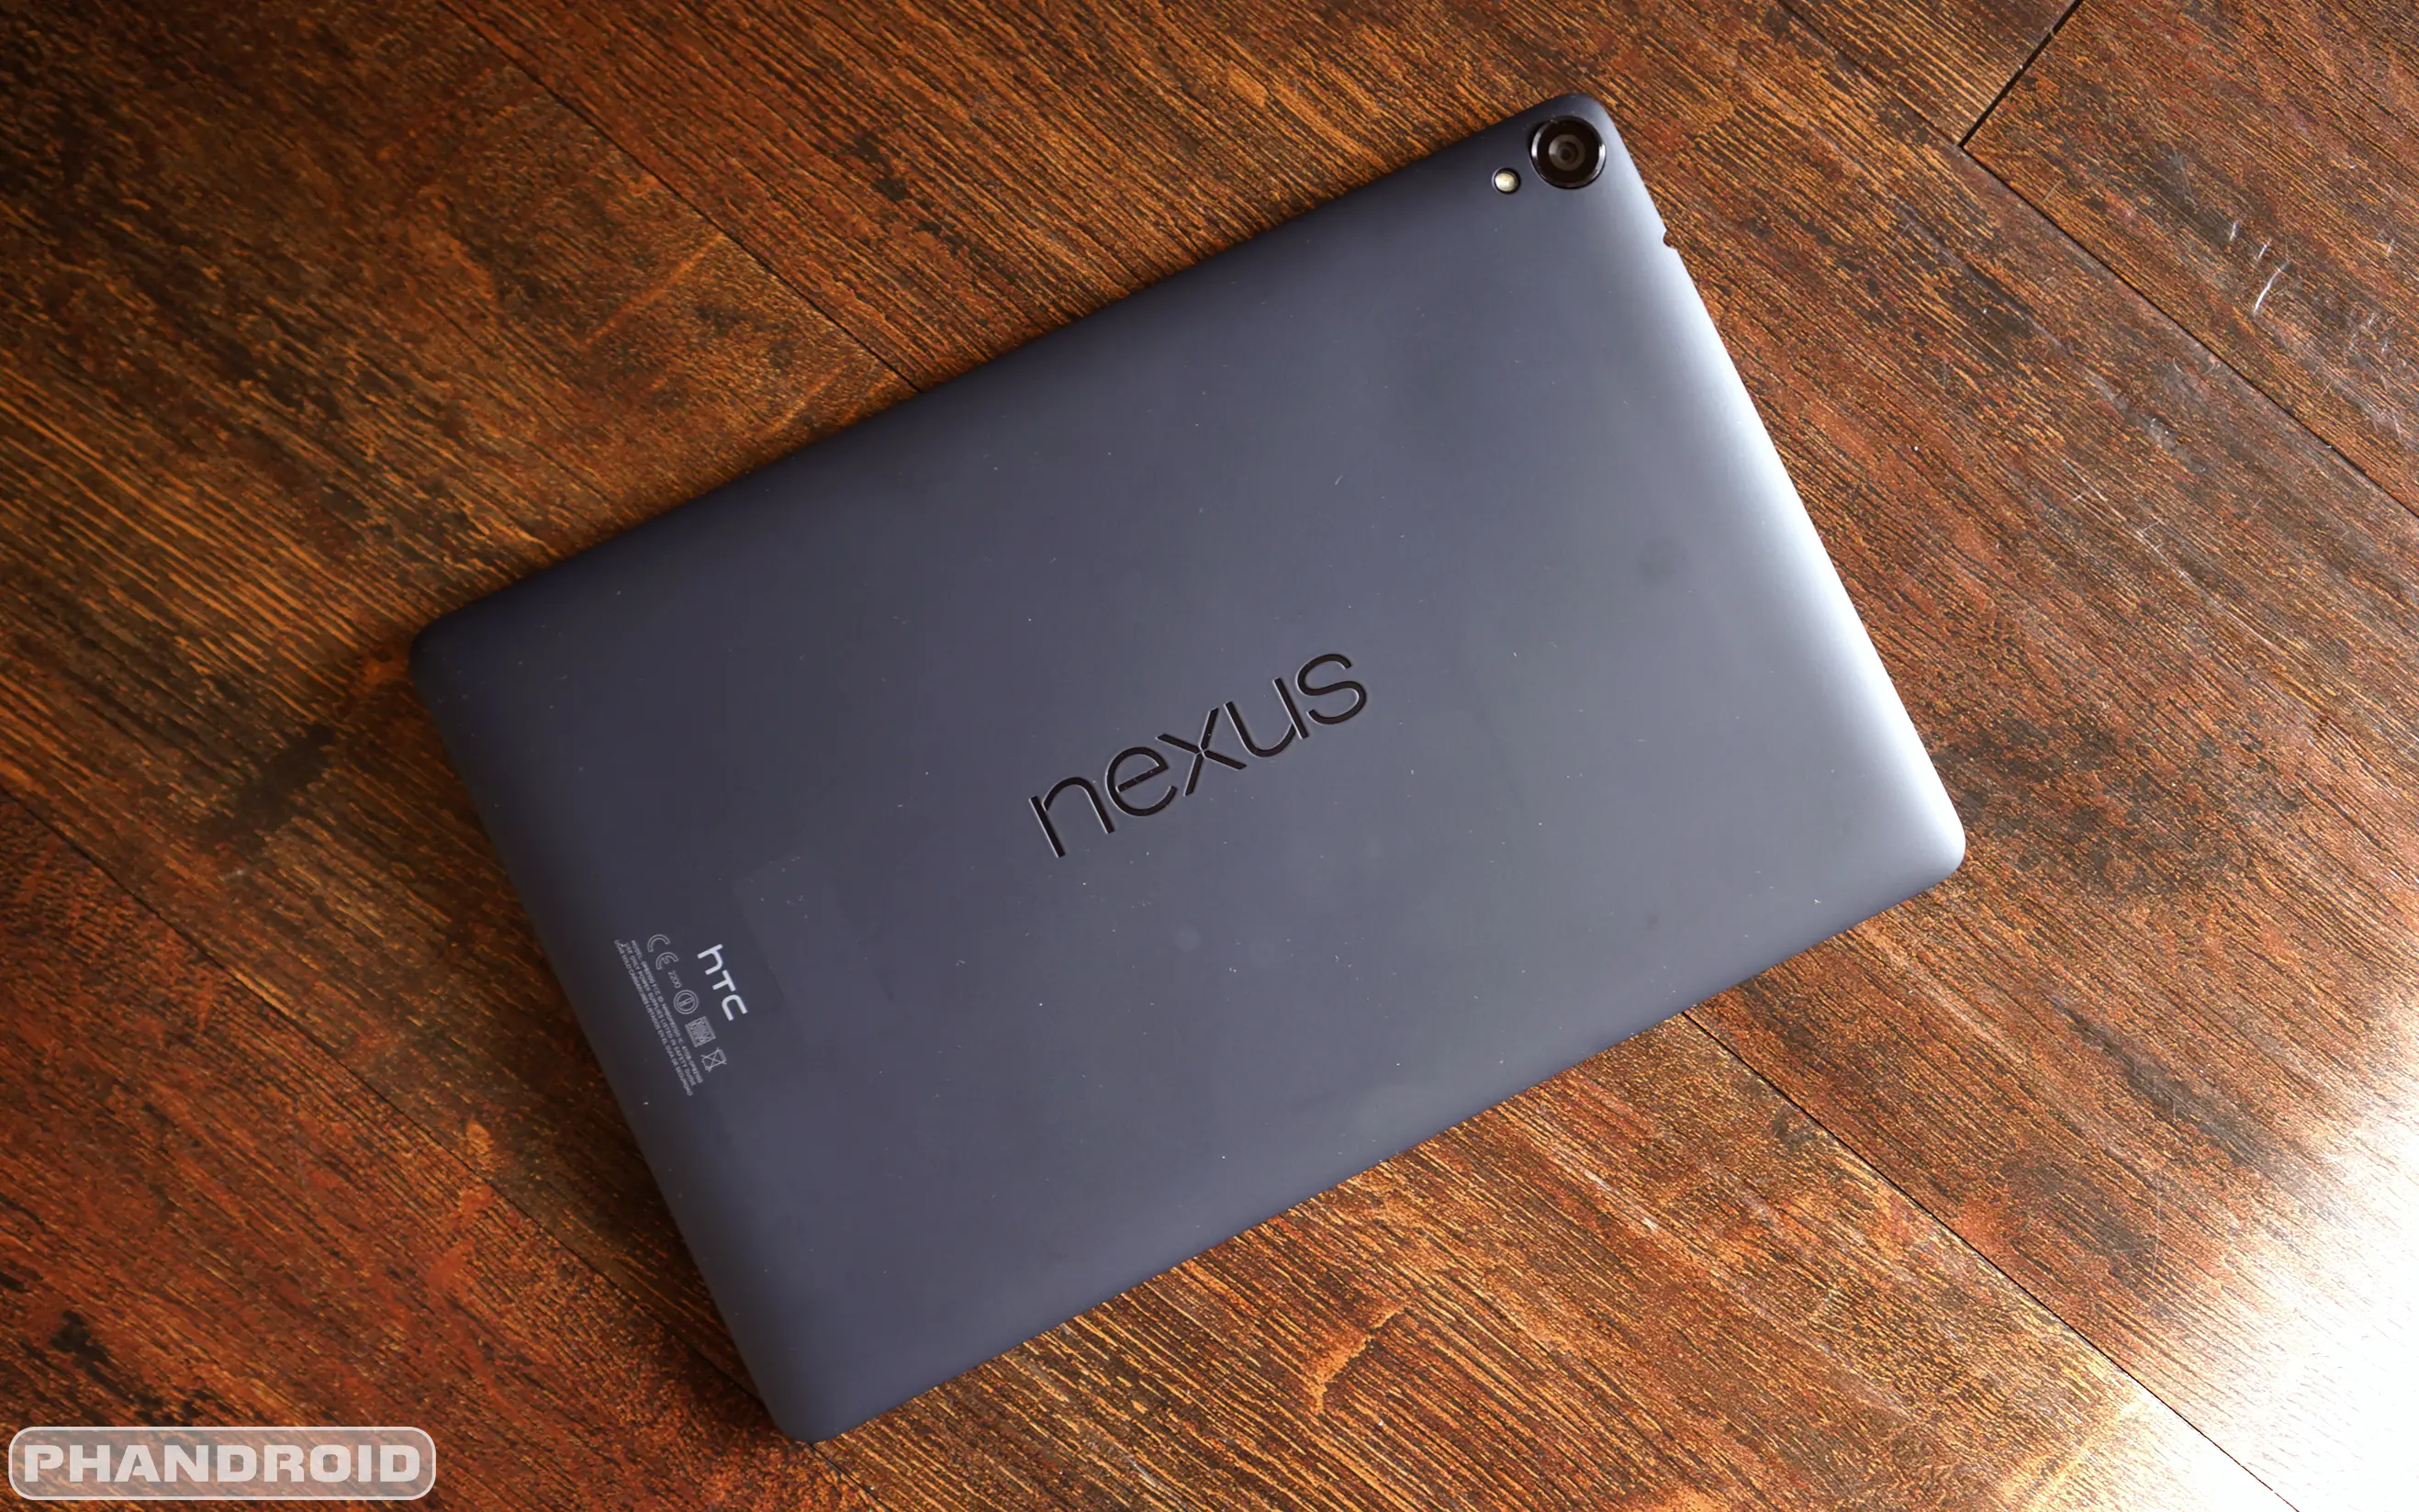
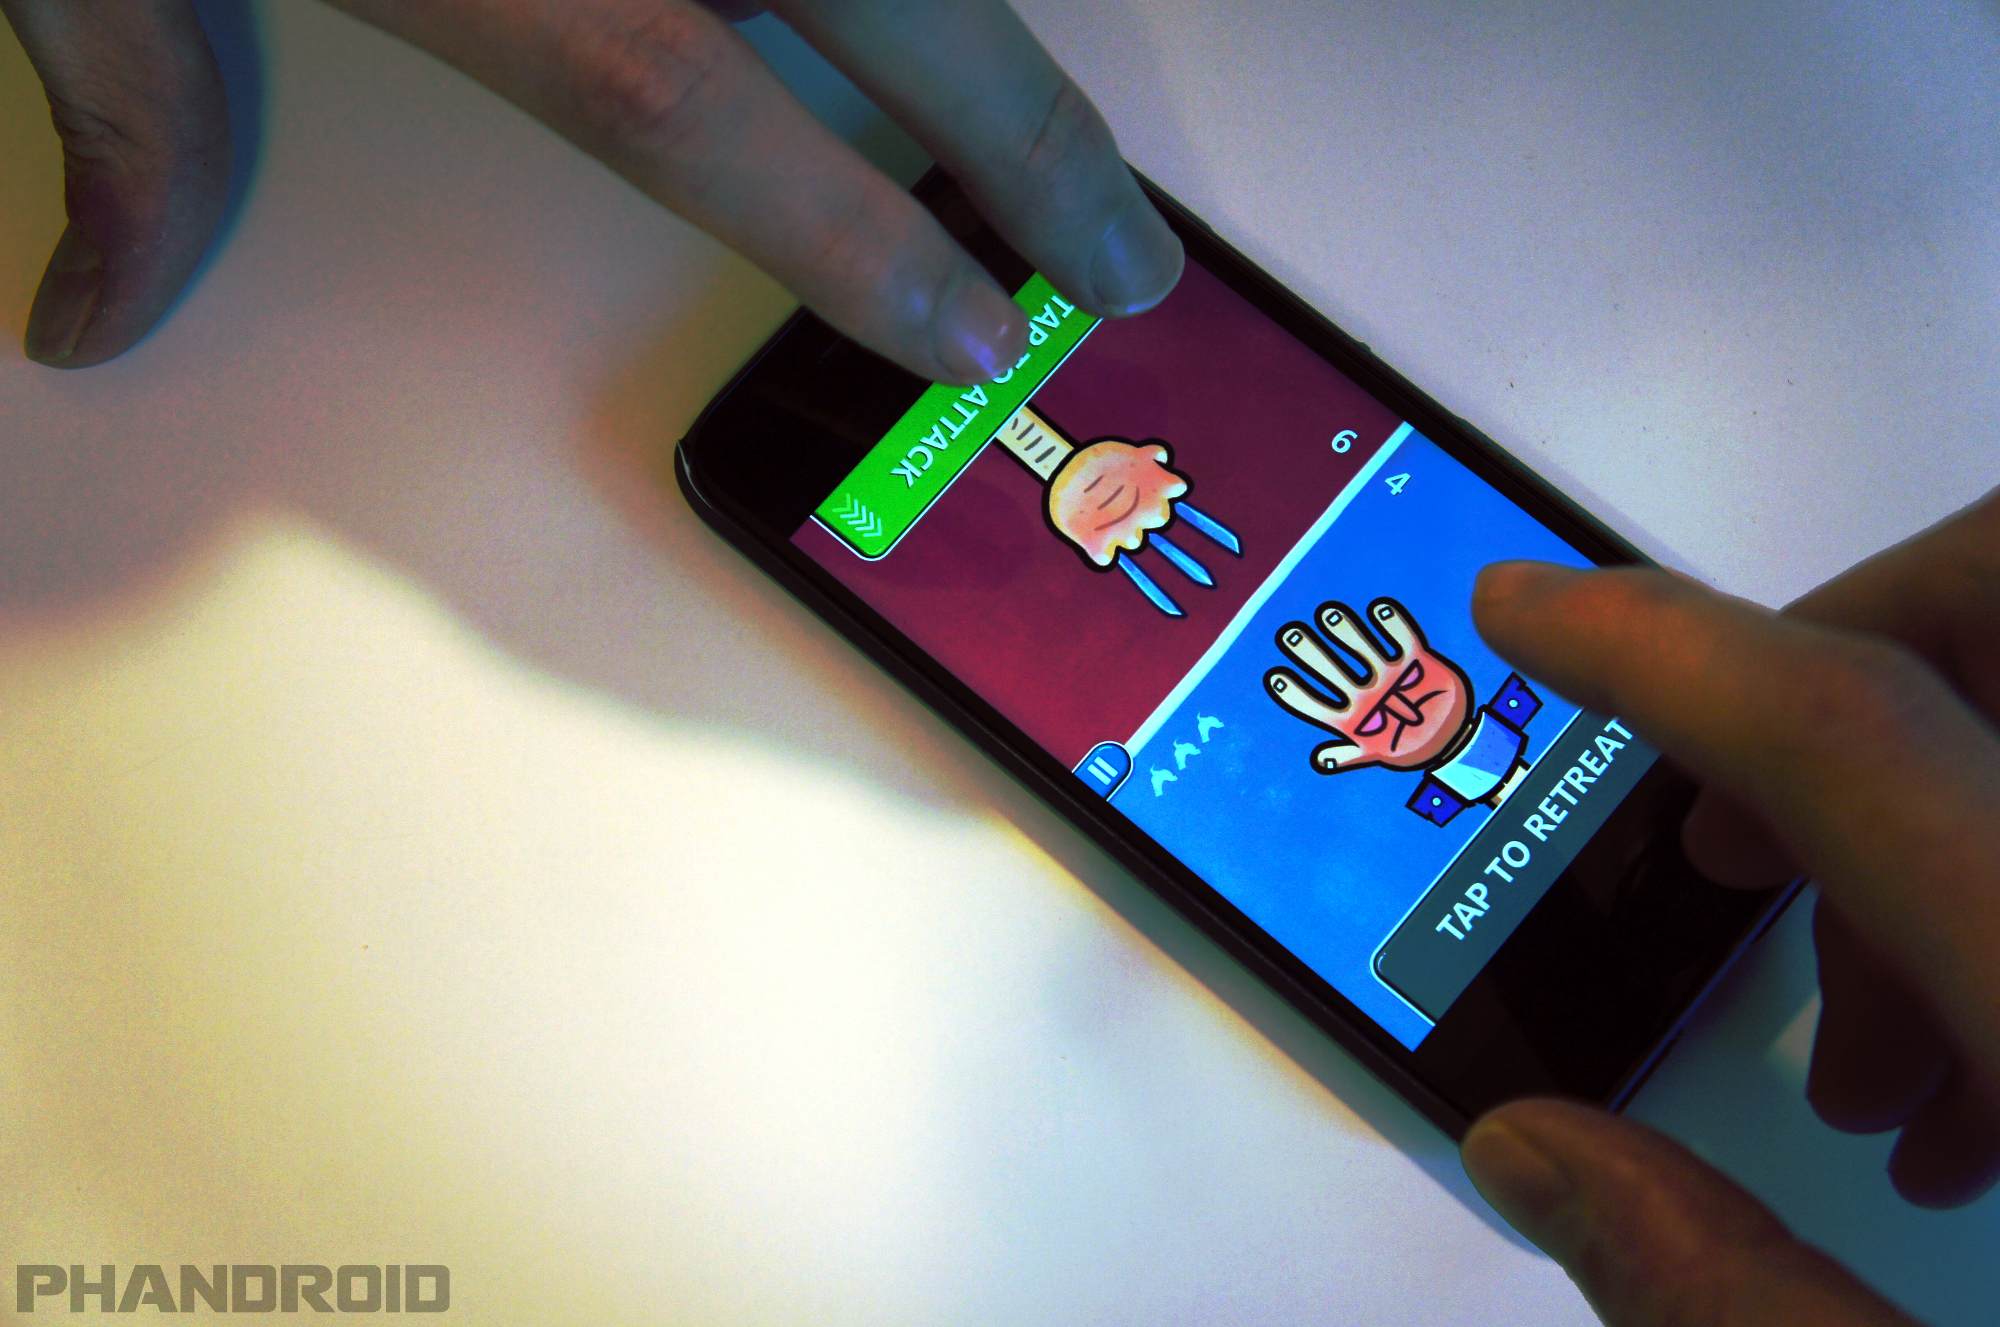
The Nexus 9 is Google’s newest tablet on the block. The lovechild of both HTC and Google, the 9-inch tablet keeps that familiar Nexus design aesthetic, while looking to appease consumers looking for a iPad-like 4:3 aspect ratio.
Because OEMs and carriers still have their work cutout for them regarding updates to Android 5.0 Lollipop for smartphones, a vast majority of Nexus 9 buyers will find the tablet their introduction to Google’s latest (and biggest) software update ever.
But don’t worry, if our hands-on with the final L Developer Preview wasn’t enough, we’ve gone ahead and compiled a quick list of the very first things you should do upon booting up your Nexus 9 for the first time. Wouldn’t want you to miss out on any of the cool new features. Have a look!
1. Update your tablet
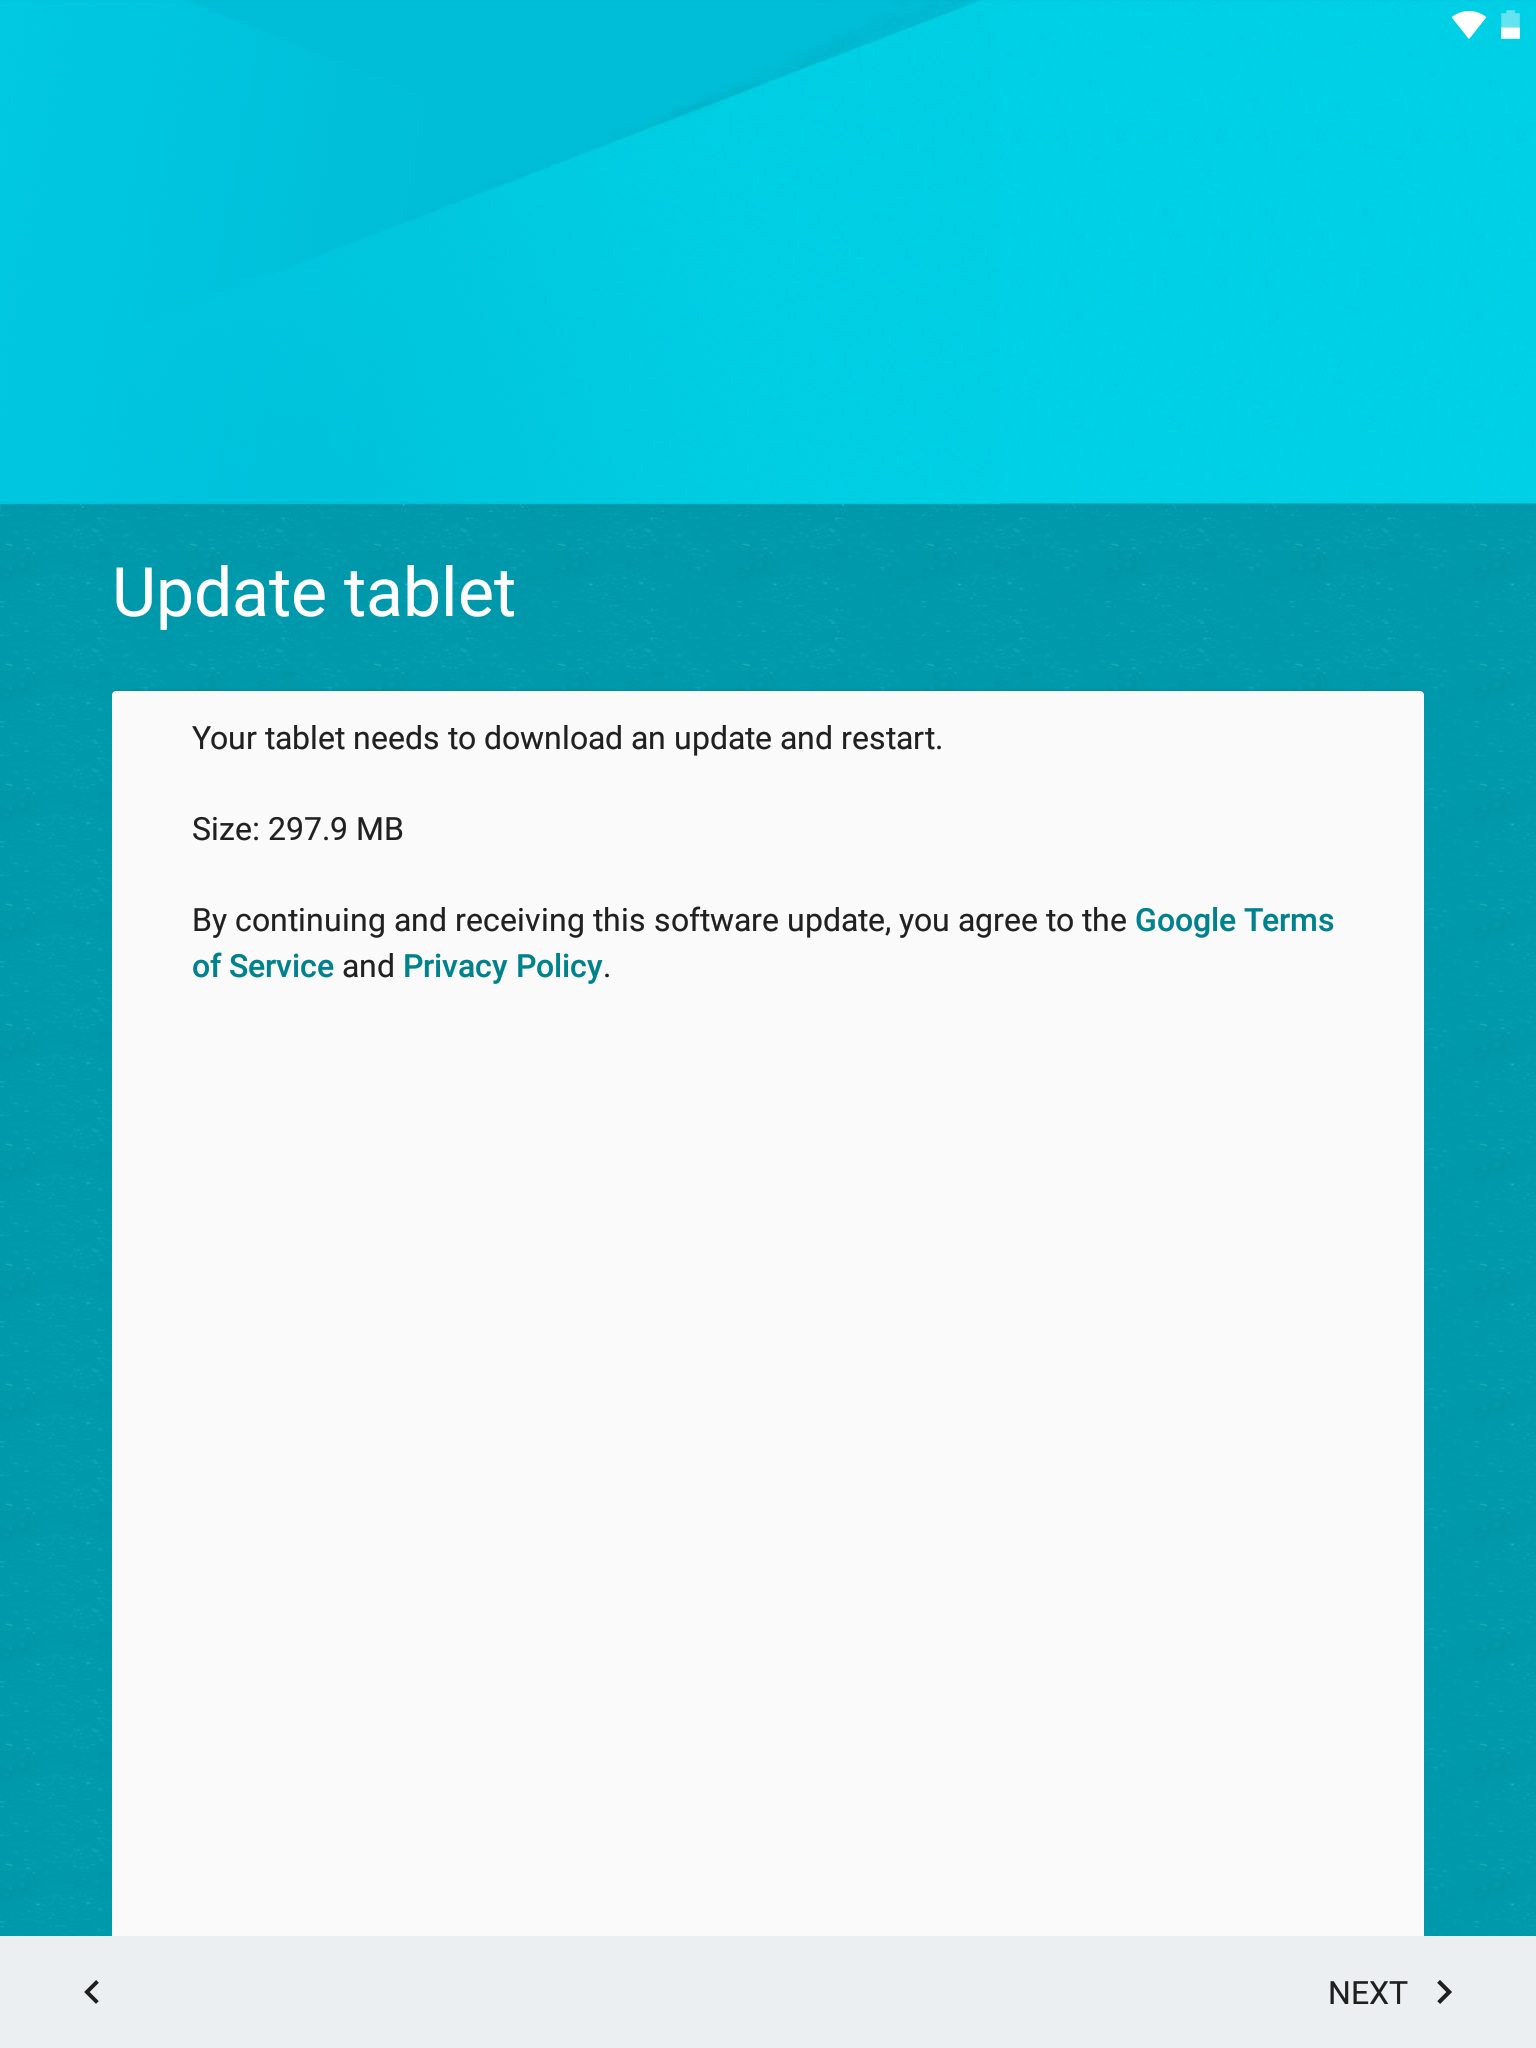
There’s a good chance that upon booting up your Nexus 9 for the first time, there will be a system update right out of the box. This “day 1” update addresses a few bugs and other weirdness some reviewers discovered before the tablet was officially available to the general public.
Updating is simple, and all done right from the Setup Wizard. Simply sign into your WiFi and the Nexus 9 will automatically check for updates. If one is found, it will update, reboot, and you can finish up with the initial setup. It’s actually a pretty useful new feature and on that was barely introduced in Android 5.0 Lollipop (in previous Android versions, you’d have to go through the entire setup before getting the chance to update).
Oh, and don’t worry if you get an update and it fails during the installation process. That’s totally normal and we’re sure Google will have everything fixed at some point in the future. Just let it sit, and your tablet will reboot normally.
2. Import apps and data from previous tablet/phone
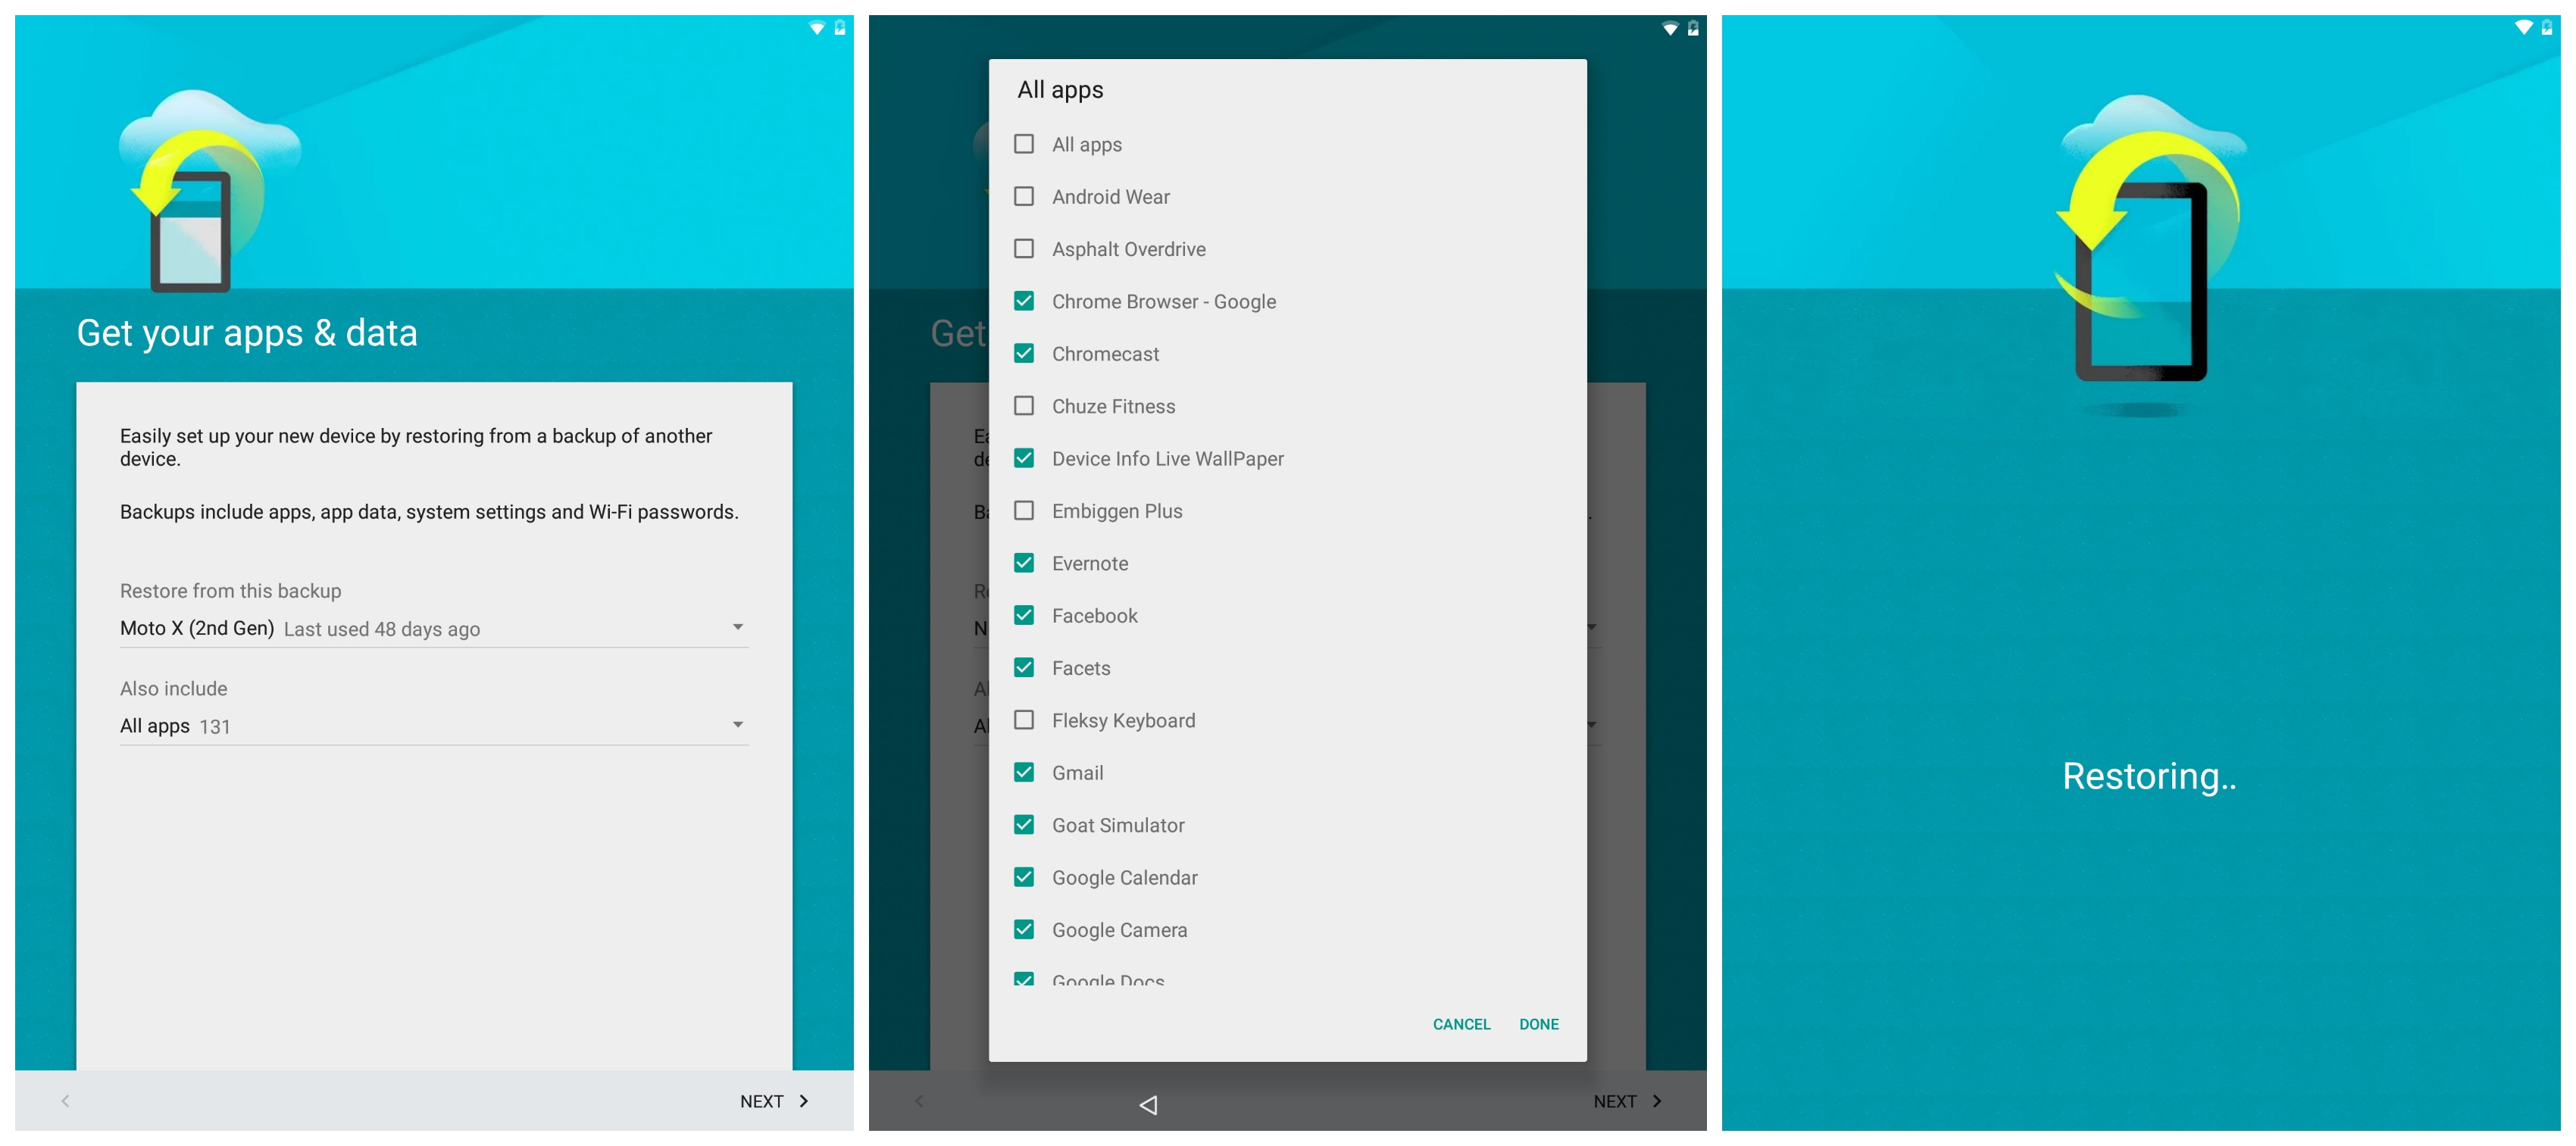
There’s a lot of new features introduced in Android 5.0 Lollipop, but none as immediately helpful as the ability to restore apps and data from a previous backup. It doesn’t even matter that the Nexus 9 is a tablet and not a smartphone — you can grab the data from any previously owned Android.
After setting up your WiFi and signing into your Google account, you’ll be taken to the “Get your apps & data” page of the Setup Wizard. Select the “Restore from this backup” option and you’ll be presented with a list of every previously owned Android device (the ones that were backed up, anyway). Select one then press “Done” to see the number of apps associated with that backup. To edit the apps you want on your new Nexus 9, select the drop down menu once again and uncheck any apps you don’t want downloaded to the tablet (they will all download from the Google Play Store).
3. Security: Smart Lock & Trusted devices

As soon as you’re out of the Setup Wizard, the very first thing you’re going to want to do is secure the Nexus 9 with some security. Jump into Settings > Security > Screen lock and choose whichever method you’d like. When choosing PIN, pattern, or password, your device will ask you if you’d like to encrypt everything on the device, requiring a password before the Nexus 9 can even start up. This ensures all your data is protected in the event you ever misplace your device, or it ends up in the wrong hands. Either way, the choice is entirely up to you. For us, we’d rather have the device fully boot up so we can track it via the Android Device Manager (which requires GPS and WiFi to figure out its location). This doesn’t mean the tablet is any less secure, our user profile will still be locked up tight will require a password — even if someone tries to factory reset it.

Once secured with a PIN code, pattern lock, or full on password, a new feature in Android 5.0 Lollipop will help alleviate some of the inconvenience that comes with locking down your device. Its called “Smart Lock” and when enabled, allows you to bypass the aforementioned lock screen security when connected to specific (“trusted”) Bluetooth devices. Anything with a Bluetooth connection is game and can be everything from a smartwatch to portable speakers, or even a car stereo. Should you move out of range and drop a connection with one of these “trusted” devices, your tablet will activate its normal lock screen security once again.
Lollipop not only allows for trusted Bluetooth devices, but faces (face unlock) and NFC tags as well. The trusted faces feature actually works in the background as soon as you wake your device and if it recognizes you before you can enter a password, the tablet is unlocked. Trusted NFC tags might be a little more challenging in finding an actual use case, but one example could be sticking one to a car dock in order to keep the tablet unlocked while driving. Hey, options are good.
4. Customize your home screen
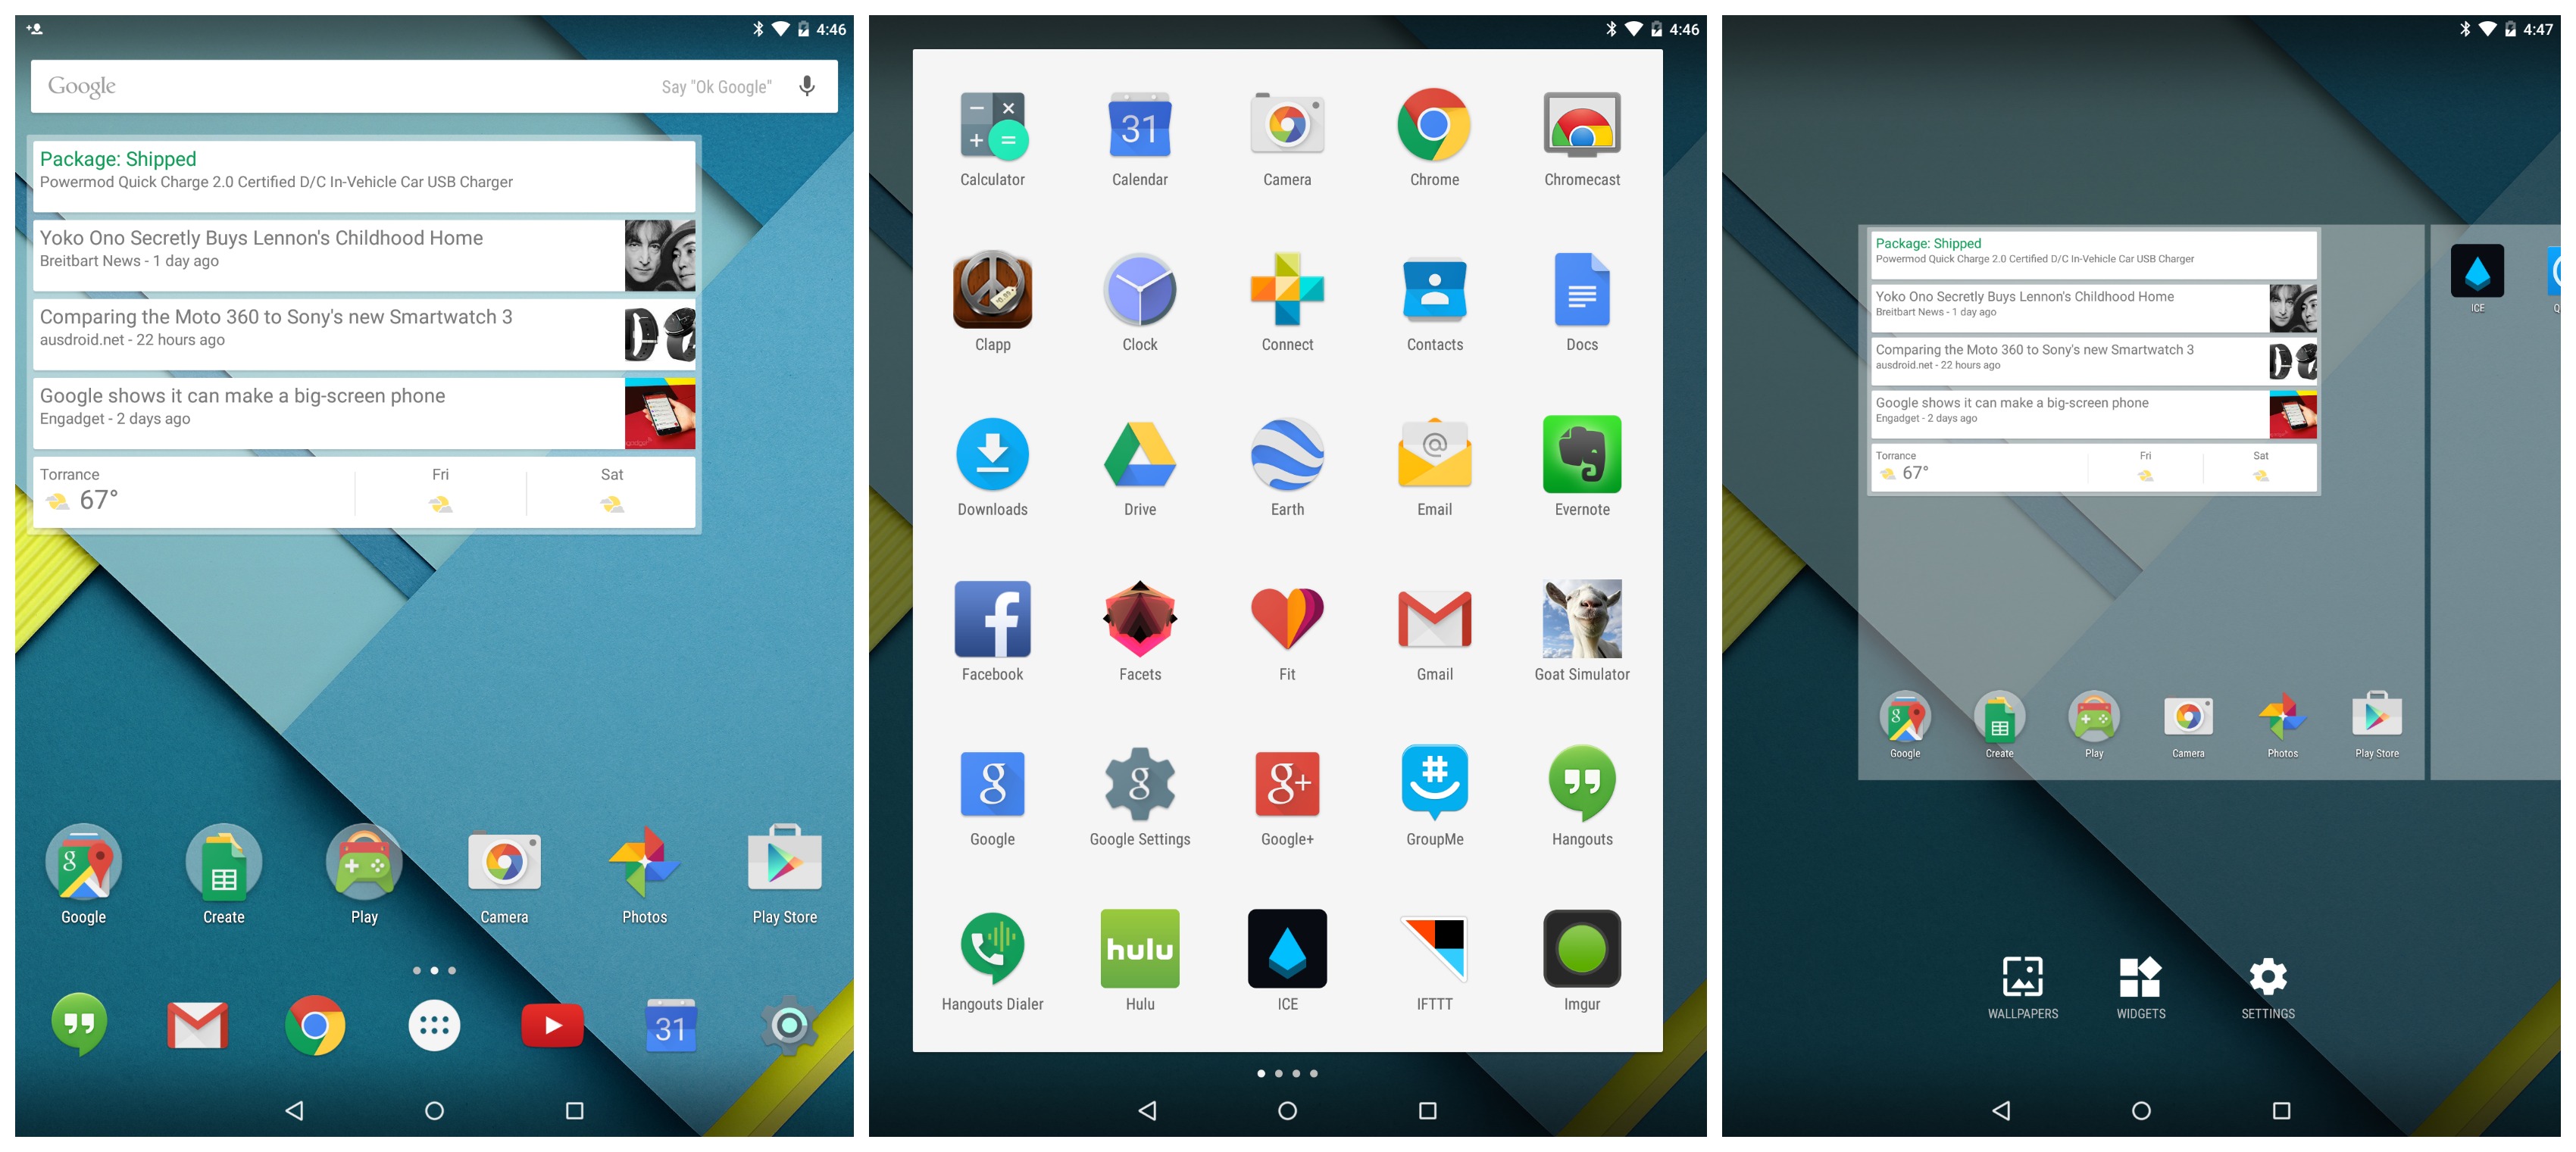
One of the best parts about owning an Android device is the freedom given to users to customize their home screen however they like. If you’re new to Android, it might seem a bit daunting at first to set up your home screen how you like, but in the end it’s worth it. Because of the Nexus 9’s unique aspect ratio, you can set a total of 6×6 icons or folders (including the dock) on your home screen. That should give you plenty of room to play around and get creative.
Long pressing any blank area on the home screen will show you a zoomed out view of your home screen pages, as well as options to change the wallpaper, add widgets, or customize your Google Now settings. With all the extra screen real estate, you should have no problem squeezing in the right widget and don’t forget that once they been placed, widgets can be resized by long pressing and dropping them again anywhere on the home screen.
If you find you need more than single paged home screen, you can add more by dragging an icon from the app drawer over to the right of the screen where another page will then be added. Oh, and don’t forget about shortcuts. These are also located in the widget section and are usually 1×1 in size (like an icon). Our suggestion? Creating a settings shortcut that takes you to the “Applications” page in your settings where you can easily manage them. Drag and drop the Settings shortcut on your home screen and a menu will pop up asking you what you would like to connect the shortcut to. Select Applications, and you’re in business.
We should also remind you of the countless replacement home screen apps (launchers) on Google Play. If you’d like to add further customizations to your Nexus 9, we’d recommend checking out Nova Launcher which, along with a boat load of options, also supports the thousand or so icon packs found in the Play Store.
5. Delete apps straight from the app drawer

If creating a shortcut on your home screen or always diving into the Settings app is too much work, you can always delete applications from your device straight from the app drawer. Just open the app the drawer and long press an app icon (like you were going to place it on your home screen), then drag it up towards the top of the screen where it says “Uninstall.” When you let it go (LET IT GO), you’ll be asked to confirm and it’ll be gone forever.
6. Disable notifications from specific apps/games straight from the notification shade
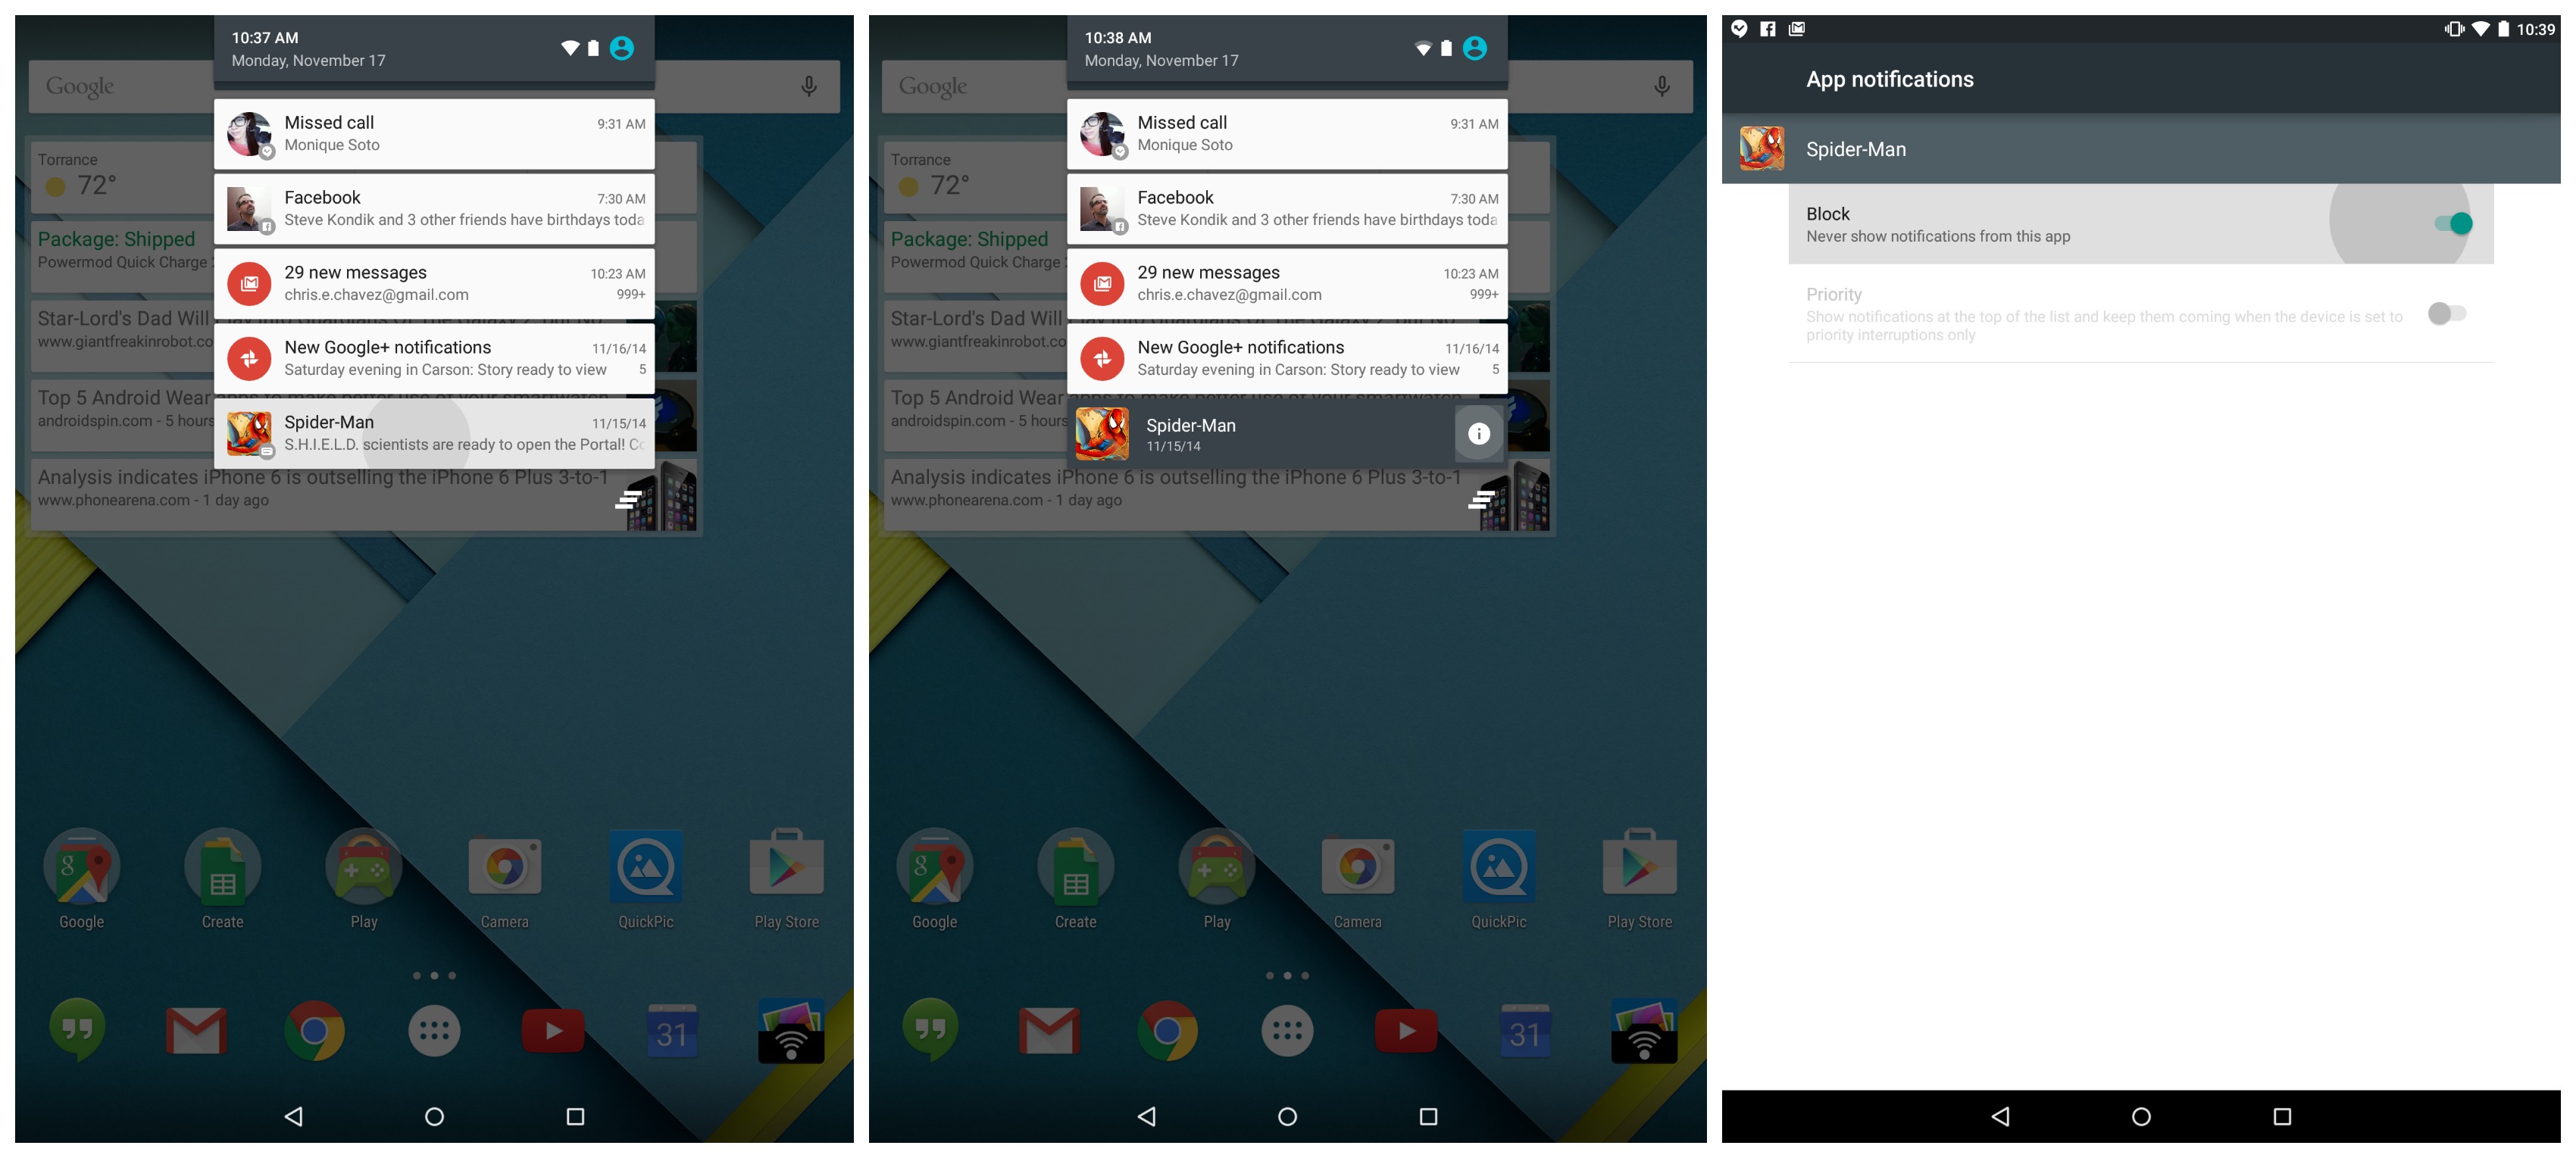
There’s no question that app notifications, while mostly helpful, can be a nuisance at times. This is especially true for games and such that constantly remind (pester) you to play them via your notification shade (or new in Lollipop, heads up notifications). No worries, there’s a super easy way to turn off notifications from these bothersome apps/games straight from the notification itself. Simply long press on notification to view the app from which it came from. From there, you can click the gear icon to be taken to the app information and if you look closely, you’ll see the option to uncheck its notifications (or uninstall it) completely.
7. Customize Google Now

Google Now is probably one of the single most useful features found inside our Android devices. During the setup process, you may remember seeing an opt in page for Google Now where, we hope, you selected “Yes, I’m in.” Fist off, Google Now is like your very own automated personal assistant app. Without having to ask it anything, it’ll notify of you traffic on your way home, flight times, packages that have shipped, where you parked, and lots more. Like all good things, it gets even better when you adjust some settings to your liking.
To access Google Now you can either swipe up from the home button, or swipe left on your home screen. Here you’ll find a ton of information, usually relating to your location, items you’ve searched, and things you’ve ordered. If you slide your finger from the left most edge of the display, you’ll find the sidebar menu along with a few options: reminders, customize, and settings.
Reminders are just that, a list of everything you’ve told Google to remind you of, whether it’s picking up the kids from school, or taking the beer out the freezer. Customize is probably the most fun, providing you a list of categories you can tailor to your interests. Sports will allow you to pick your favorite teams to follow, stocks, places for your home and work addresses (traffic), TV & video to receive updates on your favorite shows and movies, and everything else (items Google thinks you might be interested in based on search). You should probably take a minute to add your personal interests in order to make Google Now work for you the best way it can: keeping you up to date with the world around you.
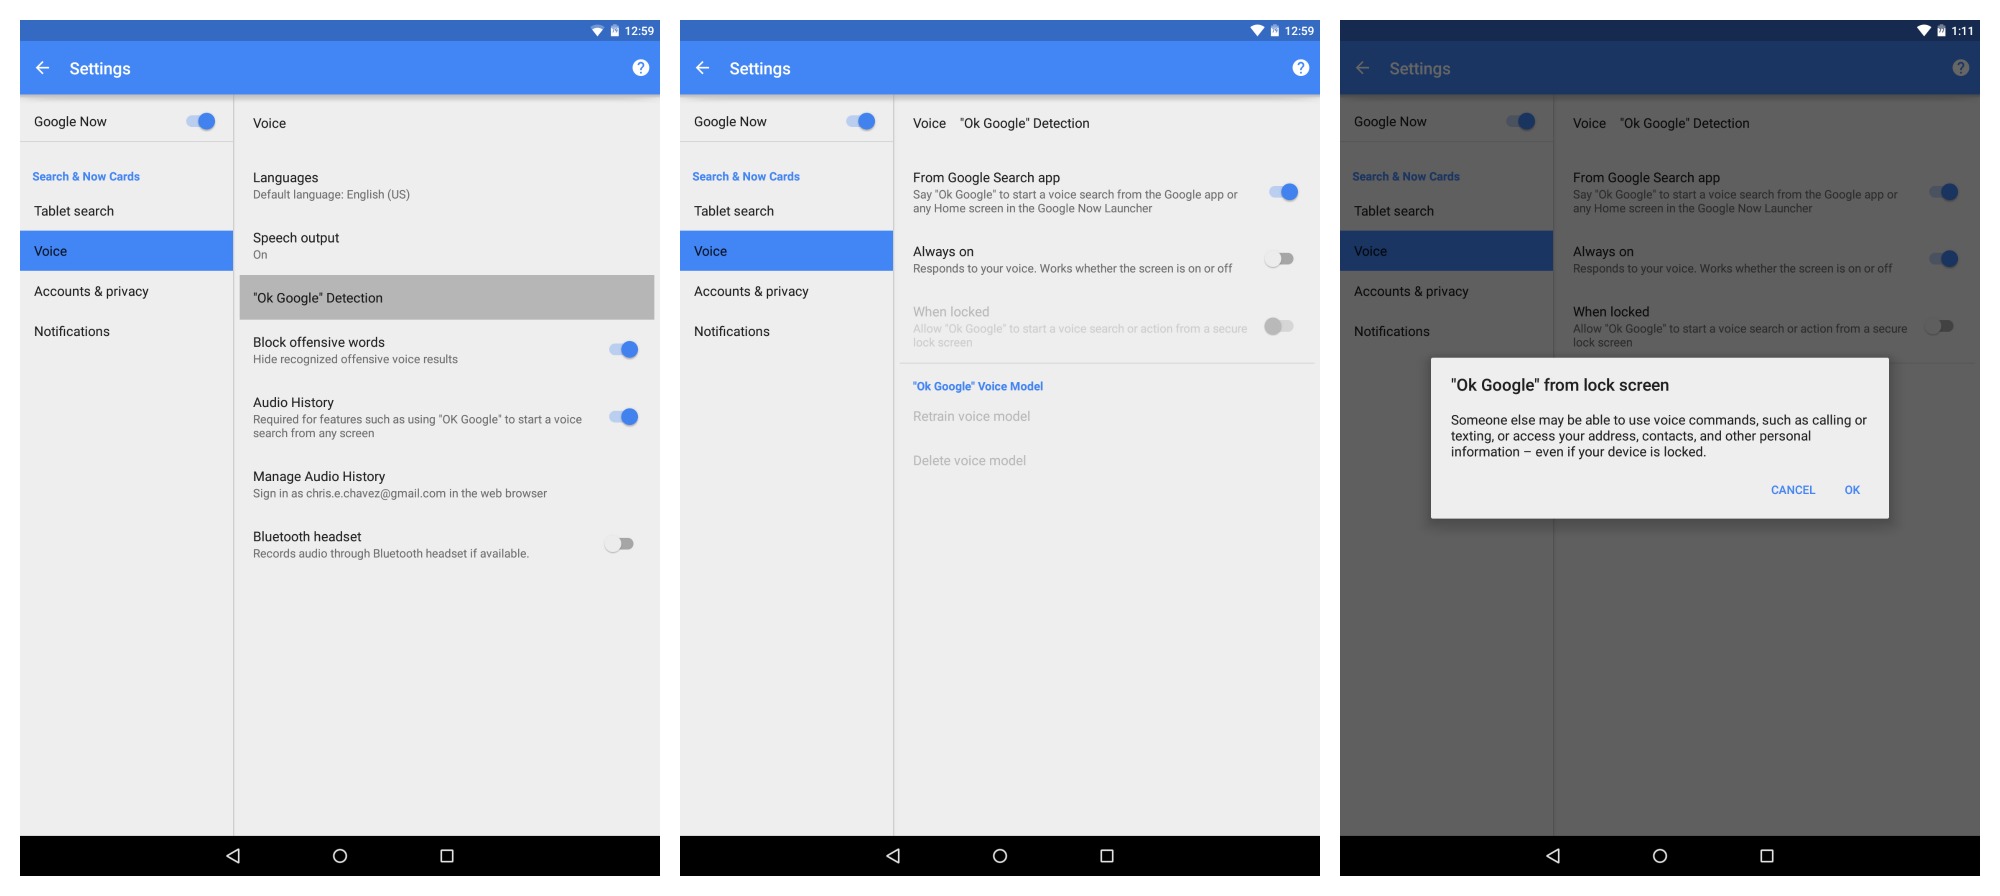
With that out of the way, we now recommend you dive into the actual settings from the sidebar menu. It’s here you’ll be able to tell Google Now what you’d like it to search for when performing queries (tablet search), manage your accounts and privacy, or — our favorite — configure the Google Now hotword detection. If you’re not the type to worry about Google listening in on your most intimate of conversations (really, they have better things to do), you can even set the hotword to “always on” so that “Ok Google” works even while the Nexus 9 is sleeping.
Once enabled, Google Now will need to “learn” your voice (so that not just anyone can perform voice searches while your tablet is sleeping). The final setting — “When locked” — allows the “Ok Google” hotword to start a voice search/action even if the tablet is secured with a password/PIN/etc.. Unless you don’t mind someone else potentially issuing voice commands that can do everything from making calls, text, or accessing your contacts or other personal information — you might want to leave this one off.
Now that Google Now is all setup exactly how you like it, should something ever pop up that you’re not interested in or find convenient, press the 3-dot menu directly above the Google Now card to tell Google if you’re interested in that specific topic (maybe it was just a 1 or 2-time search), or swipe to the left to turn off research topic updates altogether.
8. Manage interruptions & lock screen notifications
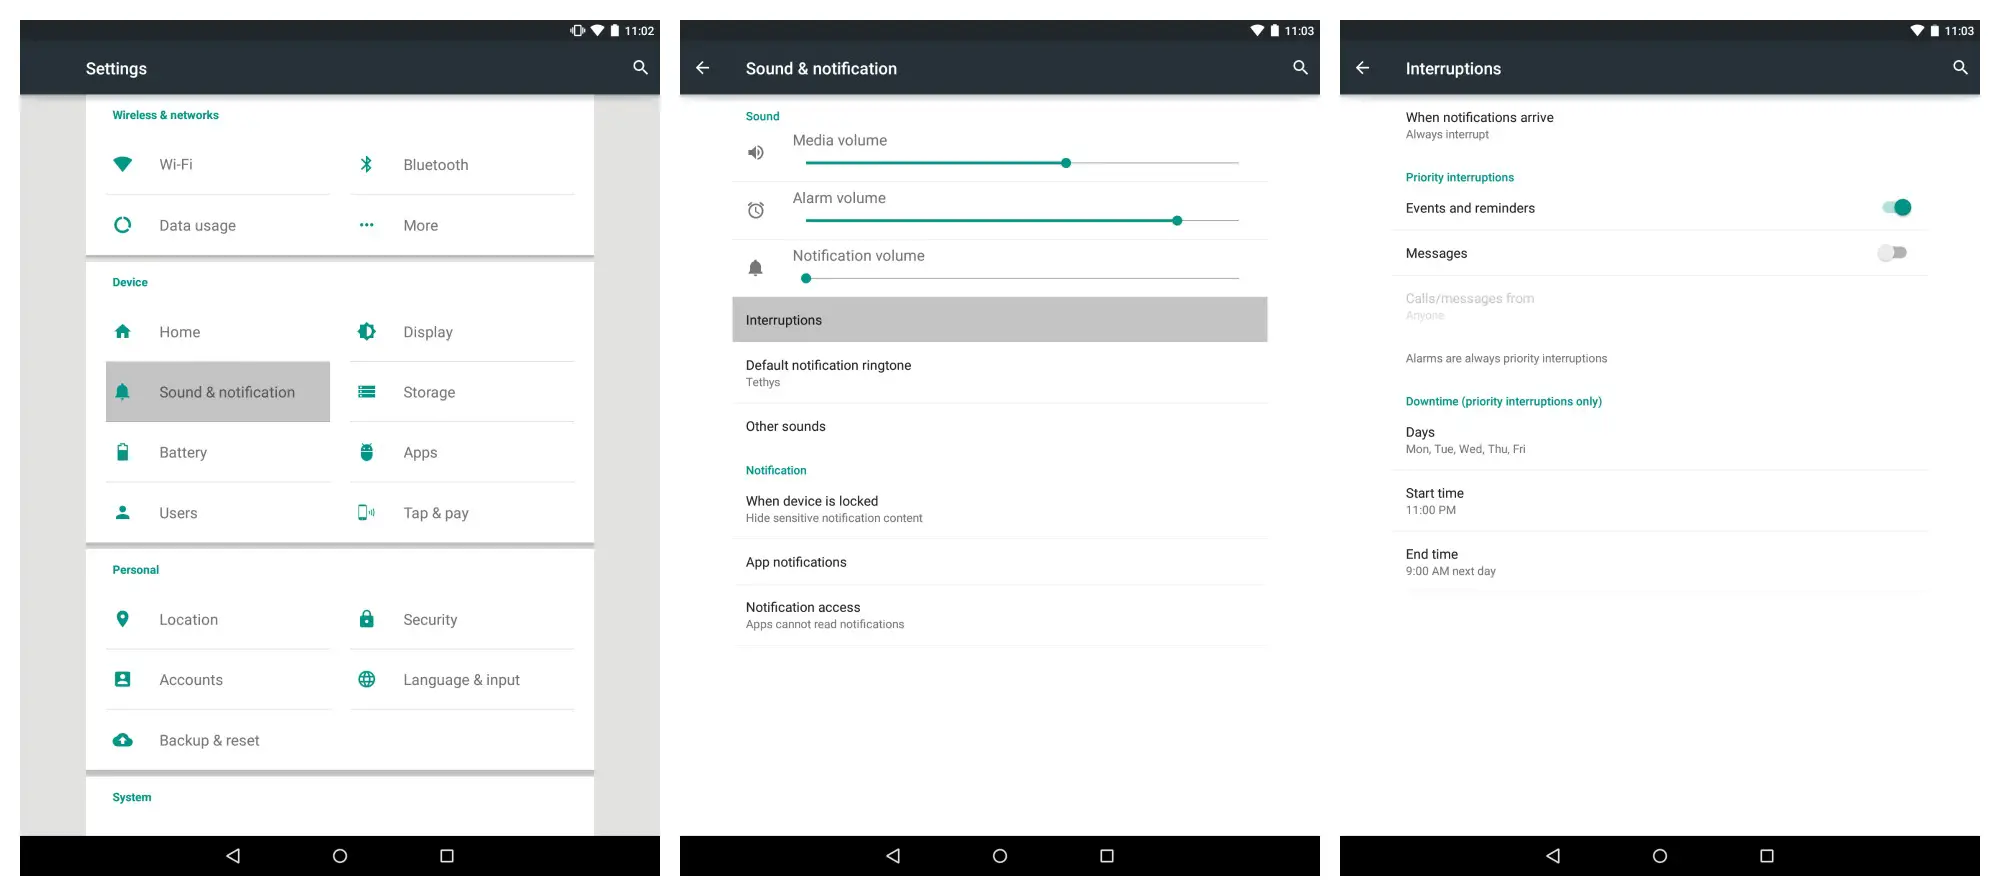
Android’s notification system is world renown for being the best in the biz. The result of years of fine tuning, it’s only in Android 5.0 Lollipop you can now manage the type of notifications you would like to interrupt you. Located in your Settings app under “Sound and Notification,” the “Interruptions” option will give you a whole new set of options.
The first option, “When notifications arrive,” allows you to set which notifications can come through: all (always interrupt), important ones (only priority interruptions), or none at all (don’t interrupt). Although worded a bit differently, you can also find these settings when using the physical buttons to change volume, located directly beneath the volume slider as none, priority, or all.
When selecting a time duration to turn off notifications, you have a few options: 15 min, 30 min, 45 min, one hour, 2 hours, 3 hours, 4 hours, or 8 hours. Even when set to only priority interruptions, you can further tweak this by turning on/off events and reminders, or messages. Keep in mind that while alarms are always classified as a priority interruption, they too can be silenced if you set notifications to “none.”
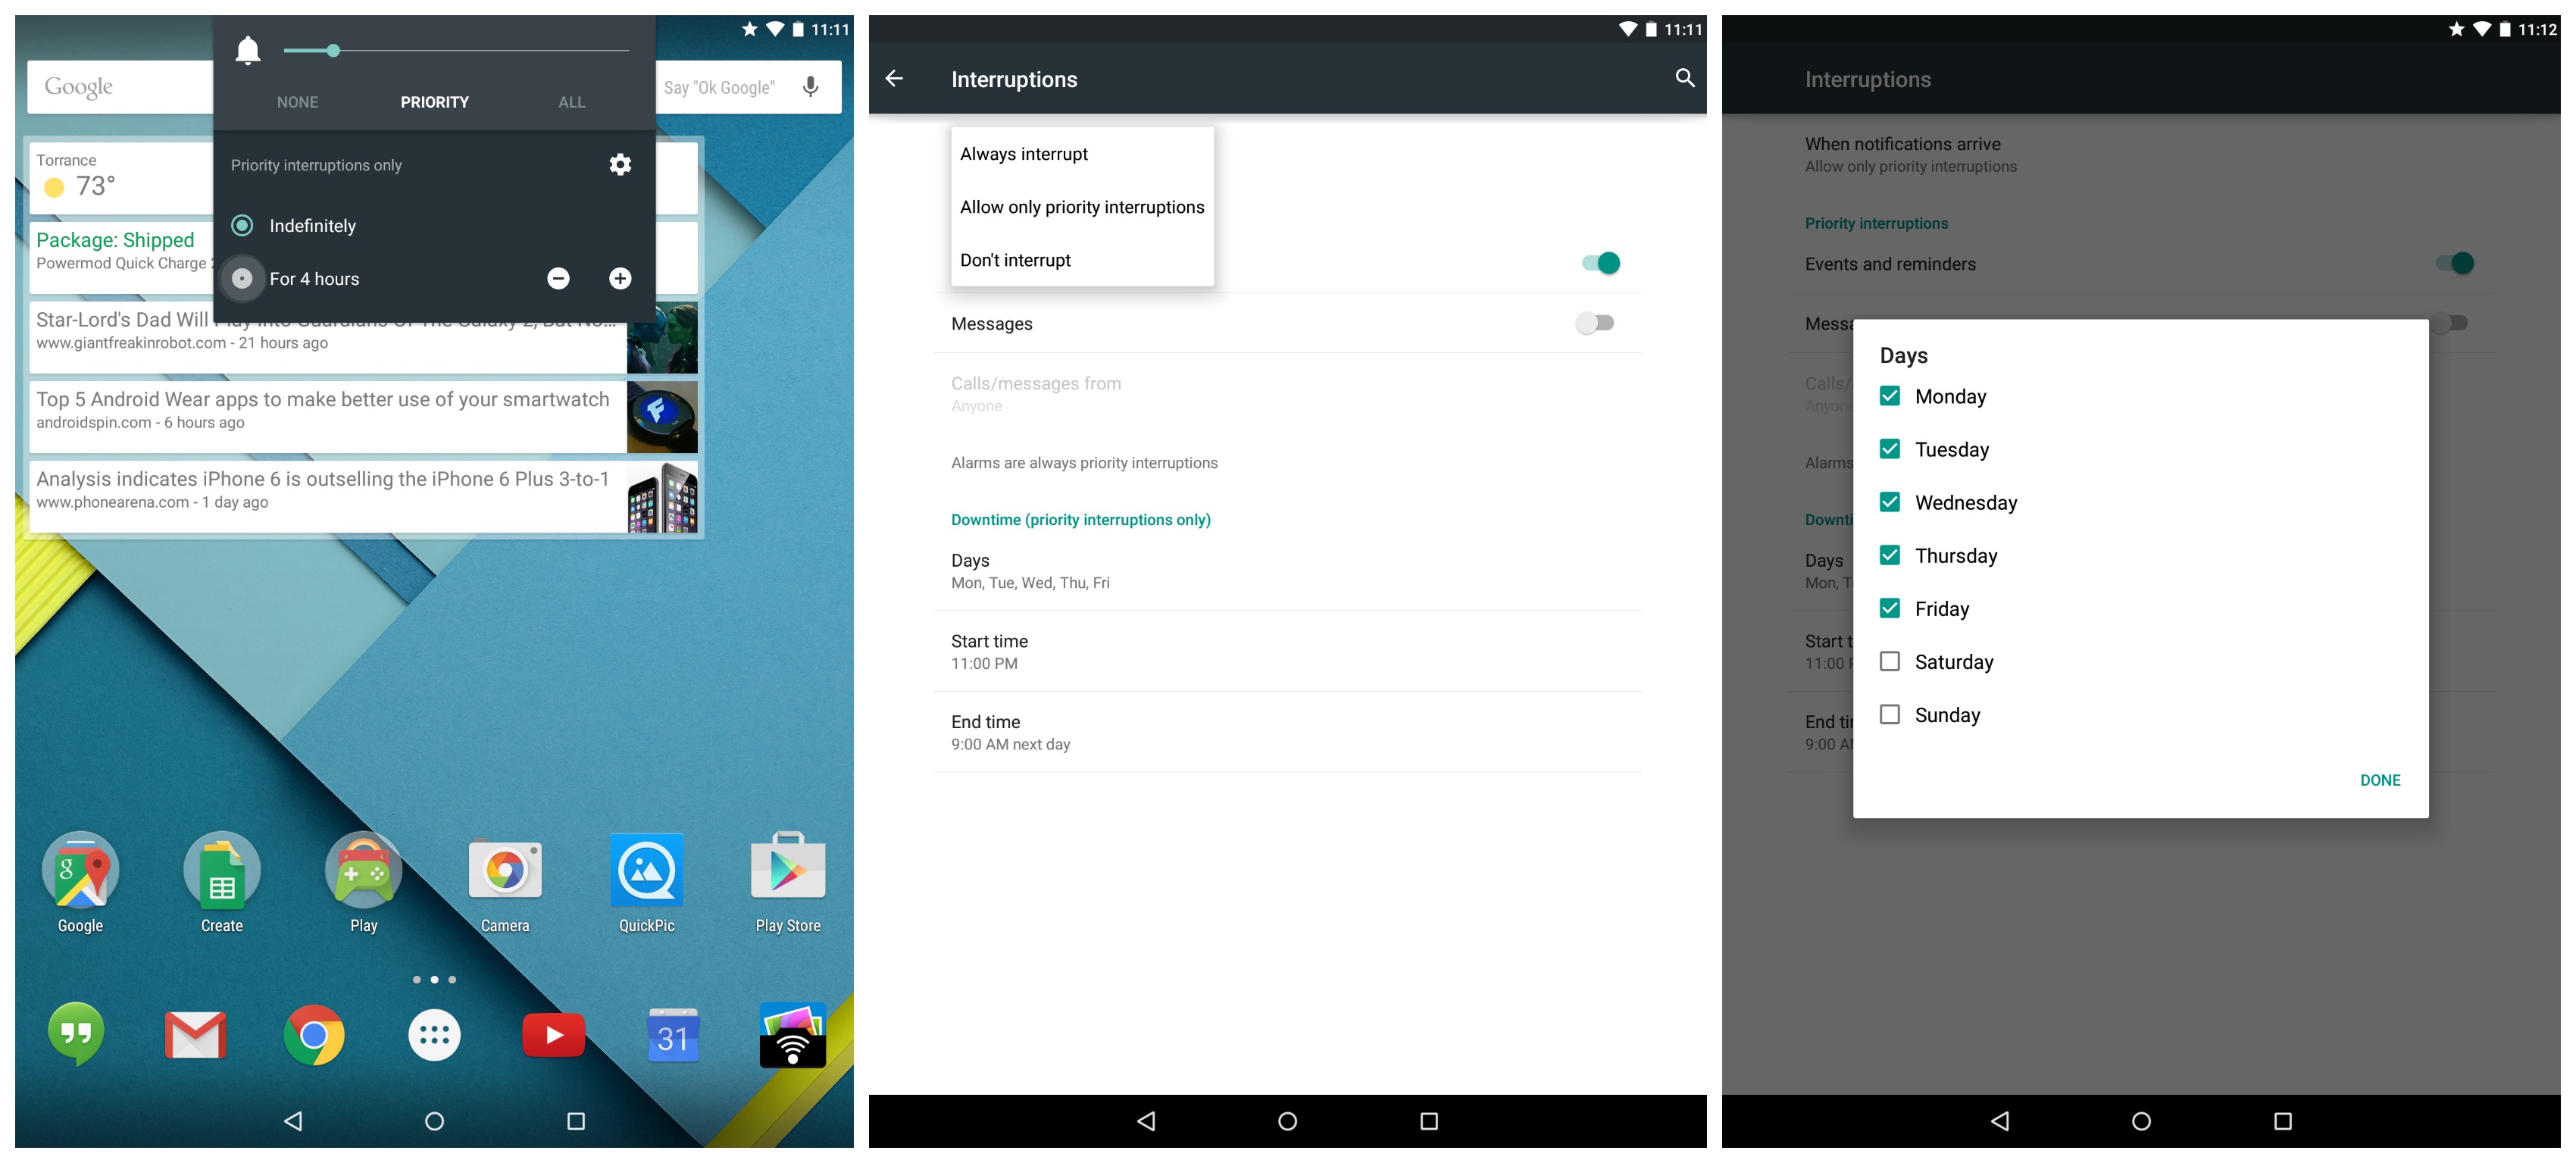
Probably the most useful feature of new Interruptions settings is “Downtime.” For downtime, you can specific times and days you would only like priority interruptions to come through. Chances are, you’ll want to set this for the weekdays when you don’t want your tablet notifying you of emails throughout the night should you forget to turn off the volume.
If you ever find an app is bothering you with notifications, you can turn off its notifications completely in the “App notifications setting.” It’s here you can also set an app to “priority,” in the event you’d like to continue receiving notifications from a specific app when interruptions are set to priority only. Neato.
Lollipop also introduces — for the first time ever — notifications right on your lock screen. Sounds great but sometimes you may not want the content of all your conversations appearing on your lock screen. No worries. You can choose how much content notifications actually show when displayed on your lock screen. Want more privacy? Open your Settings > Sound & Notification > When device is locked > Hide sensitive notification content. Or if you don’t want notifications of any kind on you lock screen (to each his own), choose “Don’t show notifications at all.”
9. Enable battery saver mode

It’s probably not as helpful as it is on a smartphone, but Lollipop’s all new Battery Saver mode is also fully present on the Nexus 9. When enabled (Settings > Battery > 3-dot menu > Battery saver), performance of your Nexus 9 will drop dramatically, animations will turn off, and “most background data” will be turned off.
The Nexus 9 lets you know it’s in battery saver mode thanks to bright orange notification and nav bars on the top and bottom of the device. There will also be an ongoing notification letting you know battery saver mode is enabled (if you couldn’t tell already), with an easy button to turn it off straight from the notification. Again, it’s probably not as helpful as, say, on your smartphone where a little extra juice can save your life, but it’s a nice (partially hidden) option none-the-less.
10. Setup Users & Profiles

User profiles are really nothing new, but Lollipop handles them a bit differently now. If you’ve ever set up users profiles on your computer, you should be right at home here. First off, there are 2 ways of accessing/creating new profiles: either pull down your notification shade twice to access quick settings and tap on the the blue user profile icon in the top right corner, or jump into Settings > Users.
There are 3 types of profiles: user, restricted, or guest. A creating a regular user account will give that user full access to all apps and settings on the device, only their Google account and photos will be kept entirely separate. It’s like their own personal playground on the Nexus 9.
A restricted account is a lot more work in that it can’t do much and the creator has to manually select exactly which apps — one-by-one — the restricted account can have access to. Some apps, like Photos, cannot be accessed in a restricted account no matter what, making this an incredibly hampered account best for served for the kiddies or if you’re using the tablet in a workplace.
Guest mode will allow a user to sign into their Google account and sync apps, but it’s all (somewhat) temporary. Once signed out of a guest account, all the data still remains meaning anyone can go back and resume that original guest session. That means anyone singing into their Google account under the guest profile will need to make sure they sign out and select the “remove guest” option before handing the tablet back to its owner.
11. Enable screen pinning

Having a Nexus 9 is great. It’s huge 9-inch display is perfect for surfing the web. So perfect, that at some point — be it a significant other or the kiddies — someone is going to want to take a crack at it. That’s where Screen Pinning can take some of the worry out of loved ones or acquaintances stumbling through your stuff. The feature (located in Settings > Security > Screen pinning) lets you lock down tablet use to a specific app (the last app you had open).
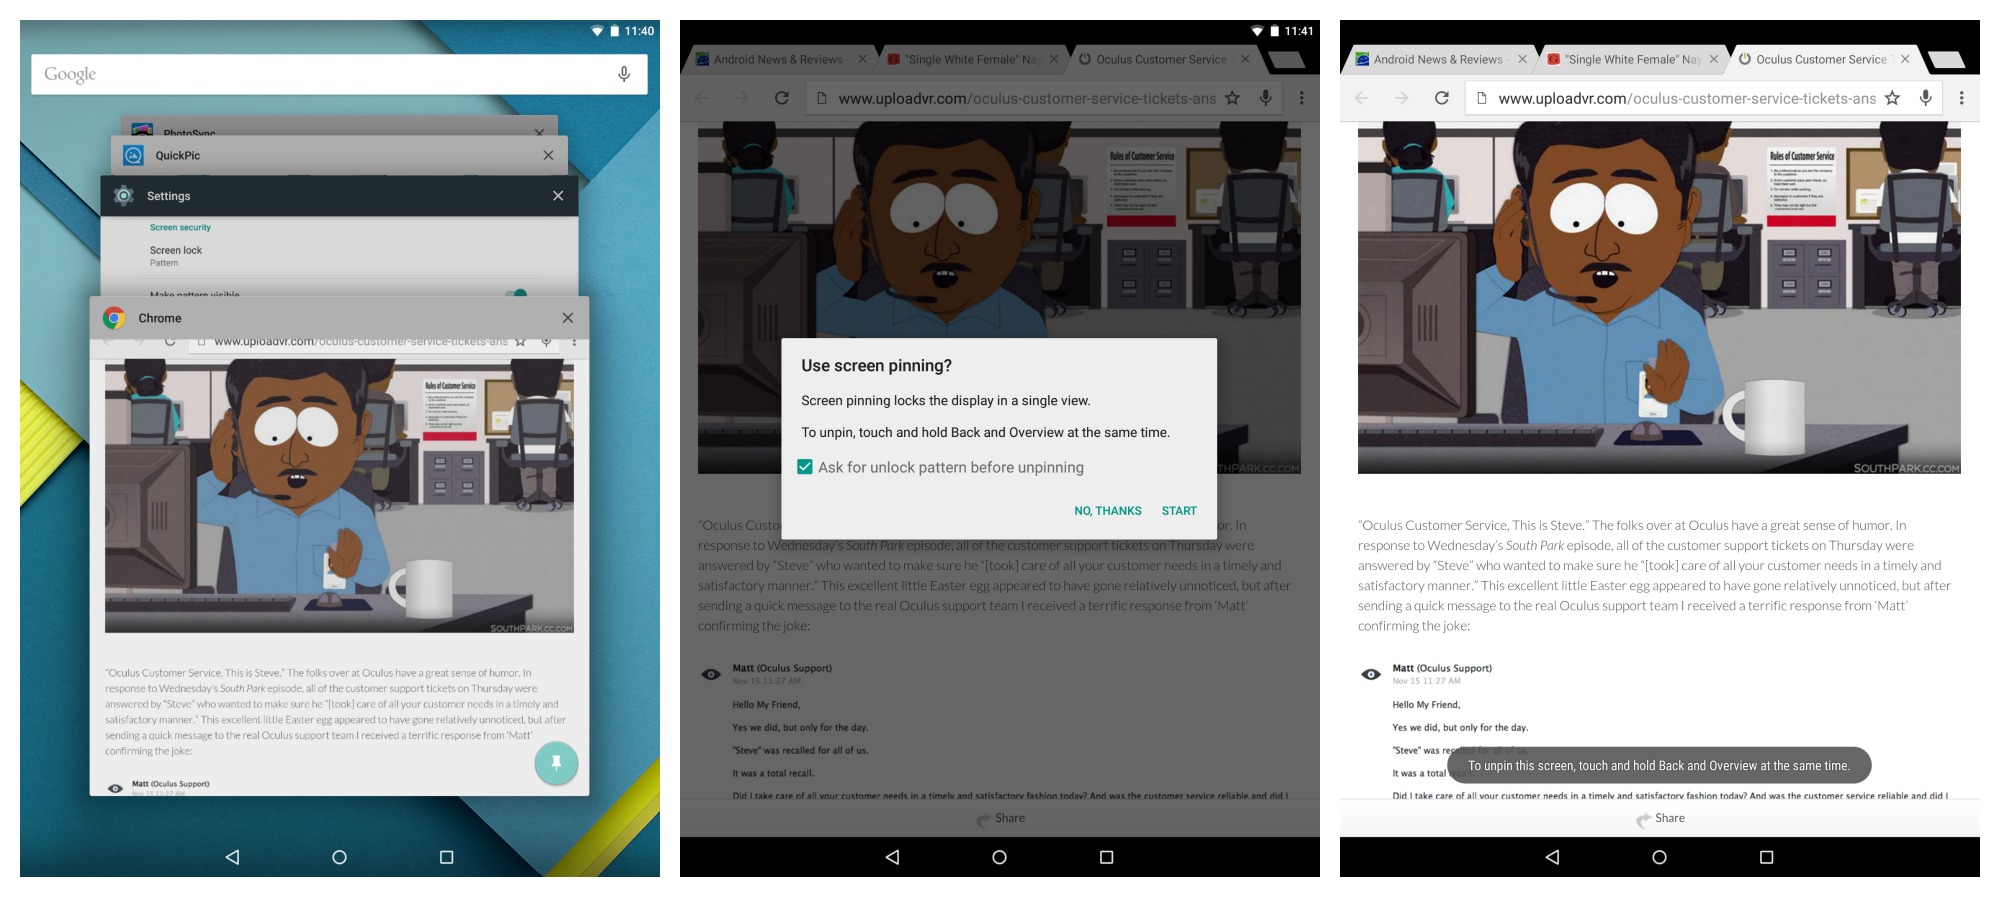
In order to exit the app, the user will first need to press a combination of the back and recents simultaneously to unlock it. If you have a password or PIN set for your lock screen, you can set Screen Pinning to require that before exiting an app instead, much more secure if there’s a lot of “sensitive” data on your device).
Our advice? Download a separate browser from the one you’re currently using (like Dolphin or Chrome Beta) so nobody can access your browsing history.
12. Install battery percent for KitKat/L

We can’t for the life of us figure out why Google makes it so difficult to view the actual percent of battery life left on your device, but nothings really changed in Lollipop. Sure you can always double pull the notification bar to view it, but if that sounds like too much effort, there’s another way. Technically, battery percent in the notification icon is baked into Lollipop, you”ll just need to download an app to enable it. It’s called Battery Percent for KitKat/ L and you can find it on the Google Play Store (for free) right here.
Once installed, the app will require a reboot for the changes to go into effect and once booted up, you’ll be able to view the exact battery percentage straight from the battery icon in the notification bar. Your life will forever be changed.
13. Backup photos and videos to Google+ / Photos

Your Nexus 9 already comes with Photos pre-installed. A replacement for the once great Gallery app, Photos is actually an extension of Google+, allowing you to back up your photos to the cloud where they’ll be stored in your Google+ profile. Upon opening Photos for the first time, you’ll be asked if you’d like to automatically backup your photos/videos and if you oblige, simply click the sign in button to sign in with your Google account. From there, you’ll be taken to the “All” photos tab of the app, where you’ll have to confirm you’d like to back up your photos and videos by pressing the “turn on” button at the top.
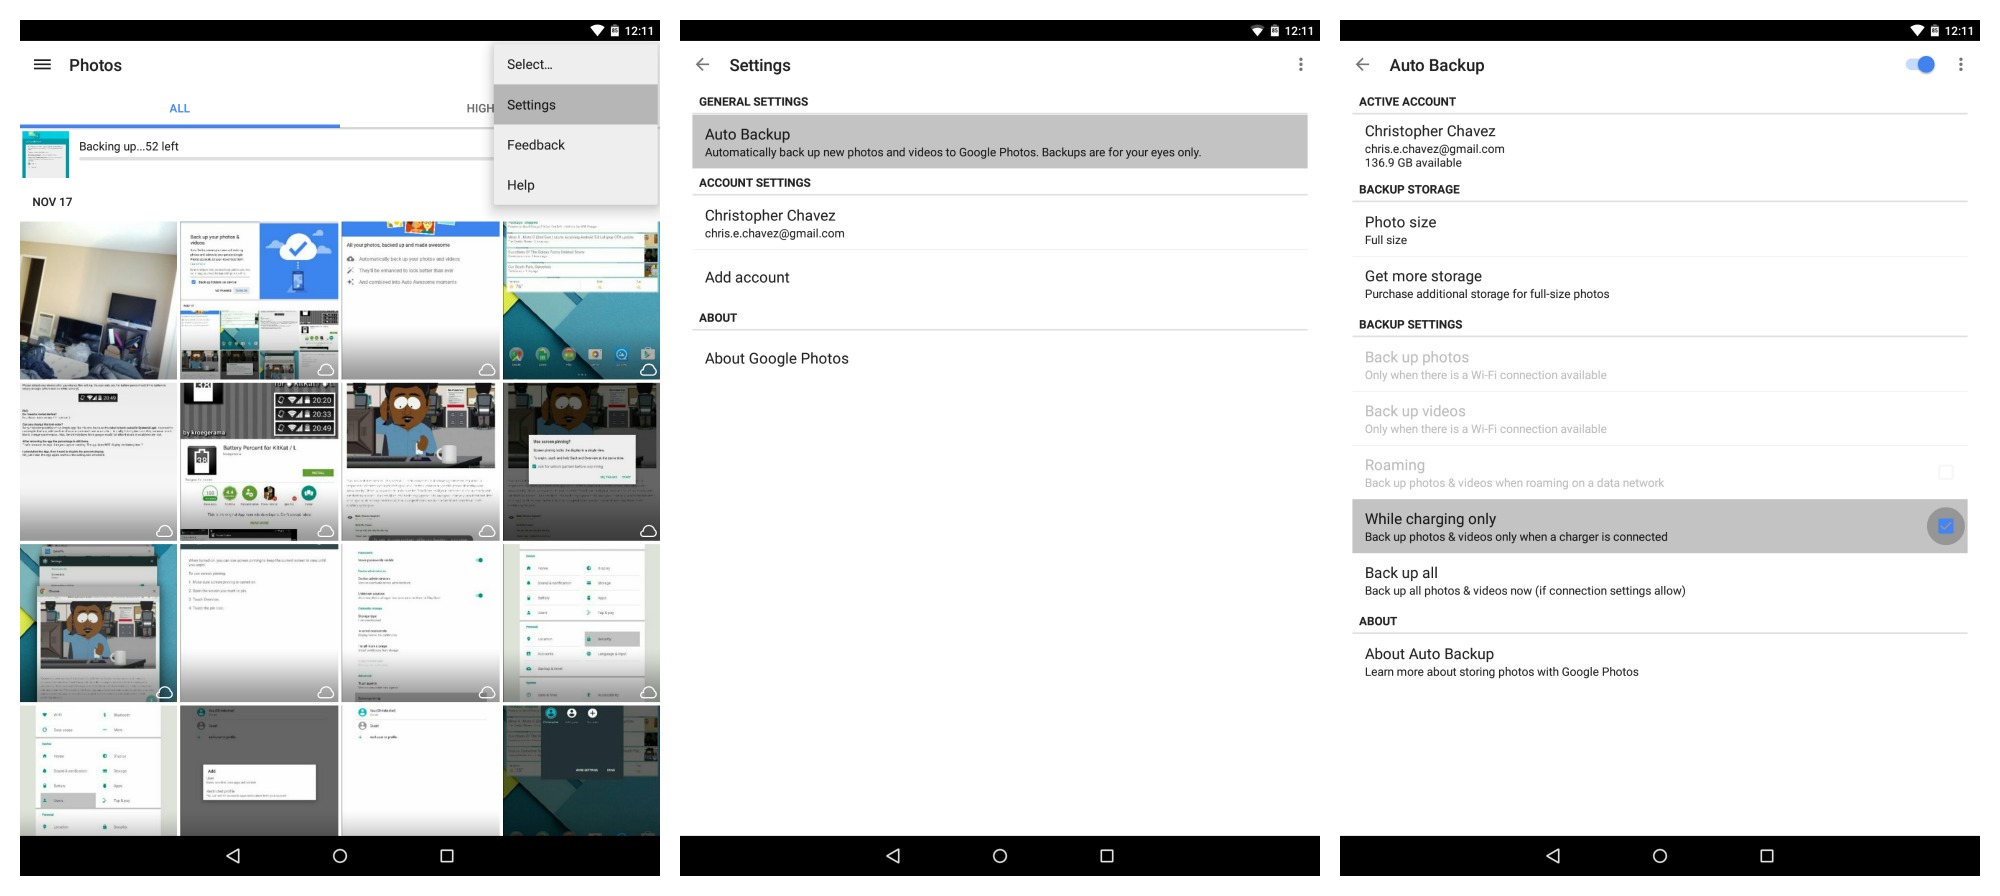
We recommend selecting the 3-dot menu in the upper right and going into the Photo settings where you can further customize how you’d like back ups to be handled. From there, select “Auto Backup” and you’ll be taken to a new page where you can see the total amount of cloud storage available and decide if you want photos backed up in full resolution, or resized down to 2,048 pixels once uploaded to save on cloud space. And if you’d like, you can always purchase additional cloud storage. Other options include only backing up when your Nexus 9 is connected to a charger (recommended), or backup everything now.
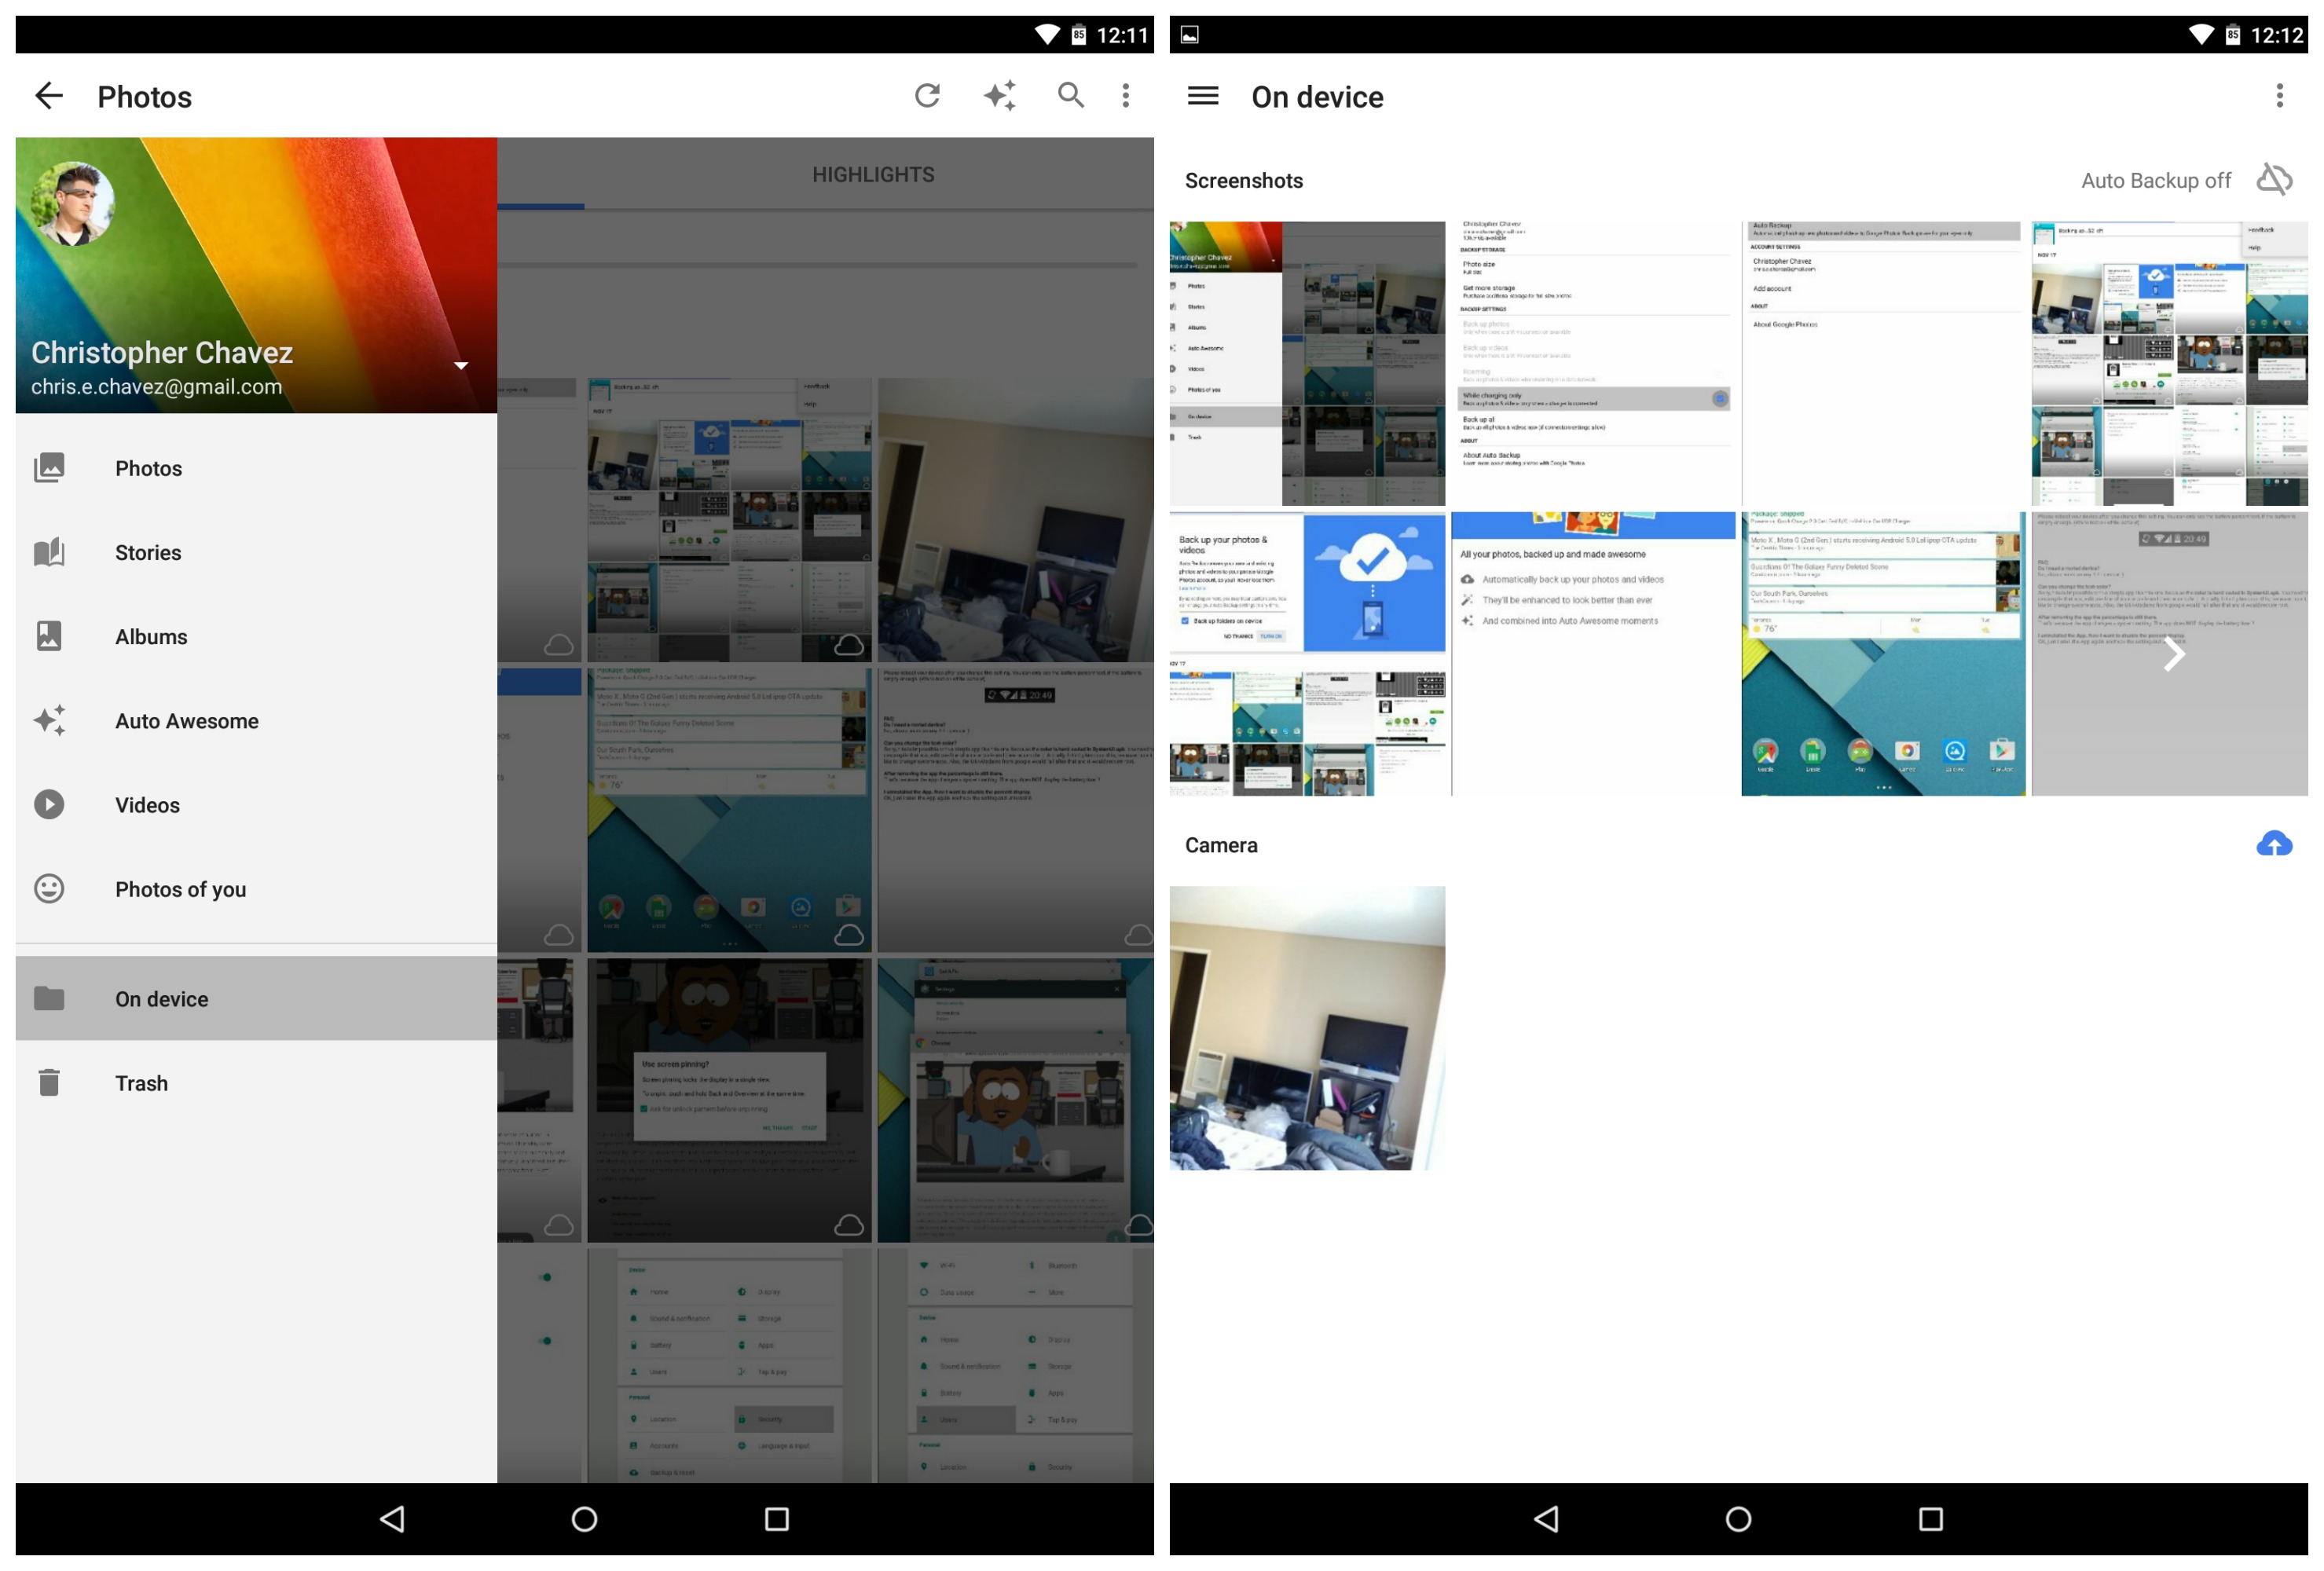
From time to time, you may receive notifications asking if you’d like to backup newly created folders (like your folder for Downloads, Instagram, Snapchat, etc.). To manage the folders you have backed up, open the slide out menu in Photos and select “On device.” Here you’ll find all the folders and the images/videos therein. Above each folder is a tiny cloud icon and when colored blue, indicates it’s a folder being backed up to the cloud. The grey and white cloud icon with a slash through it means it’s not being backed up. Manage however you’d like.
14. Play hidden Lollipop mini game
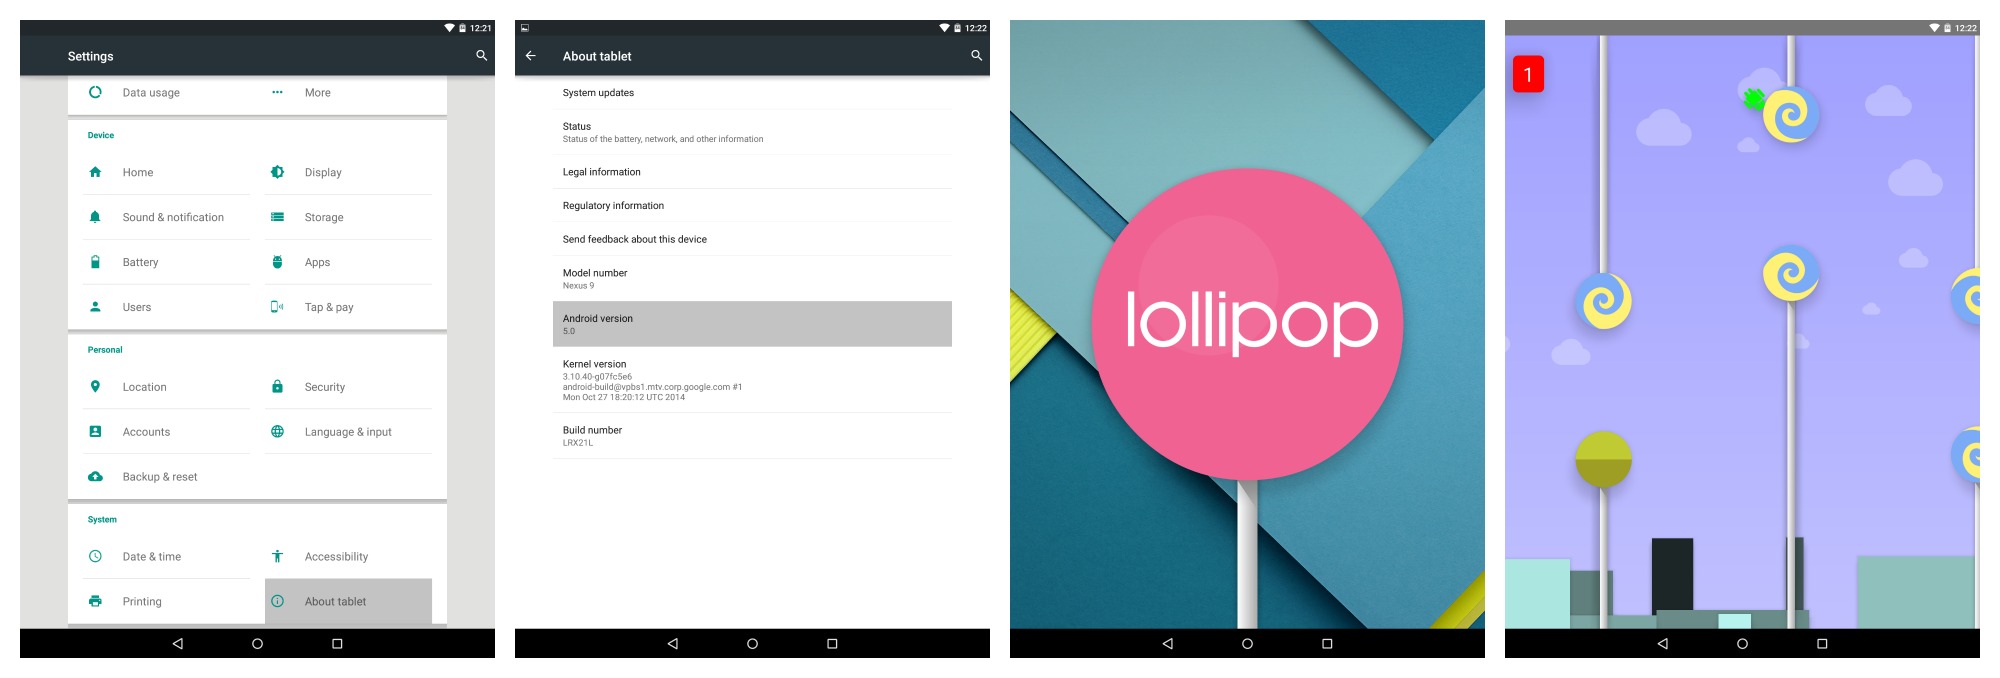
With every major Android release, Google has “hidden” an fun little Easter Egg inside the the Android version number (Settings app > About phone > Android version). But for Android 5.0 Lollipop, Google went all out, including a full on Flappy Bird clone baked inside the OS.
To get it up and running, all you have to do is press the version number 5 times to activate phase 1 of the Easter Egg: an image of a Lollipop. But there’s more. Tapping on the lollipop will change its colors while long pressing it fires up the new mini game.
It’s pretty much spot on with the original, only now featuring an Android mascot and Lollipop pipes. We should warn you, all the pull-your-hair-out difficulty of the equal pull-your-hair-out difficulty as the original. It’s not something Google had to do, but we more than appreciate the gesture.
15. Explore the Nexus 9 forums for more!
Follow all the steps above and you’ll find yourself on your way to becoming a Nexus 9 guru. Of course, the tablet is capable of much more and should you need further tips, tricks, or any other info you can think of, the Nexus 9 forums on AndroidForums.com will prove a valuable resource. Lurk all you like, but if you’d like to add some input of your own, you can sign up for an account right here.


The very first thing is to check if it has lightbleed…. :( :,( Really sad but true…. :(
So… What’s lightbleed again?
Mine already broke…so yay me. Screen wont turn on and the LED just blinks white whenever I try turning it on. Have tried different chargers, tried rebooting, tried plugging into my laptop.
Truth be told, mine has been buggy as sh*t since day one. Software updates haven’t helped much.
Mine worked fine for the two weeks I had it. There was the occasional stutter when swiping into the Google Now screen and it would take longer than usual to load certain apps every now and then but besides that, wasn’t that bad.
Compared to my Nexus 7 though, it’s definitely slower at just about everything. That NVIDIA CPU just can’t keep up. :/
I suggest Nvidia SHIELD, this thing blazes Android.
I”m sure it goes without saying across the board as we all back everything up but….
*If you feel strongly about, or have a strong connection to a particular app that may no longer be in the Google Play Store, or not easily available through a conventional app store, (Amazon) do yourself a huge favor and backup the .apk file from your current device to somewhere accessible for when you’re done setting up your new hotness. There’s a chance that an app that you’ve had for a while across numerous devices is no longer available let alone the version you’re comfortable with. No rooting necessary. Just grab the .apk and stick it somewhere safe. Personally when the time comes for me to ante up and get the N9 I’ll need TV Portal. Who the hell know’s if and or where it’ll be available when that time comes.
You forgot the 16th thing… return it an get an iPad. I hate to say it, but I haven’t heard much good come out of the Nexus 9, I really wanted to snag one, but I’m going to stick with my iPad a while longer
I hate Apple but the sad thing is I kind of did this and bought the Ipad mini 2.
Step 1: Unlock boot loader
Unlocking the boot loader wipes everything so best to do it early.
Okay, so I’ve been wondering about this. Is the data backup like a full backup regardless if the app is up to date or whatever? What I mean is I know some apps don’t have Google Play Games integration. So if I get this said app and get a new device the data will be restored? Or does it require the app to have data backup built into it?
I’ve always wondered about this. I’ve always rooted and restored my own data, so I’ve never took the time to notice.
You forgot that this is a Nexus. Step 0 – Unlock your bootloader.
I’ve had mine for about a week now (coming from a nexus 10), and I’ve had a much better experience so far. No obvious light bleed (I have to be really looking for it against a black screen to even find any), solid build, nice to hold in hands. I noticed some apps were a bit laggie the first few times I opened them, but after day 1 everything opens on demand. Wifi range is better, screen looks nice and sharp. I’m not saying it’s better than an Ipad (which I bought my wife), but i’m definitely not saying the iPad is clearly better than the Nexus 9. I was hesitant to buy this because after 2 years of use, my nexus 10 was still absolutely solid, but I’m glad I did. Plus i’m quite excited to see how future updates will take advantage of the 64 bit architecture.
I really liked the Lollipop experience on this tablet! But returned the unit after being annoyed by the light bleeding and the heat on the left middle backside, which are annoying for this pricey tablet. But the showstopper was the contineous wifi drops all the time. My other Androids and PC’s and lots of wireless devices function fine on my routers, only the 9 on three locations was horrible. I am not alone with this problem, maybe a driver, maybe faulty hardware in some units.