ZIP files are a useful way of bundling together documents and media files into a single file. This makes it easier when you need to share it with others, like through email, and you don’t want to attach too many files at the same time.
Another advantage of using ZIP files is that it compresses the contents to a certain extent, making a larger file smaller and easier to send over messenger platforms, emails, or if you’re sharing it on a cloud storage platform.
But if you want to make sure that your files are not accessed by anyone, you can actually password protect them. Now, Windows does not come with the feature by default so you will have to use third-party apps. In this example, we’ll be using WinRAR, which for the most part is free and easy to use.
Password protect ZIP files

- Download and install WinRAR on your computer
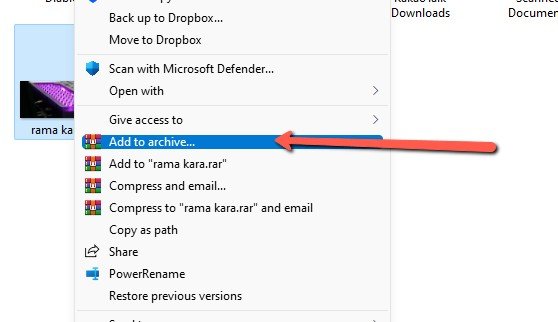
- Go to the file that you want to ZIP and password protect
- Right-click it and select “Add to archive”

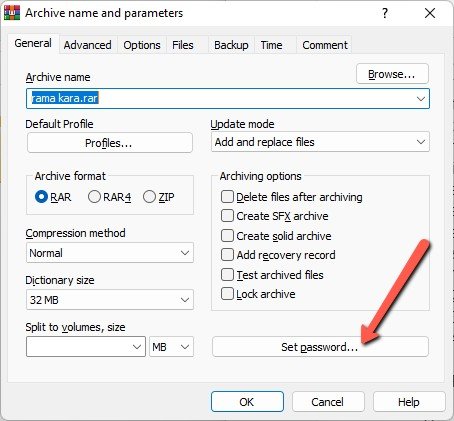
- Click on “Set password”

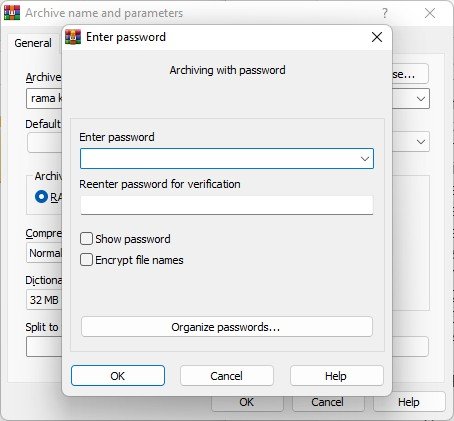
- Enter your password and enter it again to verify that they are one and the same
- Click OK

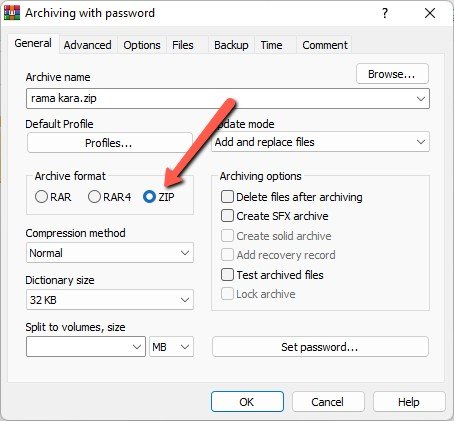
- Under “Archive format”, make sure “ZIP” is selected
- Click “OK”
- Your new ZIP file will have been created
- Now whenever you open the ZIP file, you will be prompted to enter the password to view its contents
Something to take note of is that the contents are only password protected while they remain in ZIP form. This means that whenever its contents are extracted, the contents themselves are no longer protected by the password, so we wouldn’t necessarily call it the most stringent form of security out there, but it can still be useful if you’re trying to protect sensitive documents that are sent as email attachments, or if you don’t plan on extracting its contents.
Related articles
- How to choose a strong password
- How to password-protect your Google account’s My Activity page
- How to view your WiFi password on Windows 11
- How to setup a lock-screen pattern, PIN or password on your Android device [Android 101]
- How to check if your password has been stolen


Comments