

If you’re reading this article, you’re looking for a way to reset your Samsung Galaxy S10. The Samsung Galaxy S10+ is one of our favorite smartphones from 2019, but sometimes a reset may be necessary to improve performance, fix a bug, or to wipe the phone’s storage completely.
Samsung Galaxy S10+ review: refinement at its best
Like the soft reset, the Galaxy S10+ has a few different ways to perform a factory or hard reset.
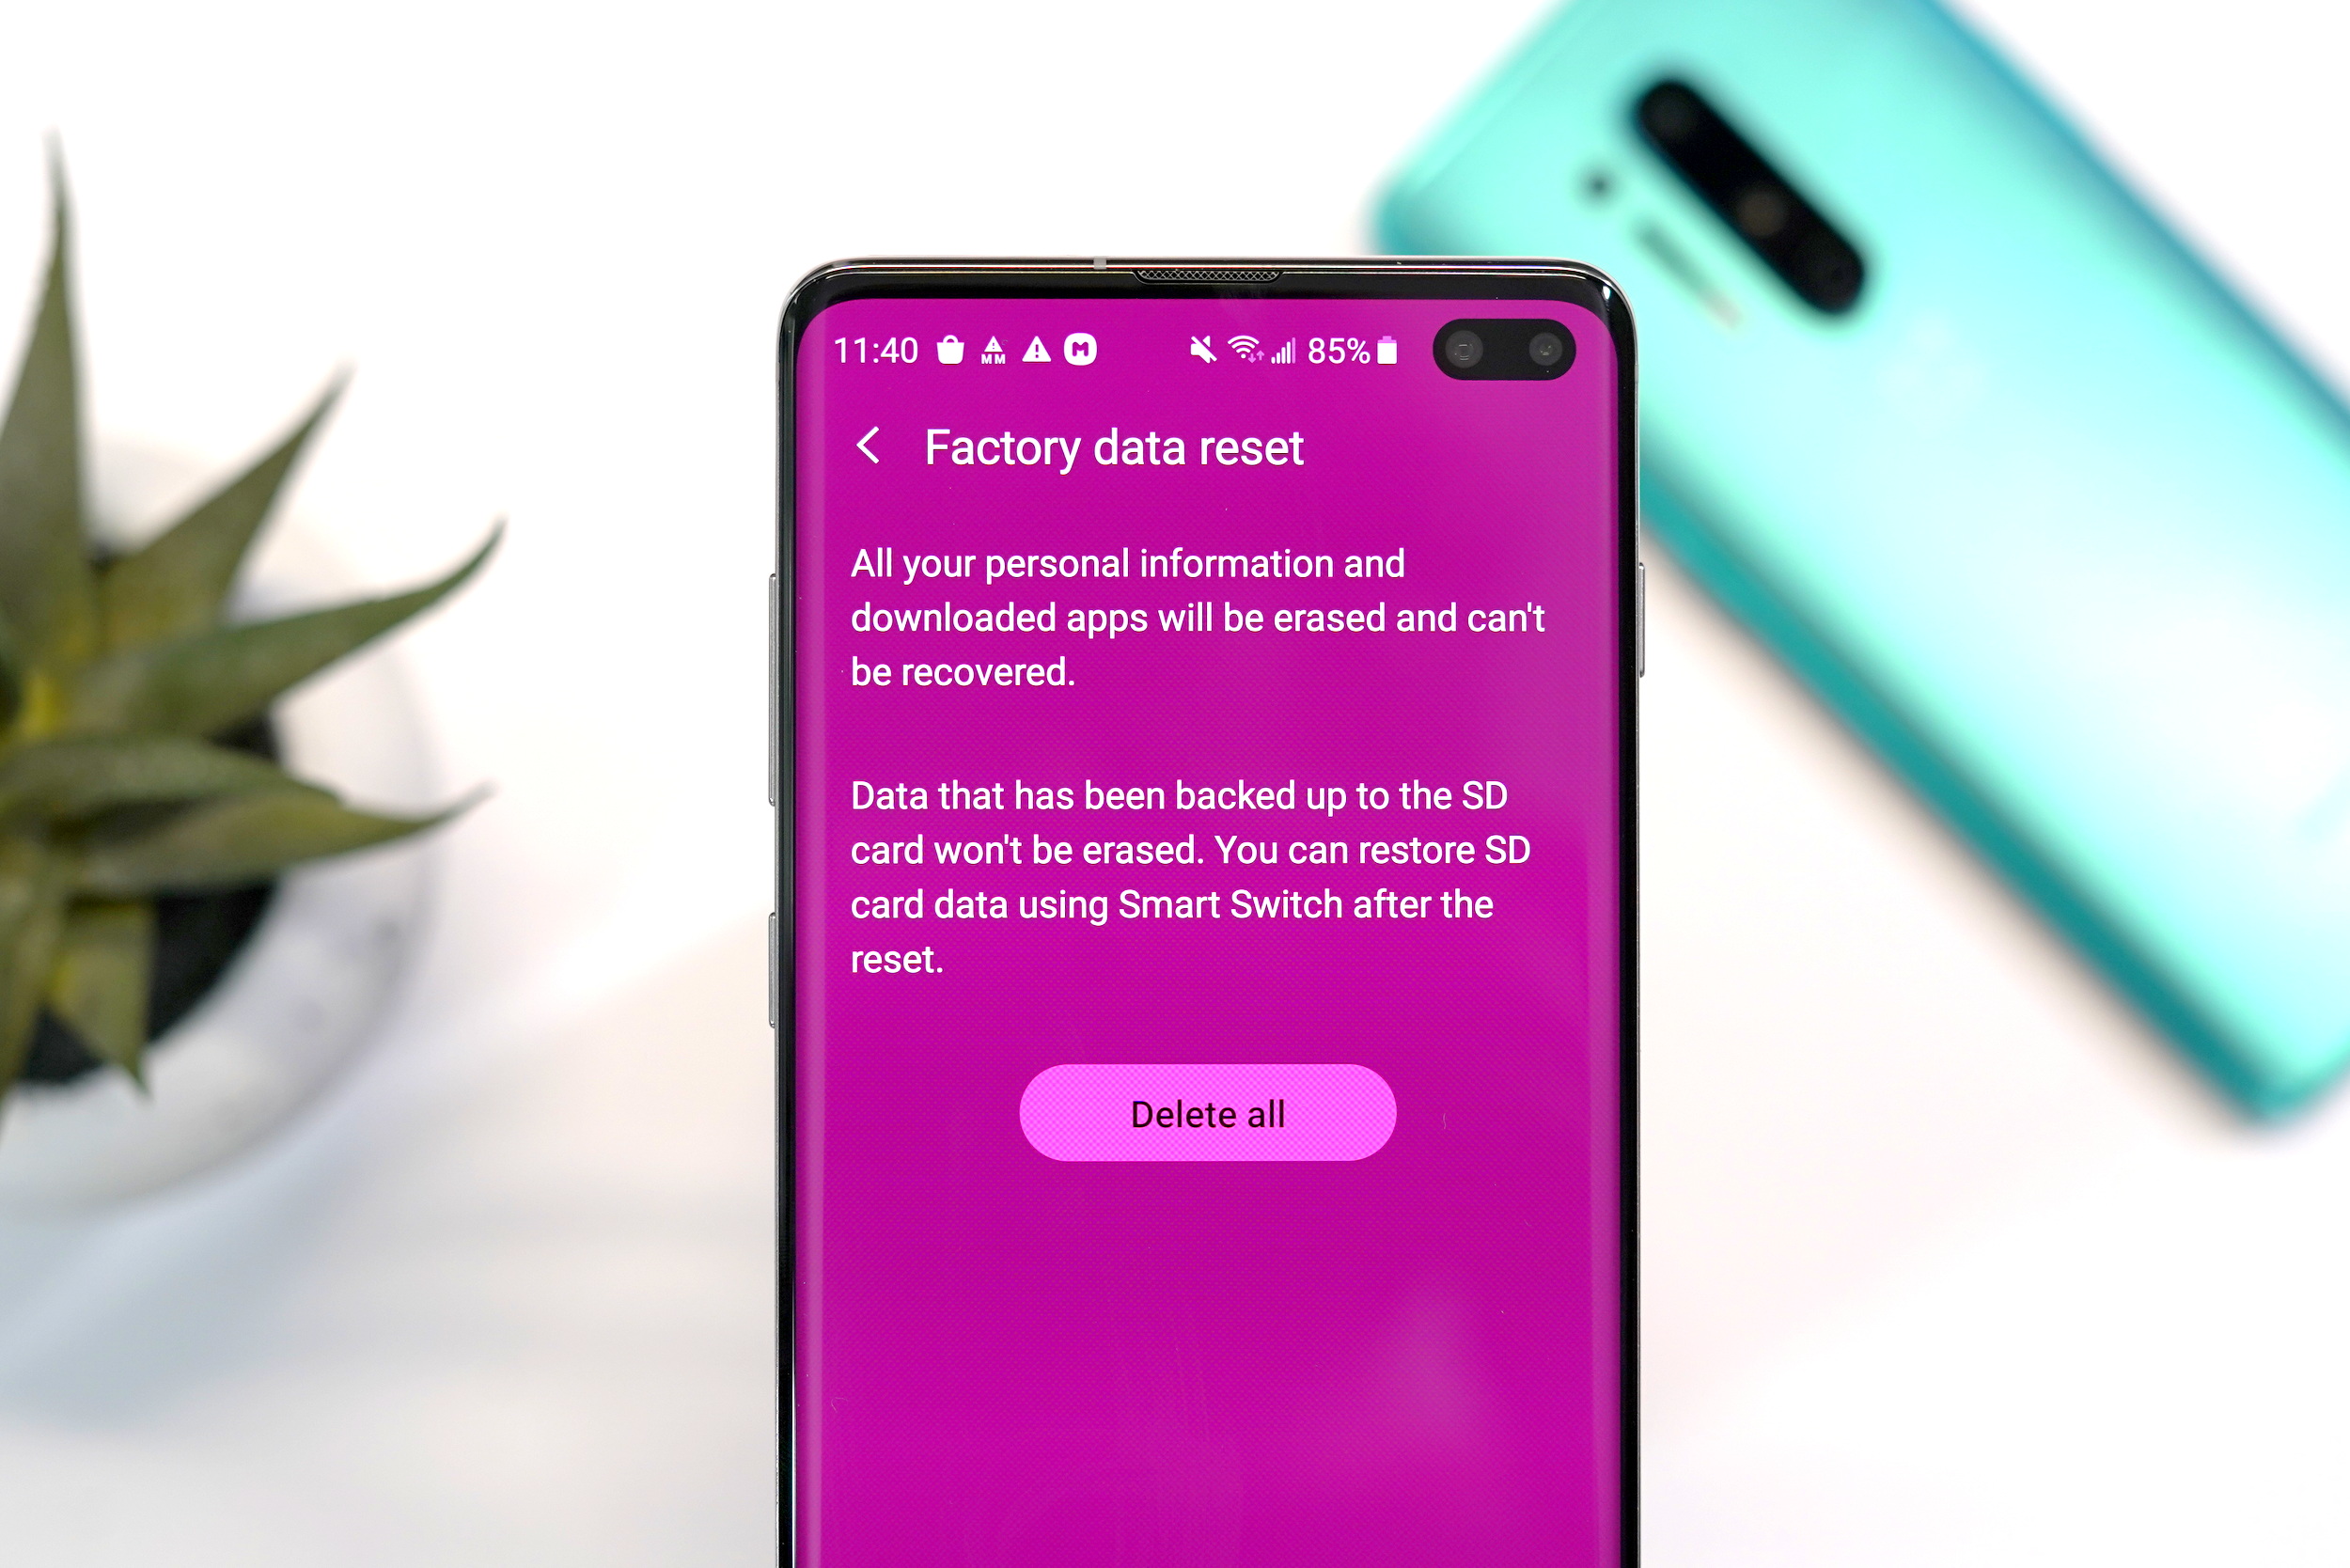
Samsung Galaxy S10+ simple factory reset
- Open settings Settings > General Management > Factory Data Reset > Reset
- Enter your PIN, Password or Unlock Pattern
- Tap “Delete all”
- Enter your Google Account password to start the factory reset process
- The reset process will take several minutes
- After the reset has completed, the phone will reboot to start the setup process
Samsung Galaxy S10+ Recovery mode factory reset
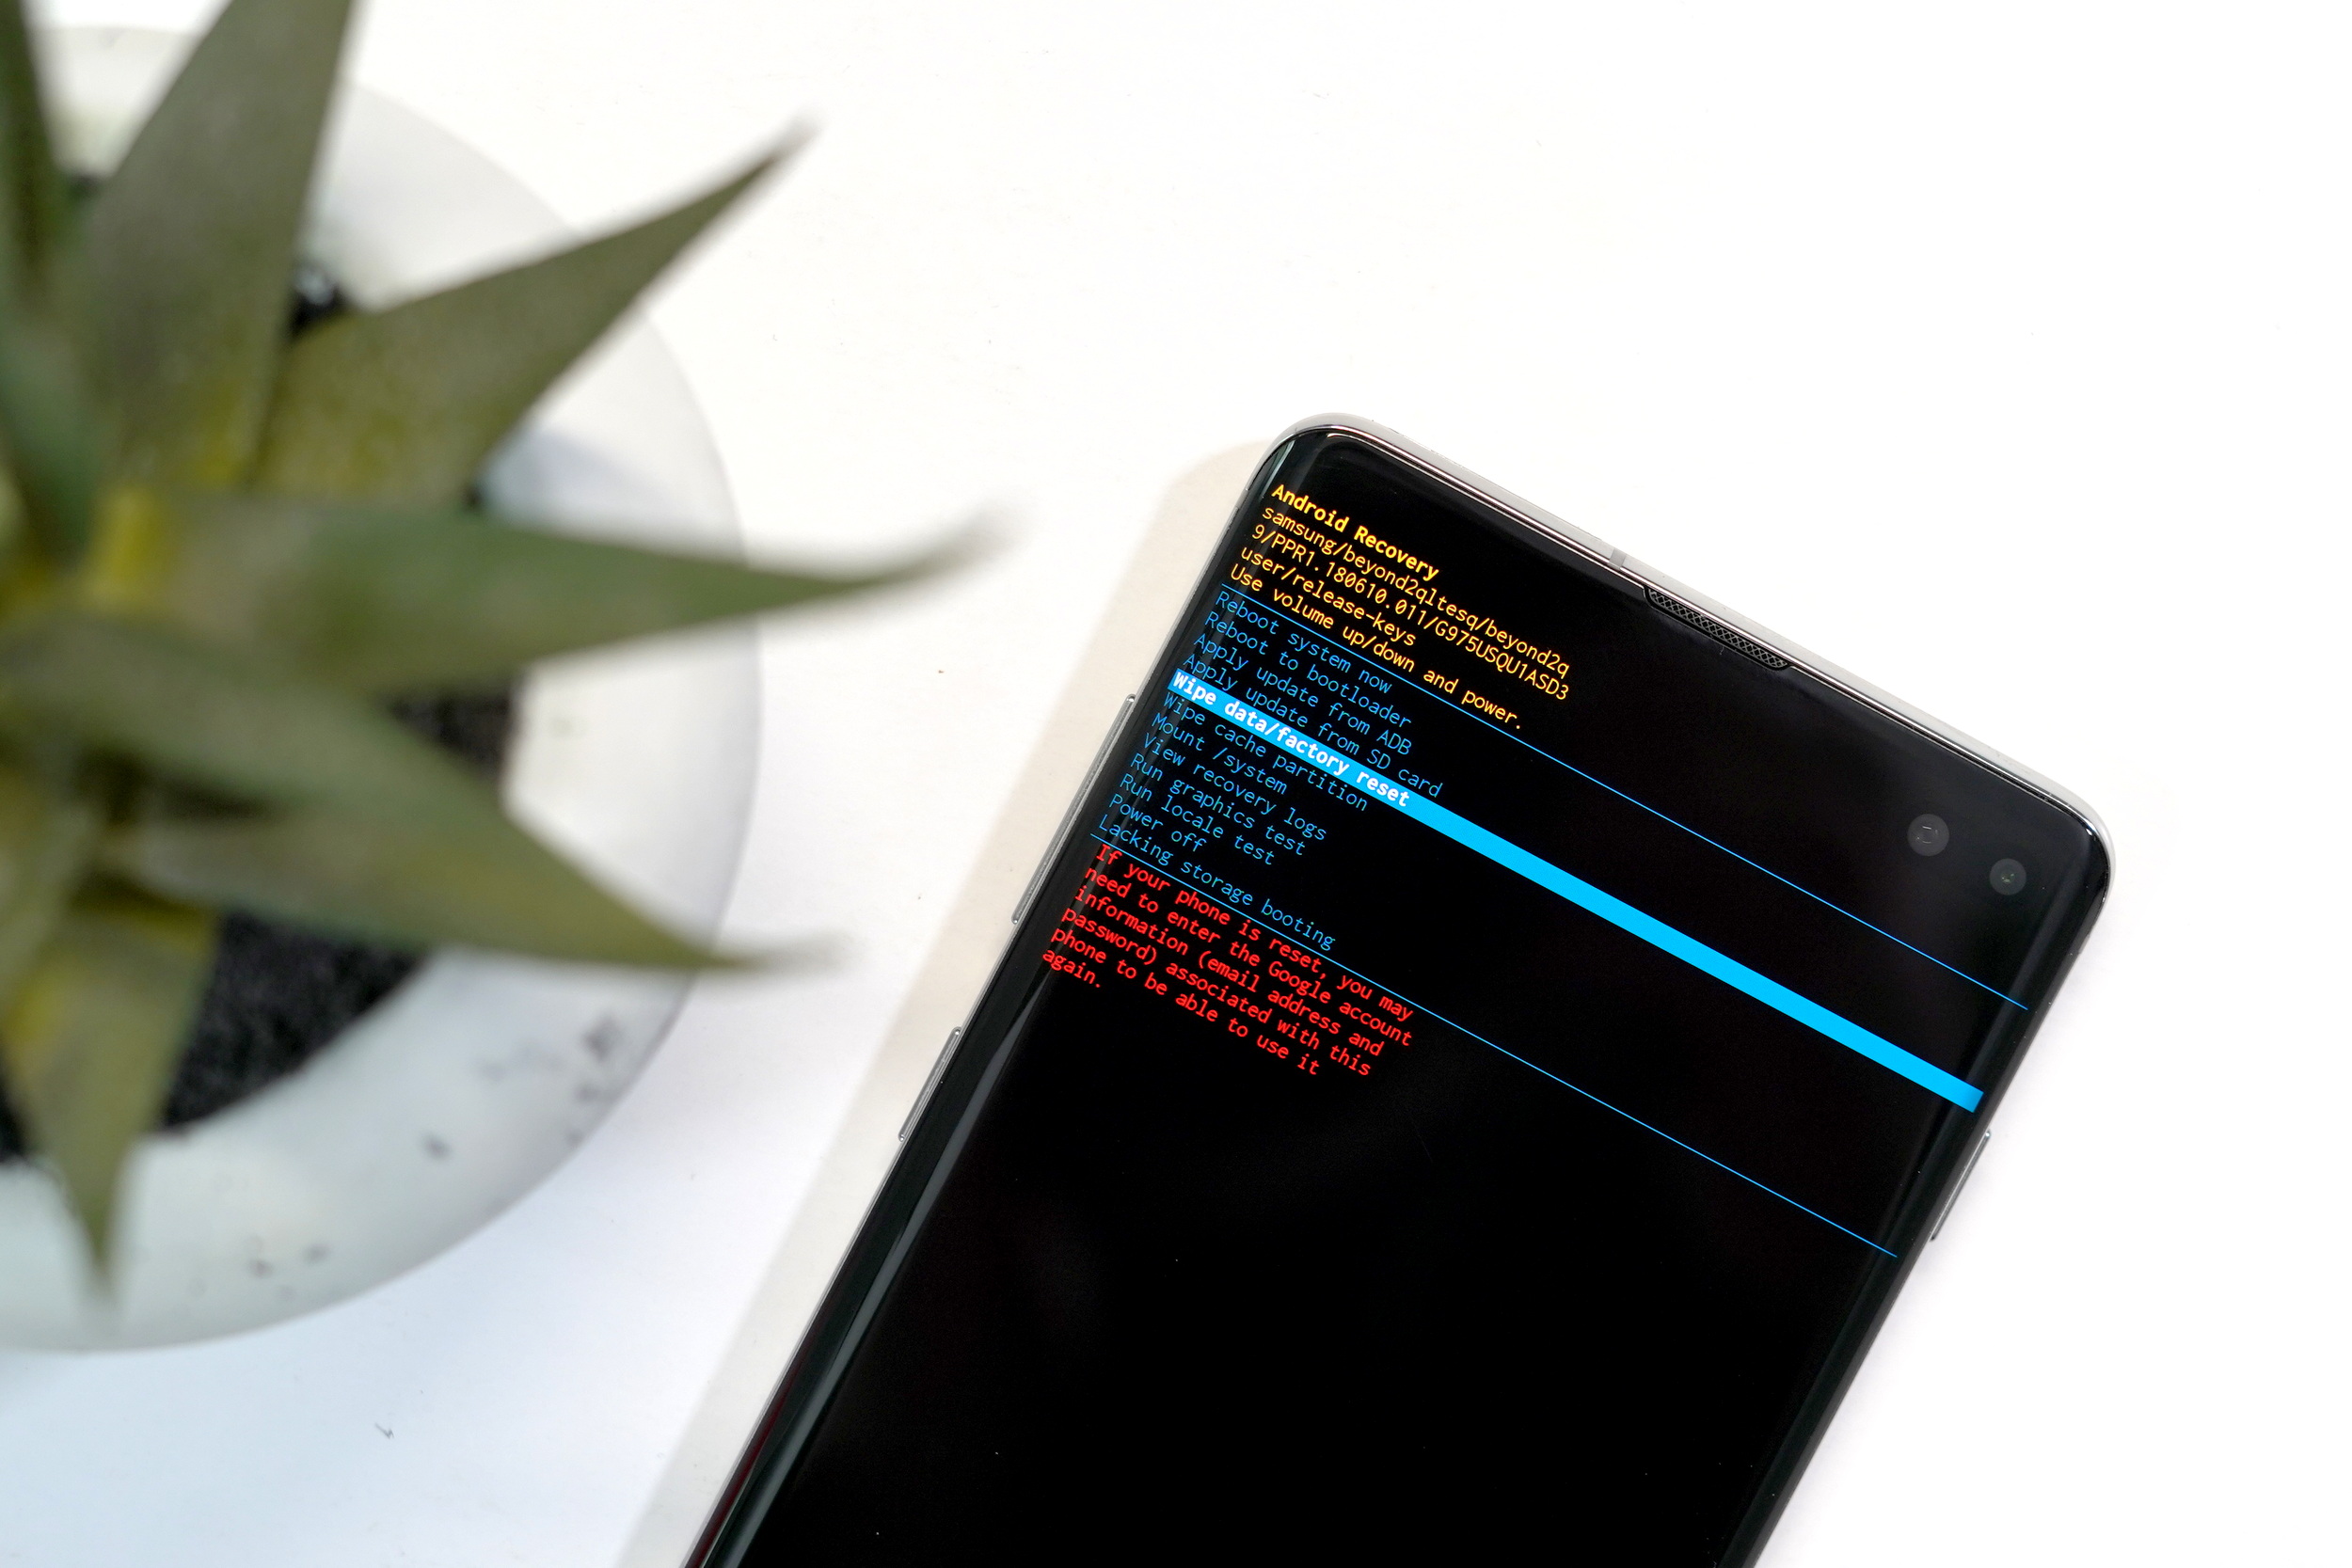
If your Samsung Galaxy S10+ is unresponsive or you are locked out of the device, you can perform a factory reset through the phone’s recovery system.
- Turn off the Samsung Galaxy S10+
- Simultaneously press and hold the Volume Up, Bixby and Power buttons for 15 seconds
- When the recovery screen appears, you can use the Volume Up/Down buttons to navigate and power button to select
- Highlight Wipe data/factory reset and press the Power button
- Highlight Yes and press the Power button
- The reset process will take several minutes
- After the reset has completed, the phone will reboot to start the setup process
- If the Galaxy S10+ reboots into recovery mode, highlight Reboot system now and press the Power button
Page 3 of 5


Comments