
Google Photos is a handy tool to store your photos and videos but you surely do not want everyone to see all of them. There are likely to be media files that are sensitive in nature and you want to keep them to yourself. This is why Google added a feature called Locked Folder to Photos so that you can keep those sensitive files away from anyone who should not be seeing them.
Locked Folder is a folder within the Google Photos app that is protected by your device’s screen lock. All files moved to this folder stay locally on the device and do not get moved to other devices through cable or cloud transfers. This is the reason if you end up uninstalling the app or deleting the app data, you will lose all those files too. With the disclaimer out of the way, let’s get started with the tutorial.
How to set up Locked Folder in Google Photos:
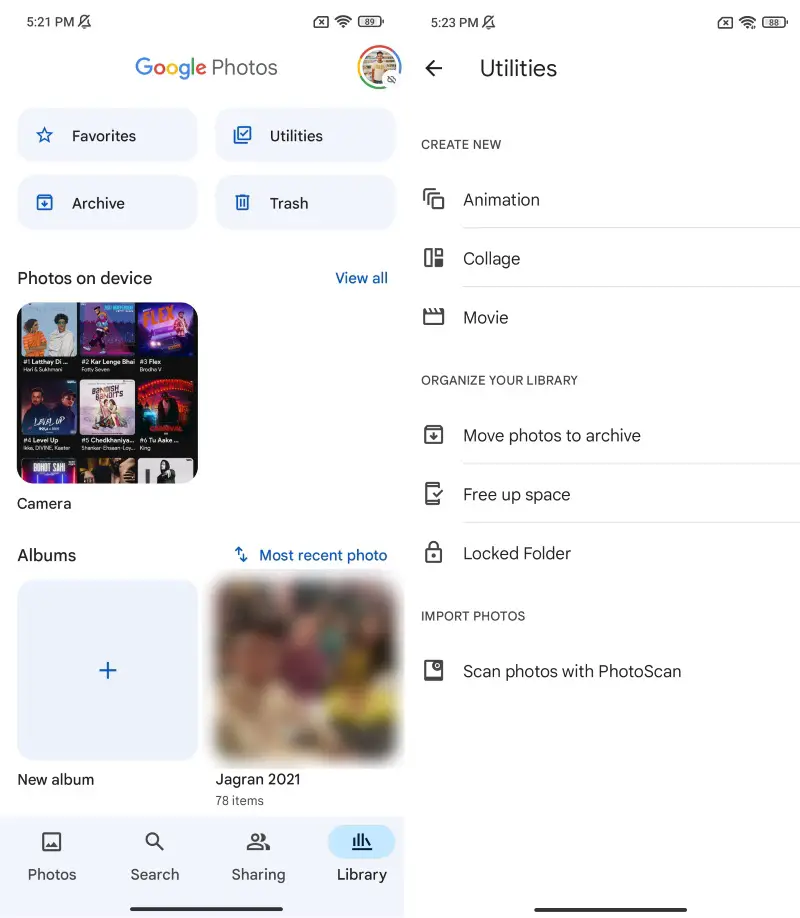
- Launch the Google Photos app and tap the Library option.
- Tap the Utilities option at the top and then Locked Folder.
- You will get a screen detailing all those conditions that we explained in the beginning. Tap on the Setup button in the bottom right corner to proceed (screenshot not allowed here).
- It will ask you to verify your identity through the device screen lock method used by you (fingerprint scanner, pattern, alphanumeric password, or numerical PIN).
The app will create Locked Folder after successful authentication. You wil see the message “Nothing here yet” as you have not moved any files which is what we will cover next.
How to hide photos and videos in Google Photos:
- Open Google Photos and tap on the photo/video you want to hide.
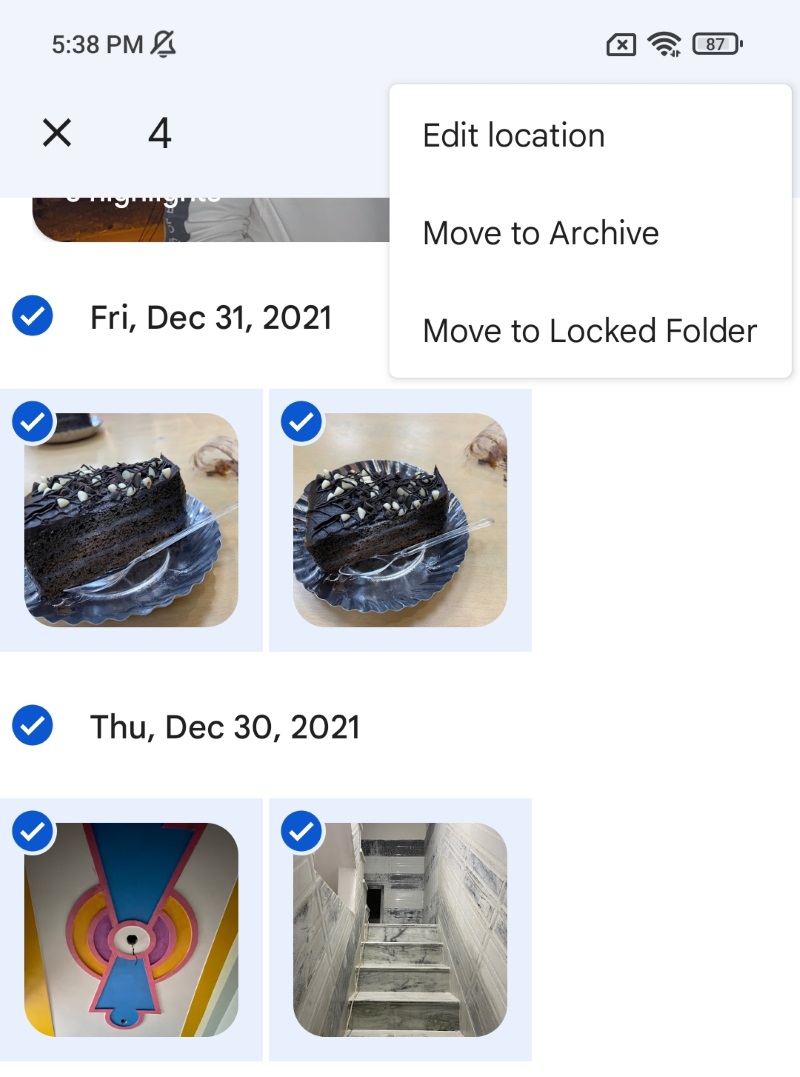
- Tap the three-dot icon in the top left corner to get a list of options.

- Tap Move to Locked Folder and confirm your choice on pop-ups.
- The app will take a few moments and the selected photo/video will be moved to the Locked Folder.

- To move multiple files at once, select all of them. Tap on the three-dot icon and choose the Move to Locked Folder option.
It should be noted that the exact time may vary from file to file. If you have a photo or video in the trash that you would like to hide, you need to restore it and then follow the aforementioned steps. You can access all your hidden files anytime by visiting Library -> Utilities -> Locked Folder.
How to unhide photos and videos from Locked Folder in Google Photos:
You will have to access Locked Folder within Google Photos as we have explained before. Tap on the photos and videos that you would like to unhide. The app will show two options: Move and Delete. Choose Move to unhide selected files and if you would like to delete them, choose the Delete option. There are no screenshots in this section because Google does not allow capturing screenshots of Locked Folder due to privacy reasons.


Comments