
Leading up to the Android 12 Material You redesign, Google put a lot of focus on privacy and security for Android users. This comes as no surprise, as we’ve seen other phone makers, primarily Apple, make strides to keep users’ data and content protected. During Google I/O 2021, Google introduced a rather awesome change to Google Photos, with the announcement of Locked Folders.
With Locked Folders, you’ll be able to move and save any of your images and videos within Photos to a password-protected folder. This will remove the content from appearing in third-party gallery apps, along with removing them from appearing on something like your Nest Hub.
Set up a Locked Folder in Google Photos
The process for creating a Locked Folder is a bit different from setting up your traditional folder. Everything is done within Google Photos, but you’ll need to confirm your lock screen passcode first before being able to actually move or save any content to those folders. Here’s how you can set up a Locked Folder in Google Photos:
- Open the Google Photos app.
- Tap Library in the bottom toolbar.
- Tap Utilities.
- Select Locked Folder.
- Tap Set up Locked Folder.
- Follow the on-screen instructions.
How to save pictures directly to the Locked Folder
This wasn’t really shared during the announcement, but Google has confirmed that you can actually take pictures on your Pixel and have them saved directly to a Locked Folder. This removes the need to deal with trying to find them and manually move pictures or videos after the fact.
- Open the Camera app on your Pixel.
- Tap Photo Gallery in the top right corner.
- Select Locked Folder.
How to move pictures and videos to the Locked Folder
Provided that you have already created a Locked Folder, the process for moving photos and videos is not all that different from the process for moving images to regular folders. The biggest difference is the new option when tapping the More icon after selecting your images.
- Open the Google Photos app.
- Select all the photos and videos that you want to be moved to the Locked Folder.
- After selected, tap the More button in the top right corner.
- Select Move to Locked Folder.
- Tap Move.
What limitations are there with using a Locked Folder?
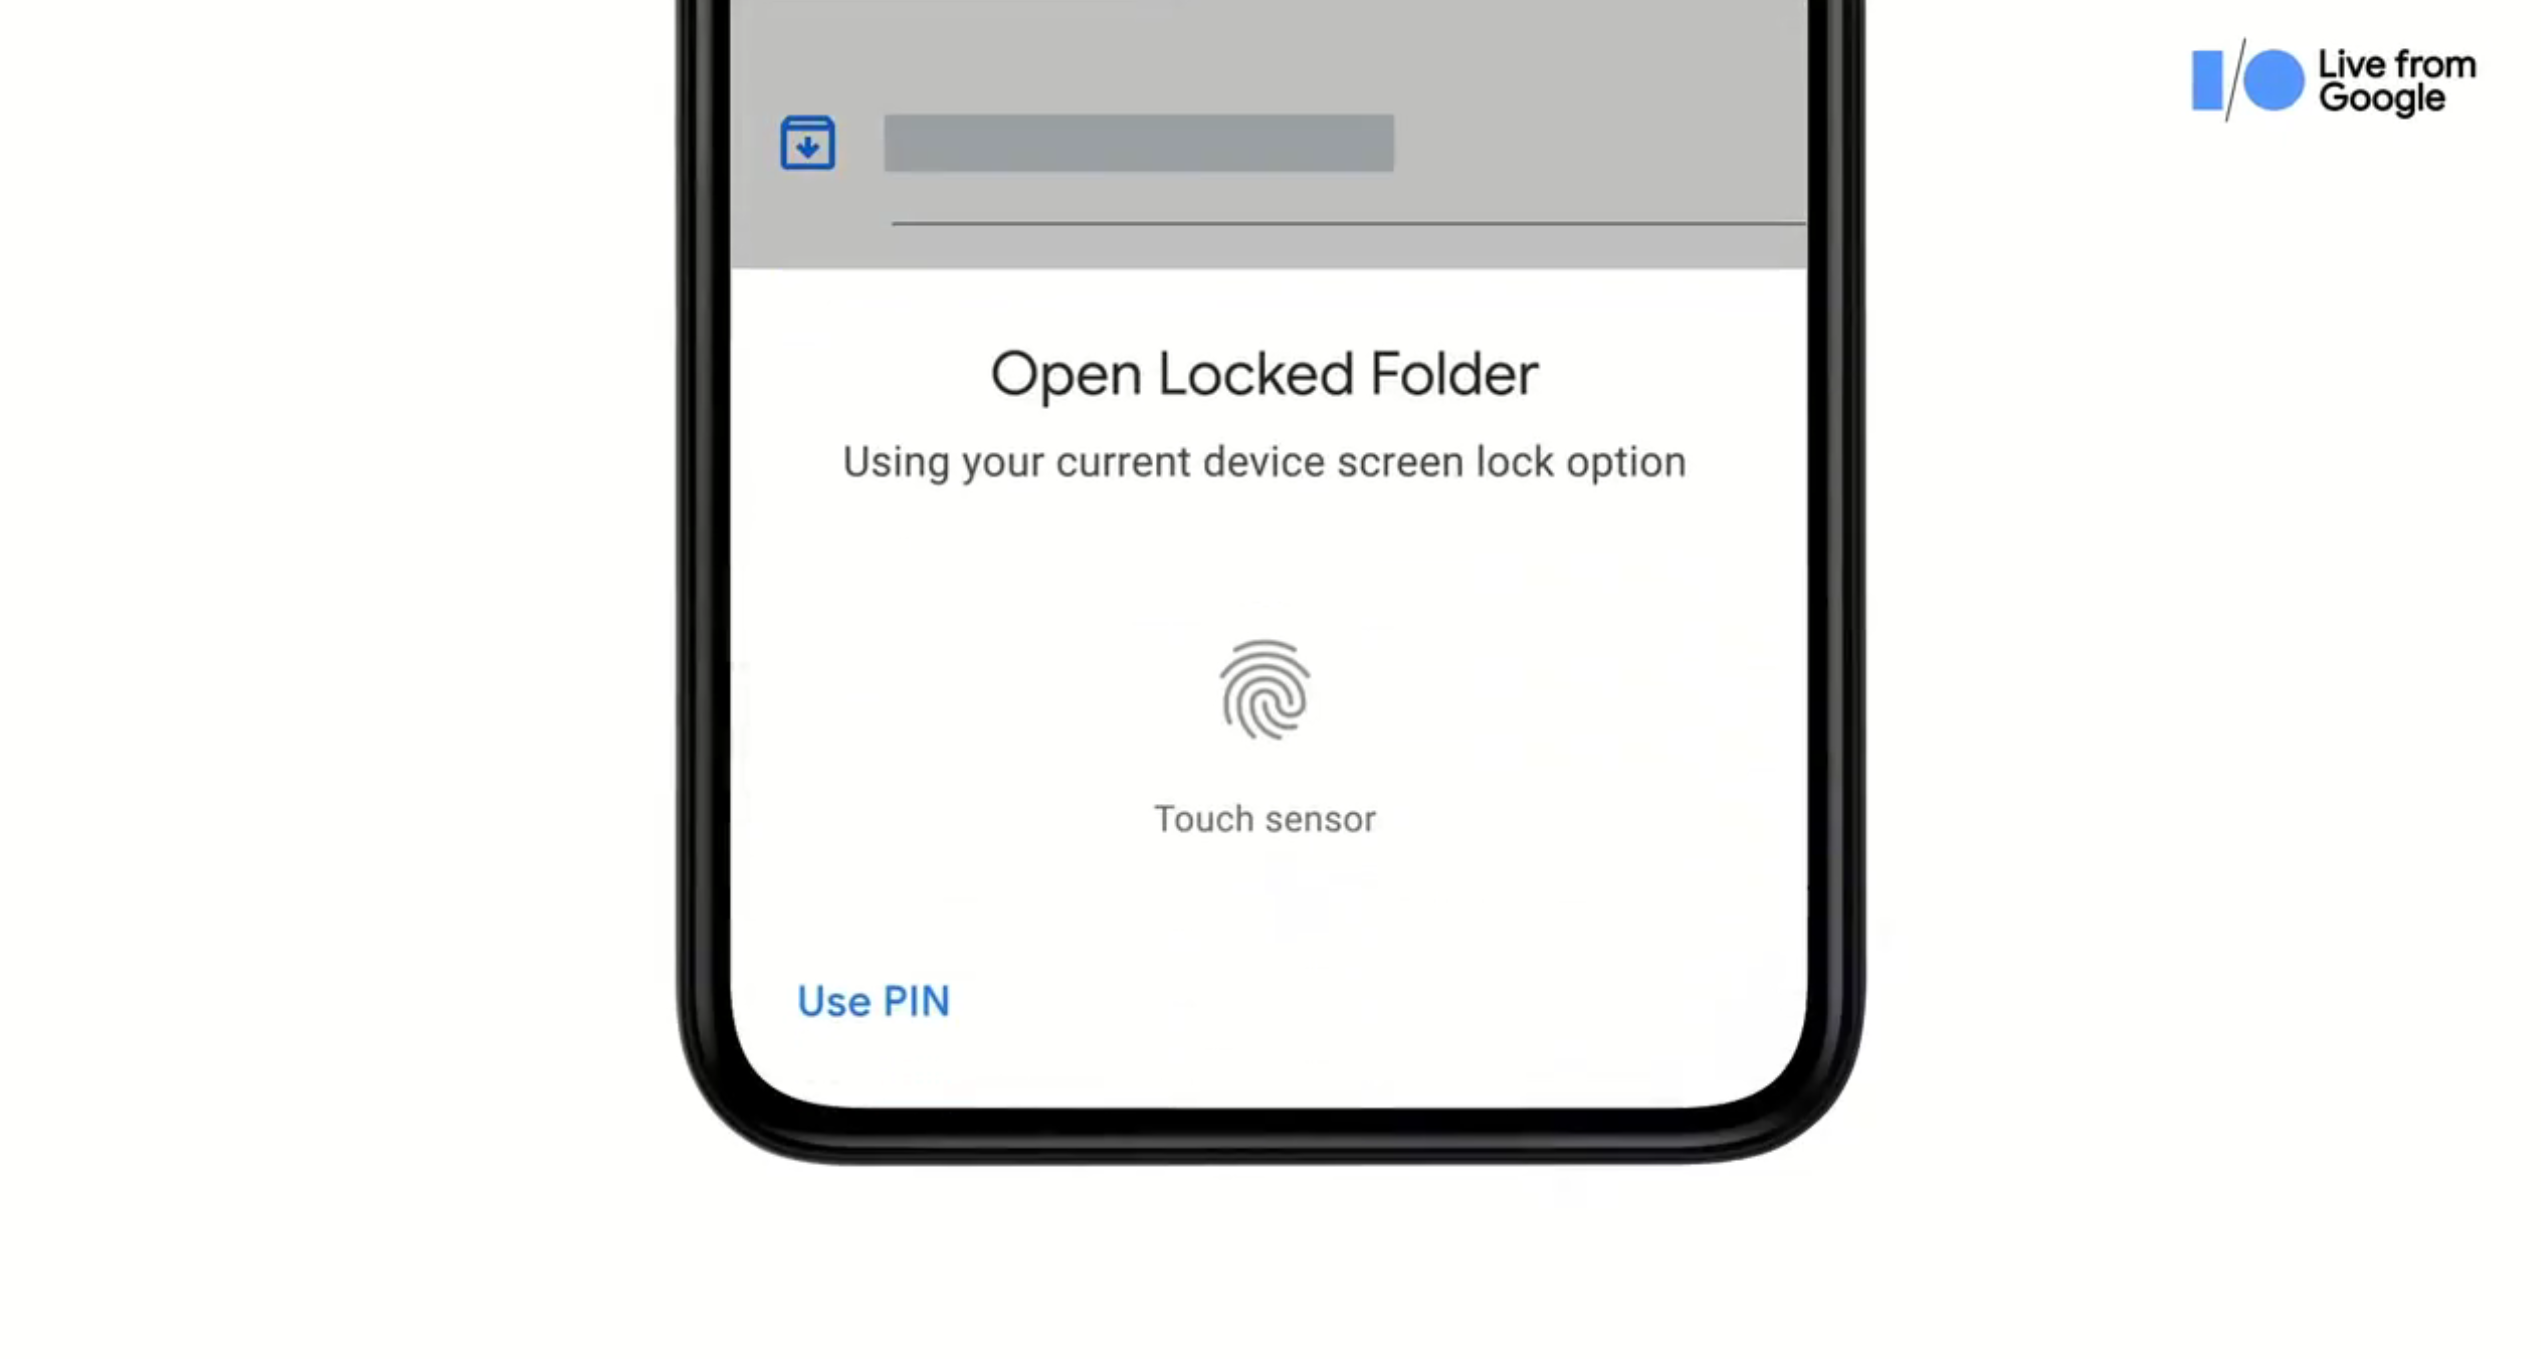
There are a few limitations to what you can do when using a Locked Folder. The first of which is that it’s currently only available for Pixel devices, starting with the Pixel 3. We’re expecting to see Locked Folders arrive on more Android devices in the future, but for now, you have to have a Pixel phone in order to take advantage of it.
When adding photos to a Locked Folder, you are pretty limited in what can actually be done to those images. Here’s the list of what you won’t be able to do with images and videos added to a Locked Folder:
- Edit items.
- Share or trash items.
- Add items to an album or photo book.
- Share items with other apps.
- Back up items.
This also means that any pictures added to a Locked Folder will result in them being removed from any of your existing memories or photo print orders. Images also won’t be displayed on devices like the Nest Hub or a Chromecast.


Comments