
The Samsung Galaxy S9 and Galaxy S9 Plus were two of 2018’s best devices. They are so good that they’re still selling incredibly well, especially when carriers offer deals on them. So, that inspired us to put together a list of our favorite tips and tricks for the devices now that the Android 9 Pie and One UI updates are rolling out.
Store all the content you need
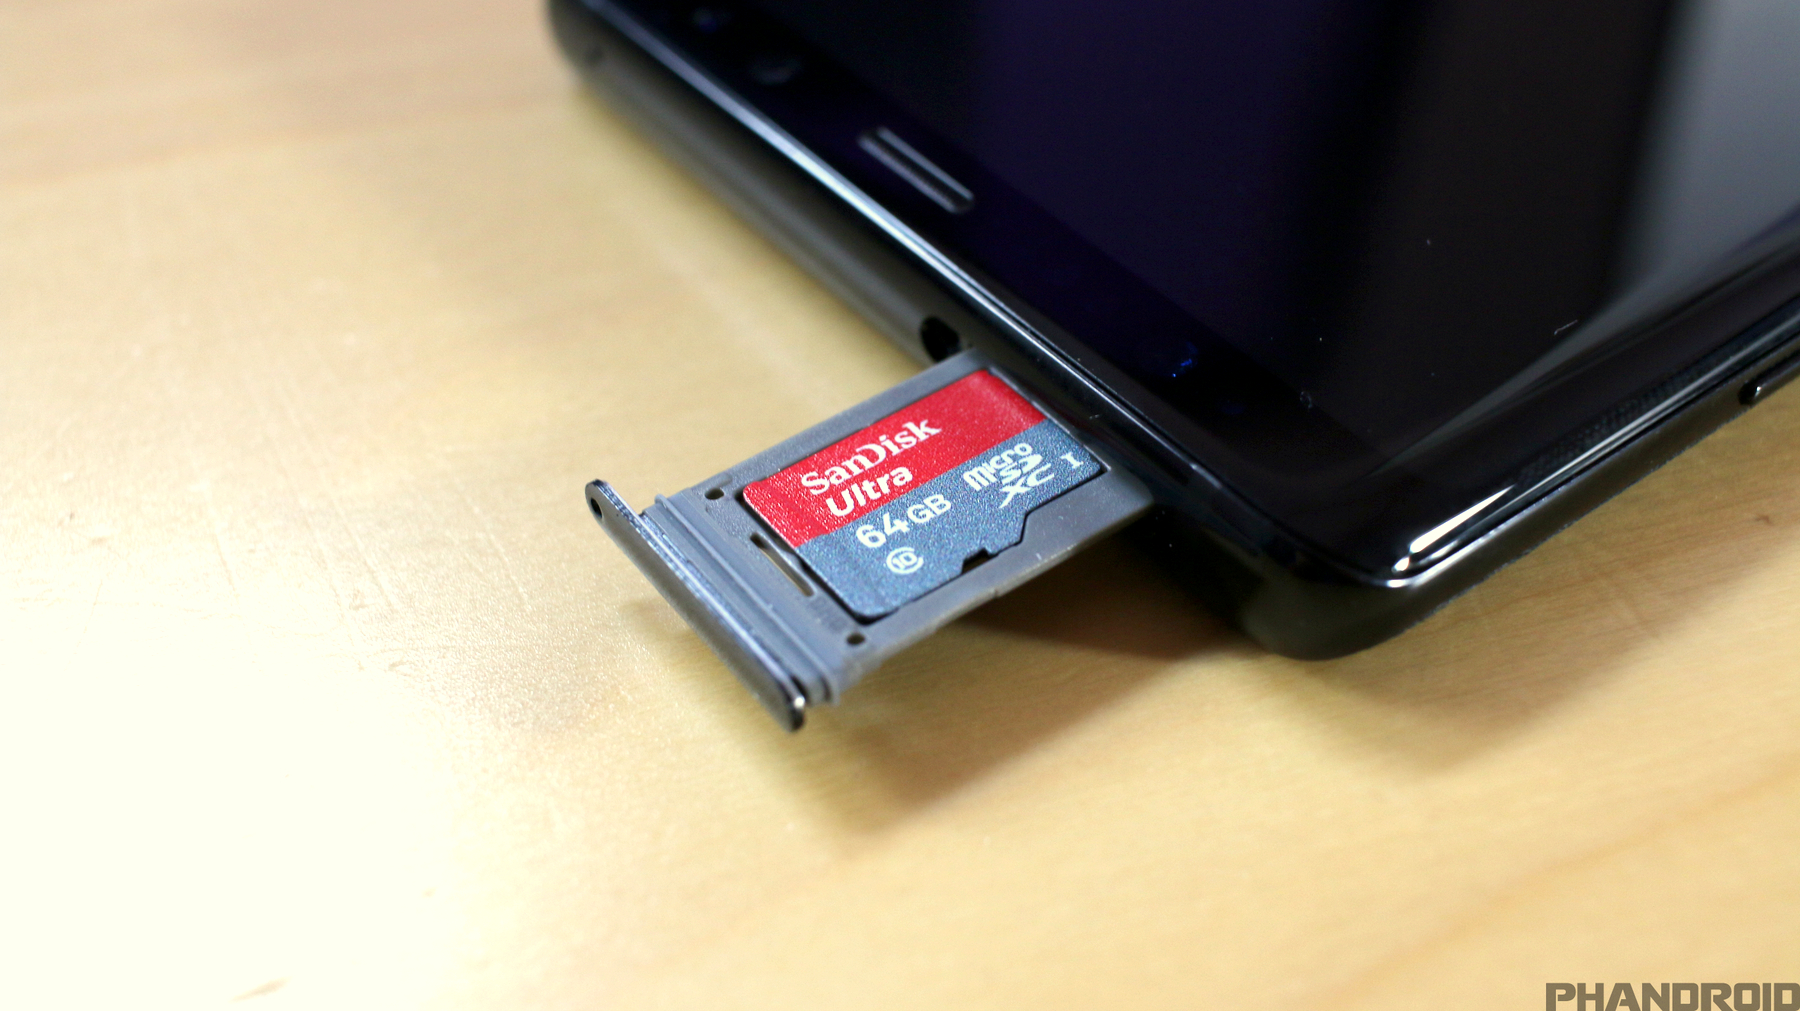 Samsung dropped the microSD card slot for a while, but they have thankfully added it back. You can easily upgrade your storage capacity without buying the expensive high storage models or a cloud storage subscription and relying on a data connection. Buy these great SD cards and pop one in.
- SanDisk 32GB microSD – $9
- SanDisk 64GB microSD – $14
- SanDisk 128GB microSD – $32
- SanDisk 200GB microSD – $52
- SanDisk 256GB microSD – $55
Turn on Gesture Navigation
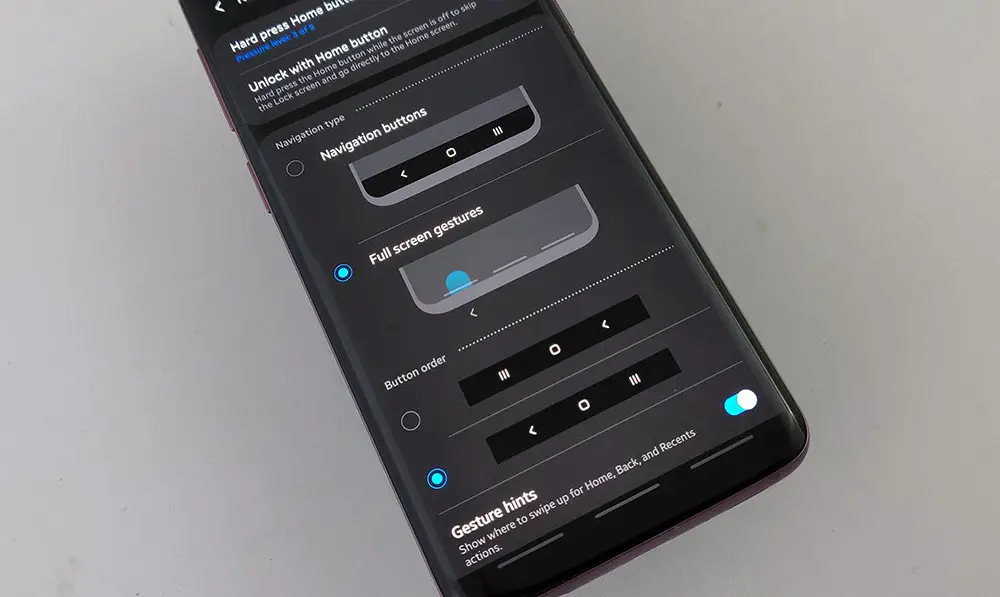 Gesture Navigation is all the rage these days with even Google getting rid of its iconic navigation buttons in favor of new gestures. Luckily, some manufacturers like Samsung and OnePlus give you the option to pick your poison. Navigation buttons are on by default, but if you’d like to turn on gestures, follow the following steps
- Open Settings
- Press Display
- Press Navigation bar
- Select “Full Screen Gestures”
There’s a little tutorial that’ll show you how to use the gestures, but this should feel pretty similar to using navigation buttons. A swipe up from the bottom of the screen on the left side goes opens up the multitasking window, swiping up from the middle goes home, and swiping up from the right goes back.
Flip your navigation buttons
Samsung still puts the back button on the right side of the screen. This is backward to pretty much anyone who uses anything besides a Samsung device. Fortunately, Samsung has given users the option to flip these buttons for a pretty long time now. Here’s how to get the back button on the left:
- Open Settings
- Press Display
- Press Navigation bar
- Select your button order
This button order also changes your gesture navigation so swiping up from the bottom of the screen on the left side will go back and the right side will open up the multitasking window.
Home Sweet Home
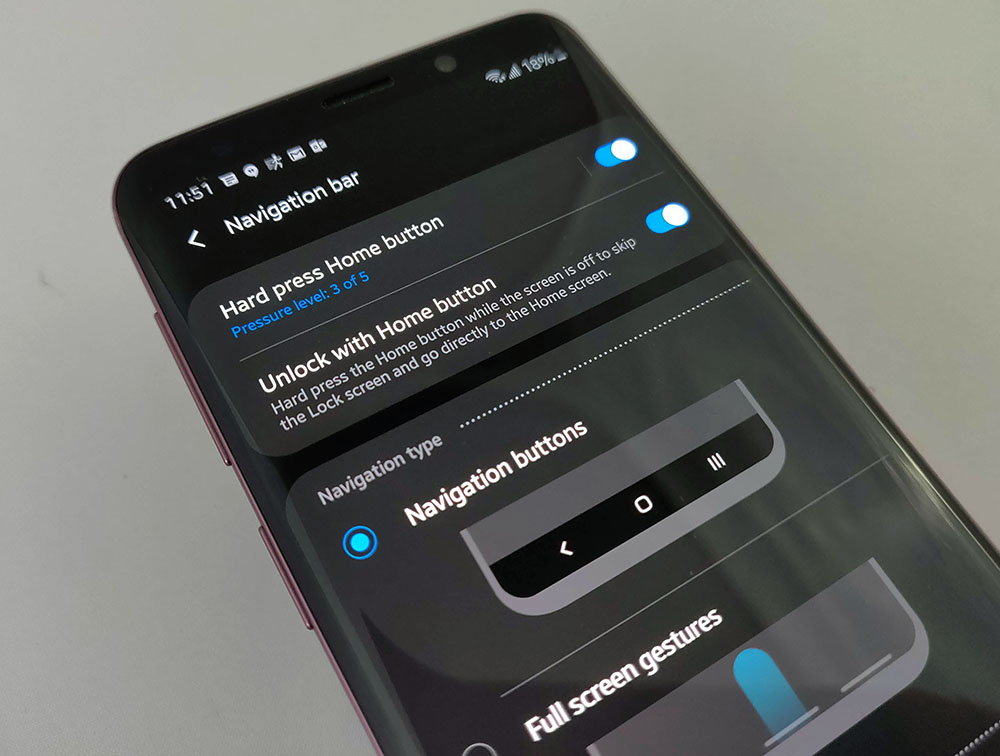
One exclusive feature of Samsung flagships is the physical home button at the bottom of the display. A quick press of this allows users to return home, even if they’re in a full screen app. Here’s how to turn it on:
- Open Settings
- Press Display
- Press Navigation bar
- Select “Hard Press Home button”
Unlock your phone with the Home button
The Home button can be used for more than just returning to the home screen. Samsung allows users to also press the button to unlock the device when the screen is off. Here’s how you go about that:
- Open Settings
- Press Display
- Press Navigation bar
- Select “Unlock with Home button”
This is a nice little feature that speeds things up. If you keep your phone unlocked at home, this should take you right to your home screen. If you use a screen lock or biometric unlock, this will take you to your lock screen where you can unlock your device.
Turn on Dark Mode
With the update to Android 9 Pie, users are also being upgraded to Samsung’s new user experience, One UI. The new skin has a ton of fun new features, but one of our favorites is an integrated dark mode. This eye-saving feature is a fan favorite and easy to enable.
- Open Settings
- Press Display
- Turn on “Night mode”
Download a custom font
One of the most attractive things about Android is the ability to make it anything you want. A lot of people focus on themes, icon packs, and wallpapers, but you can change your font too! While some manufacturers give you the option of a couple built-in options, Samsung actually lets you download fonts through its Theme store. There are free and paid options. If you’d like to dive in, follow these steps:
- Open Settings
- Press Display
- Press Font size and style
- Press “Font style”
- Press “Download fonts”
- Find a font you like and press “install”
- Press back then select your font
Change your font size
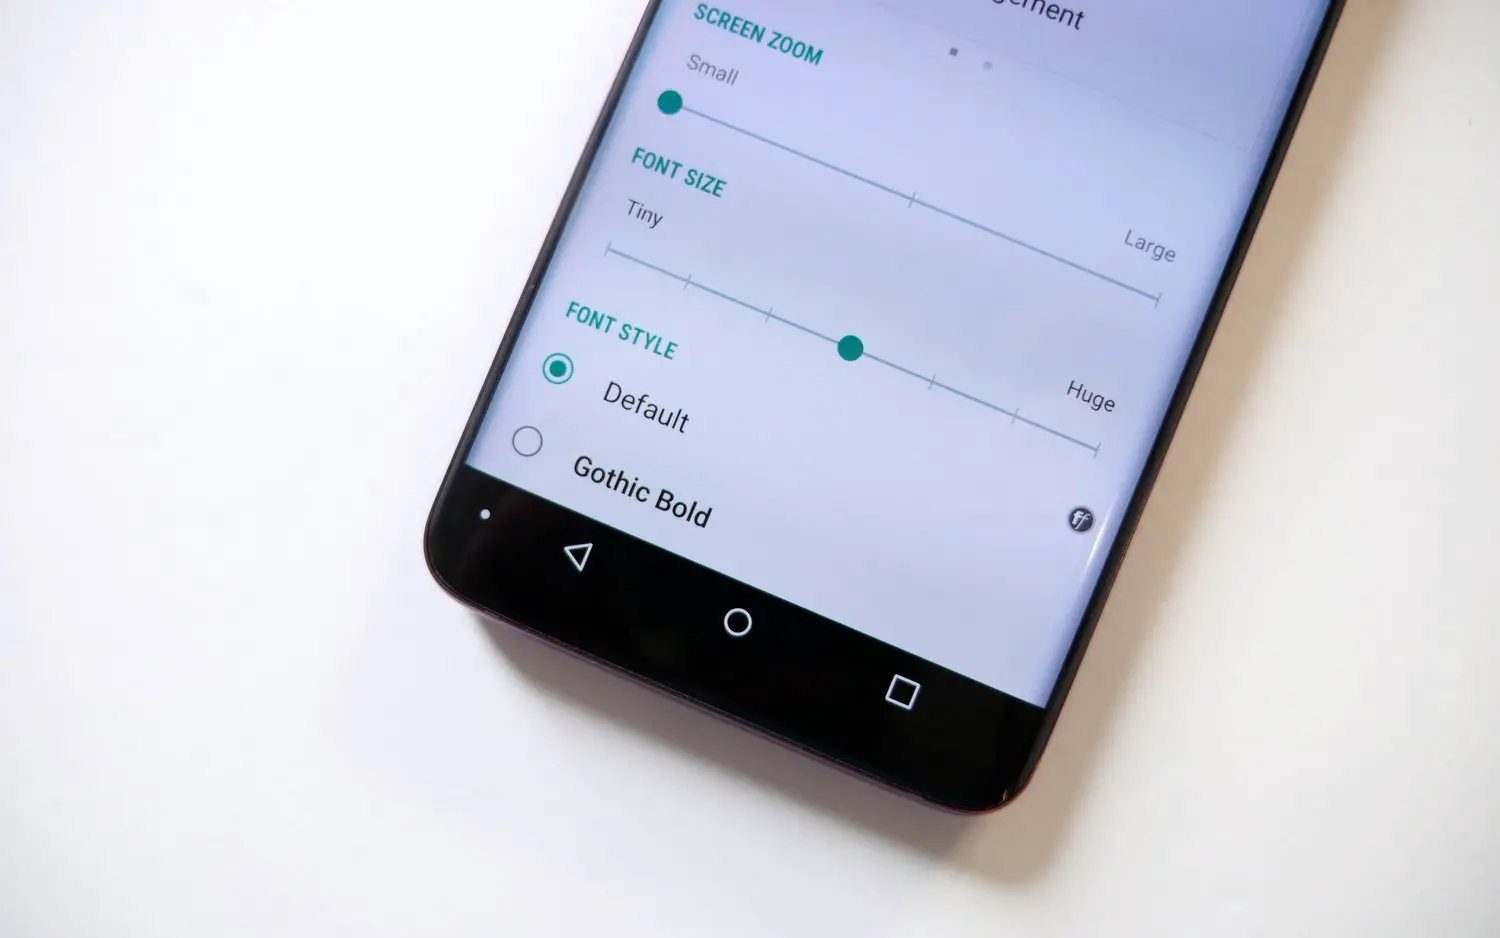
In addition to changing which font you’d like to use, you can also set how large you want the font to be. This a fantastic little trick if you’re having trouble making out the text on your screen or you’d like to get as much on the screen as possible. Here’s how you change the font size:
- Open Settings
- Press Display
- Press Font Size and Style
- Move the slider until you like what you see
Resize the elements on your screen
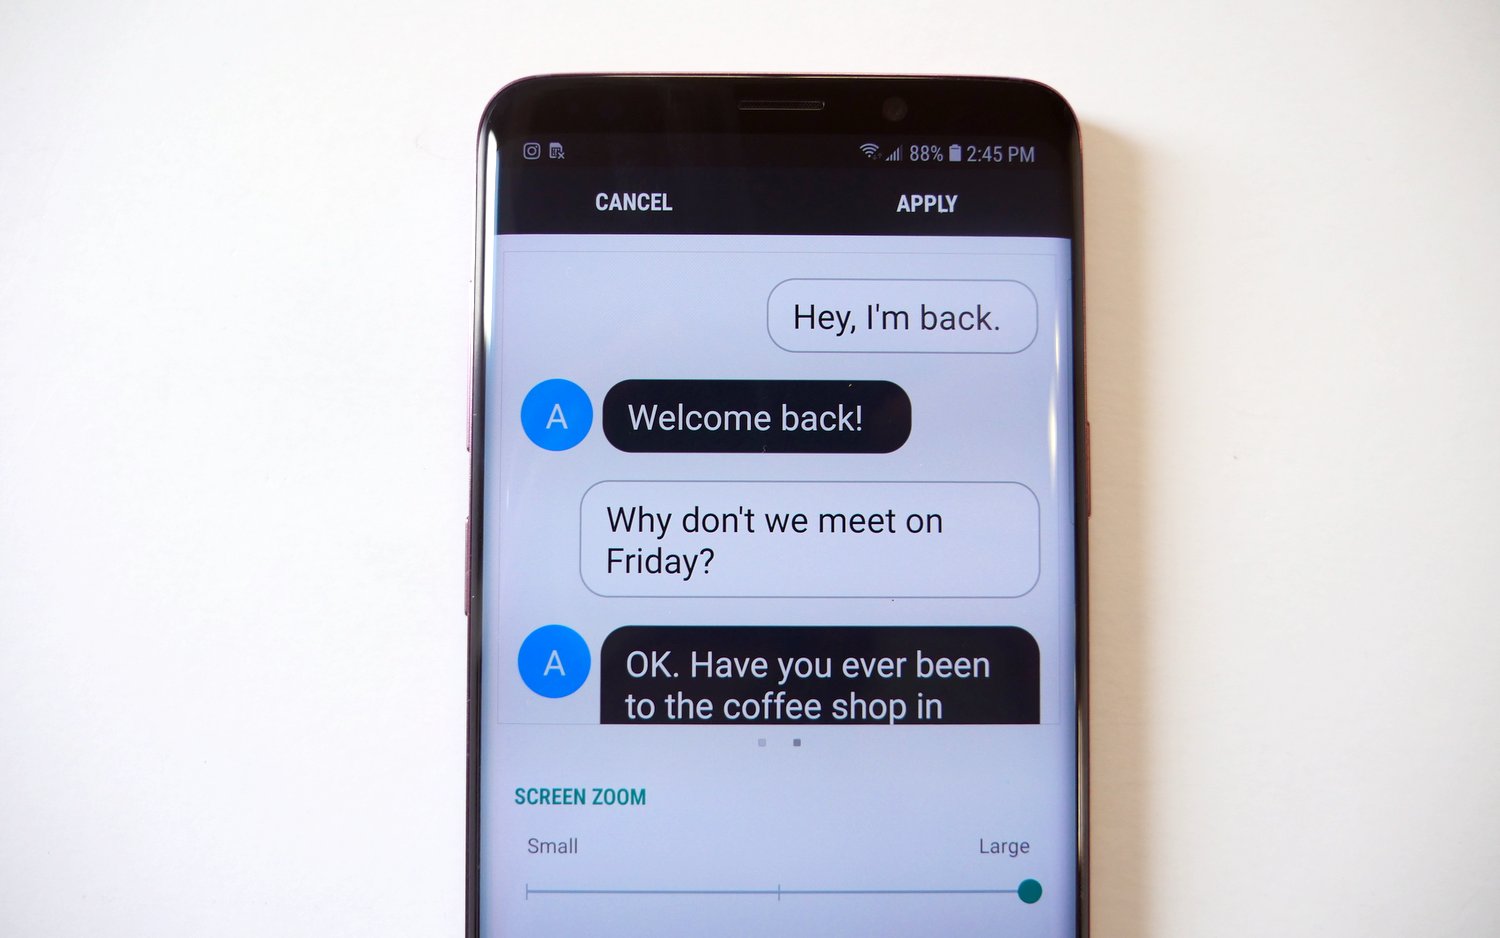
Just like resizing your font, you can resize the elements on your screen. This can make text bubbles, graphics, and menus larger and easier to see. Alternatively, you can zoom out and get way more on the screen if you have great eyesight!
- Open Settings
- Press Display
- Press Screen Zoom
- Move the slider until you like what you see
Change your display resolution
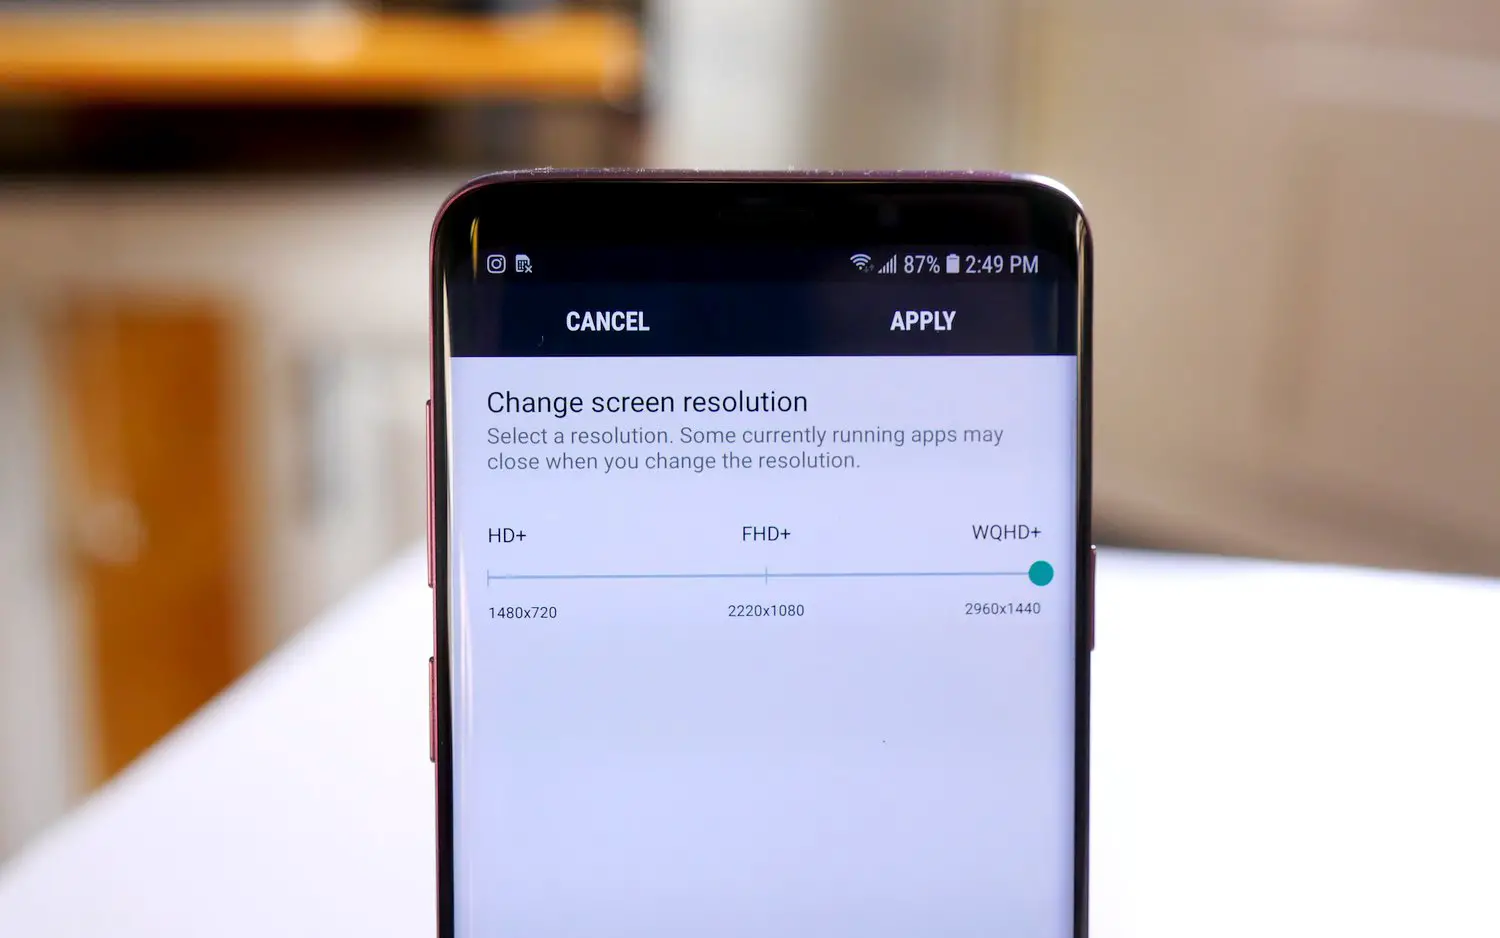
Samsung makes the best 1440p displays on the market today, but unless you looked in the settings you’d never know that they’re set to 1080p out of the box. Most users can’t tell the difference between 1080p and 1440p so Samsung sets it lower to conserve battery life. But, if you want as many pixels on your screen as possible, here’s how you change that:
- Open Settings
- Press Display
- Press Screen resolution
- Select your screen resolution on the slider
- Press Apply
Get rid of the app tray
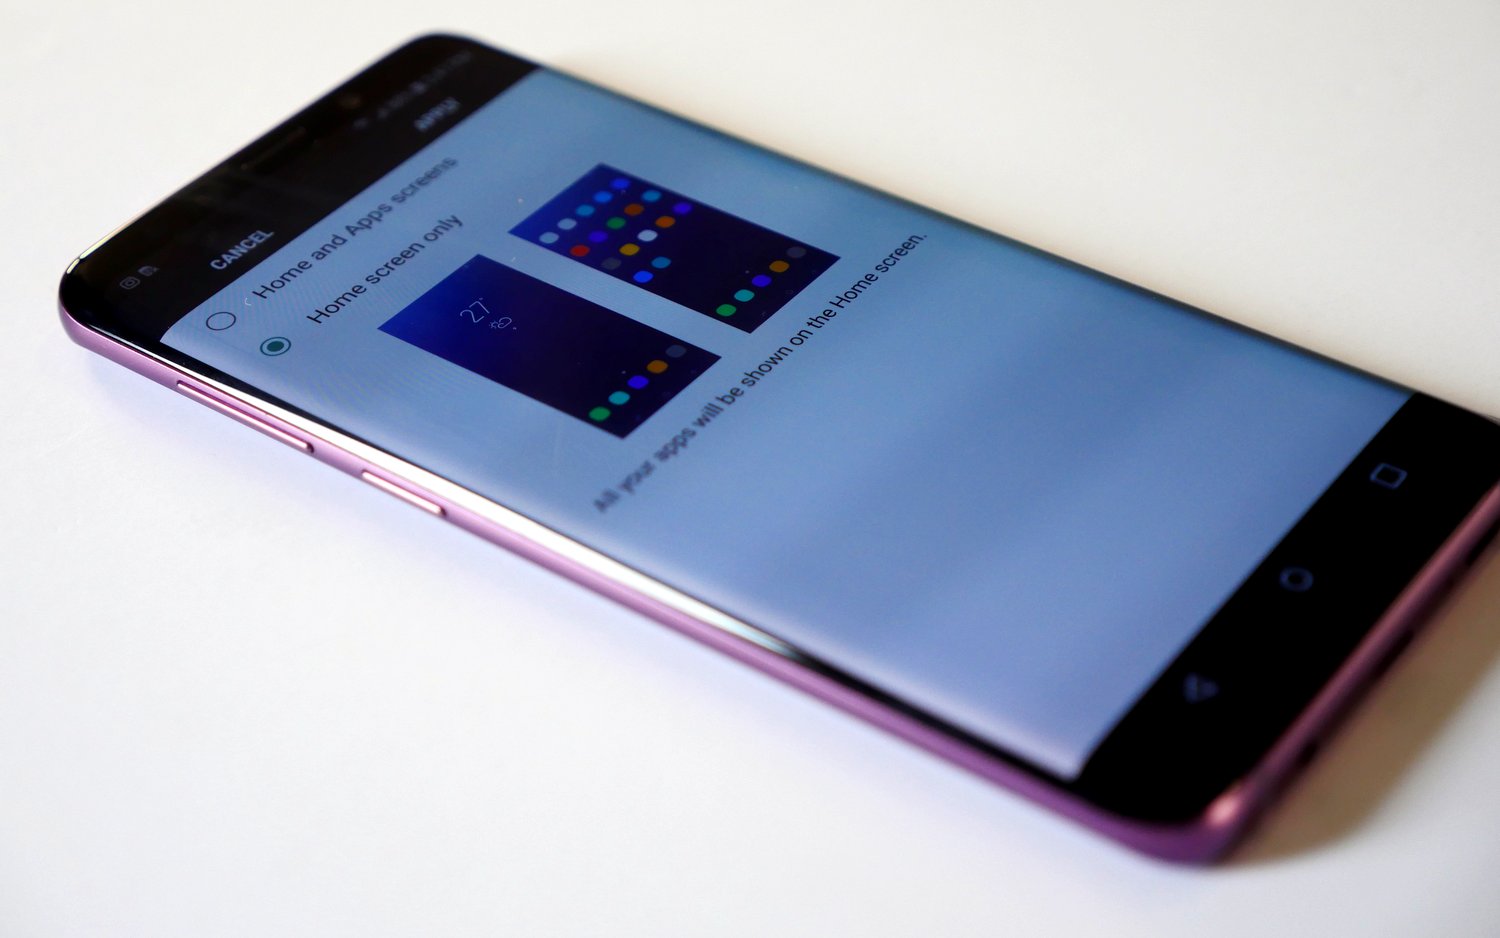
Android is incredibly flexible and can be anything you want it to be. If you’re coming from an iOS device, you may prefer all of your applications icons spread out across your home screens instead of hidden away in the app tray. Luckily for you, Samsung gives you this option instead of forcing you into what it thinks you want. Follow these steps to turn off the app tray:
- Open Settings
- Press Display
- Press Home screen
- Press Home screen layout
- Select “Home screen only”
Turn app icon badges on or off
![]()
Another UI element that recent iOS converts may be used to are app badges. They’re the little red icons that show up on top of your application icons when you have a new notification. Some people love these as they really make sure you can’t miss any notifications. Others dislike them because they can be a bit redundant if you use your notification shade regularly. If you’d like to adjust your app badge settings, here’s how:
- Open Settings
- Press Display
- Press Home screen
- Turn “App icon badges” on or off
No matter which setting you choose, you will still receive notifications about new alerts in your notification tray.
Add more icons to your home screen
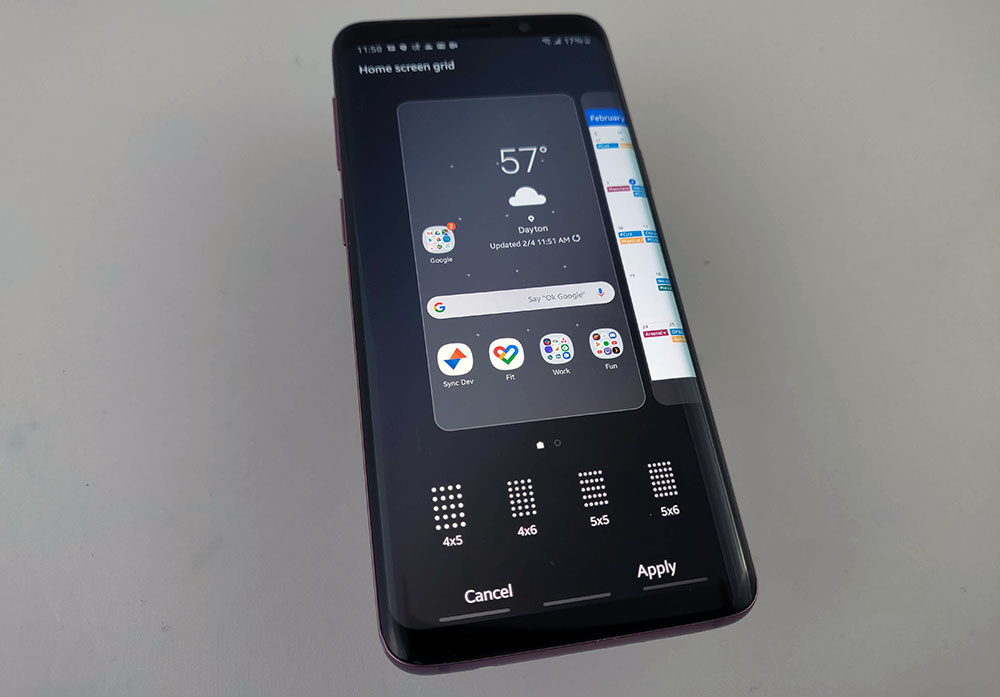
Do you like to keep it simple? Maybe you want to fill your home screen? No matter how many icons you’d to see, Samsung is giving you options to fit your preference. The Samsung Galaxy S9 and Galaxy S9 Plus offer four different homescreen grids, 4×5, 4×6, 5×5, and 5×6.
- Open Settings
- Press Display
- Press Home screen
- Press “Home screen grid”
- Pick from 4×5, 4×6, 5×5, 5×6
Remember that changing to a smaller grid may move icons or folders to another screen or remove them completely. Also, you can resize your widgets by long pressing them and then dragging the box to the edge of the screen.
Access the notification panel faster
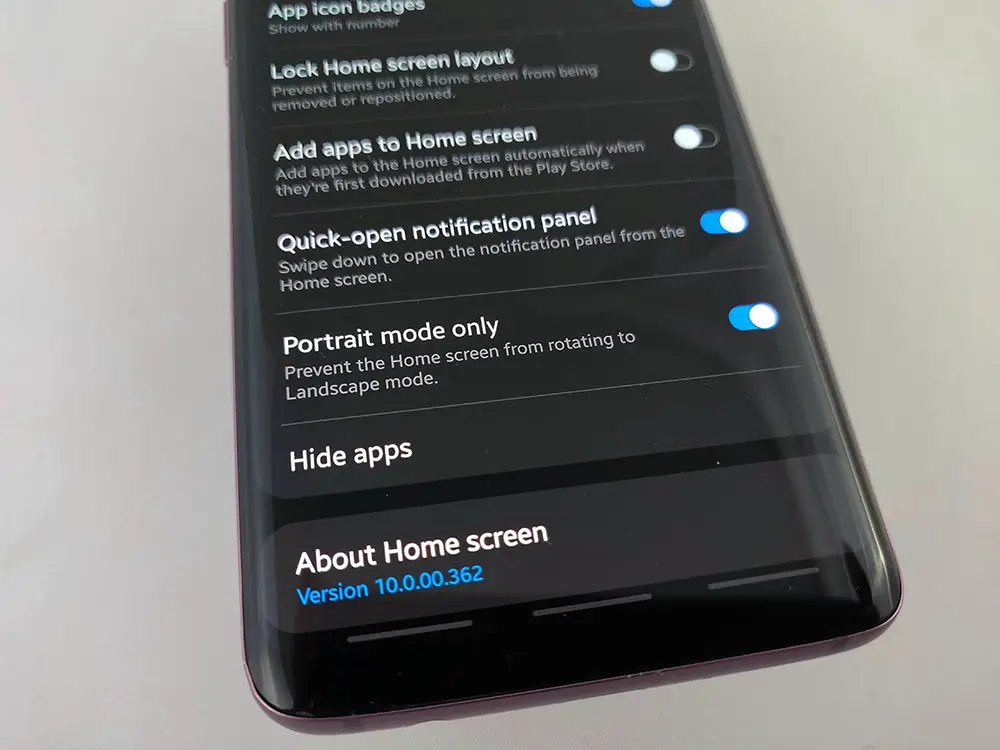
With the change to slimmer, but taller phone designs, it is now eaiser to hold phones, but harder to reach the top of the screen. Unfortunately, Android still places the notification panel at the very tip top of the display where it can be hard to stretch your thumb to reach. Normally swiping down on the screen will open up the app tray, but one setting will actually allow you to drop the notification shade with a quick swipe down from anywhere on the screen.
- Open Settings
- Press Display
- Press Home Screen
- Turn on “Quick-open notification panel”
Now, you can access your notification with a swipe down and your app tray with a swipe up.
Hide applications
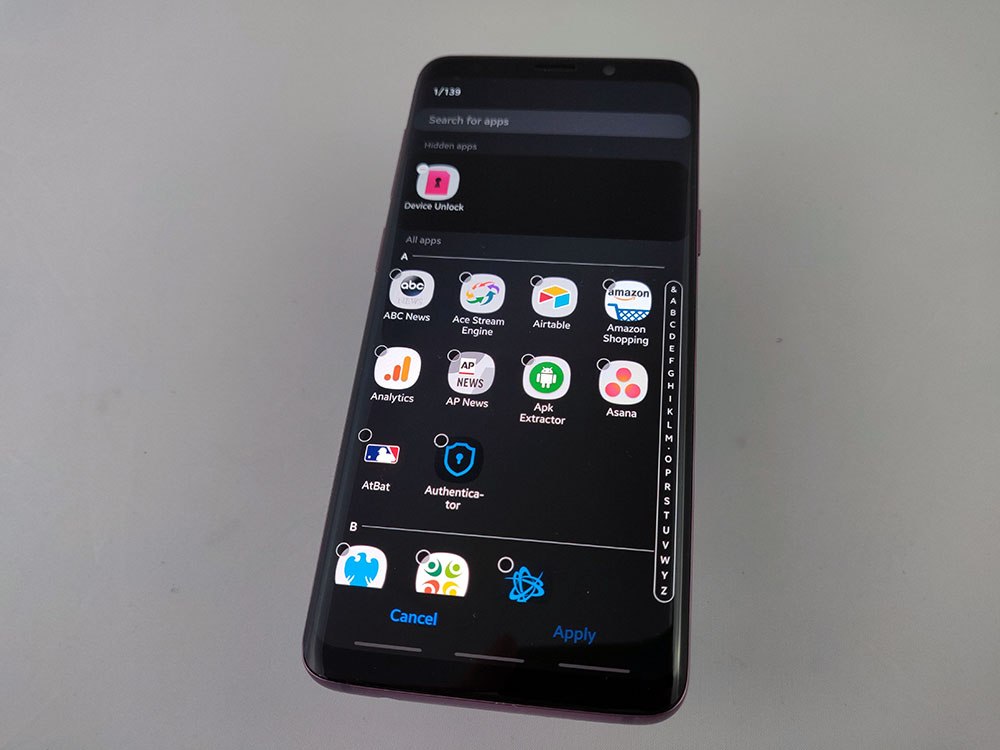
One of the downsides of purchasing a new phone is dealing with all the bloatware that comes on it- and Samsung is one of the worst offenders. Then, you have carriers adding their software too! It’s not uncommon to turn on a phone for the first time and have 10+ apps installed that you want nothing to do with. Making matters worse, some of these are installed as system apps and can’t be removed! Well, if we can’t remove them, we can at least hide them. Here’s how you go about that:
- Open Settings
- Press Display
- Press Home Screen
- Scroll to the bottom and select “Hide apps”
- Select the apps you’d like to hide then hit “Apply”
If you accidentally hide something or just decide later on down the road that you’d like to use a hidden app, you can head back to the “Hide apps” screen the same way and uncheck them. Just remember to hit “Apply” and not the back button.
Get rid of the charging cables
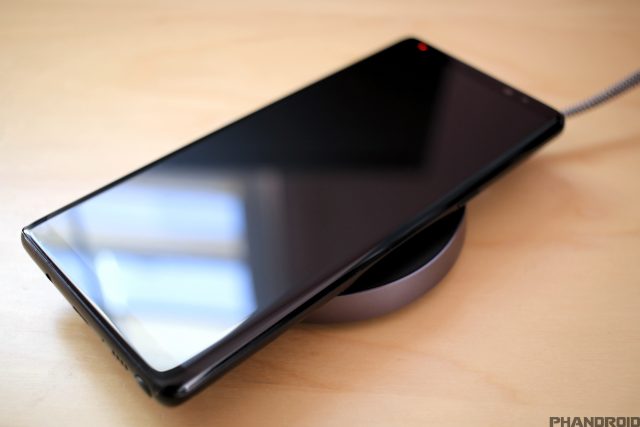 The Samsung Galaxy S9 and Galaxy S9 Plus feature wireless charging and support both Qi and PMA standards, making them compatible with almost any wireless charger out there.
Wireless charging is typically pretty slow at charging your device — nowhere nearly as efficient as charging with a USB cable — but the Galaxy S9 always features wireless fast charging. Using a compatible fast wireless charger, the phone charges much more quickly.
There are plenty of fast wireless chargers on the market and most are pretty affordable. Here’s a list of my top picks:
- CHOETECH Qi Certified Charging Pad – $13.99
- RAVPower Fast Wireless Charger – $12.99
- Anker Fast Wireless Charger – $21.99
- Samsung Qi Charging Pad – $29.99
- Samsung Fast Charge Stand – $39.98
Customize Edge panels
Edge panels are the panels you can open up on the ride side of the screen with a swipe in on the curved Infinity Display. These windows give you access to contacts, app icons, news headlines, and more. But, there are only a few turned on by default and some can be customized. If you’d like to check out exactly what you can do, head here:
- Open Settings
- Press Display
- Press Edge screen
- Press “Edge panels”
- Check which Edge panels you’d like to enable
- Select “Edit” under each panel to further customize the information and links shown in these panels
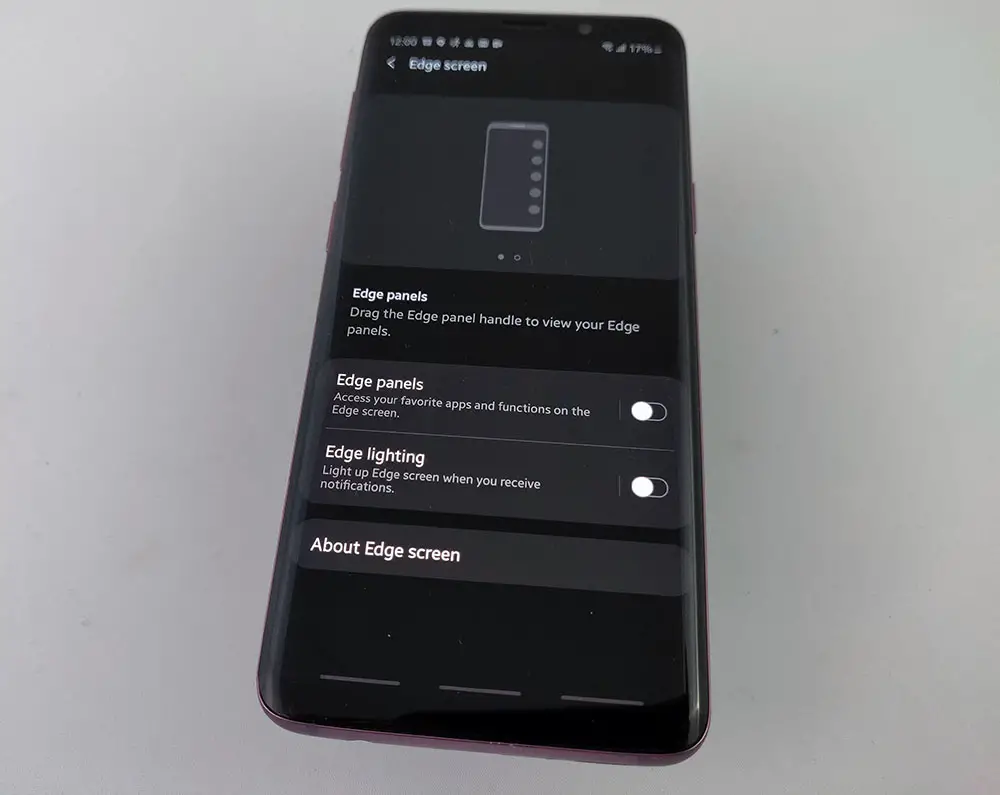
Turn Edge panels off
While Edge panels are awesome in theory, some people don’t like them in practice. It can be a little annoying to have a panel open up while you’re just trying to normally swipe in from the right. So, if you want to turn them off completely, follow these steps:
- Open Settings
- Press Display
- Press Edge screen
- Toggle off “Edge panels”
Turn on Edge lighting
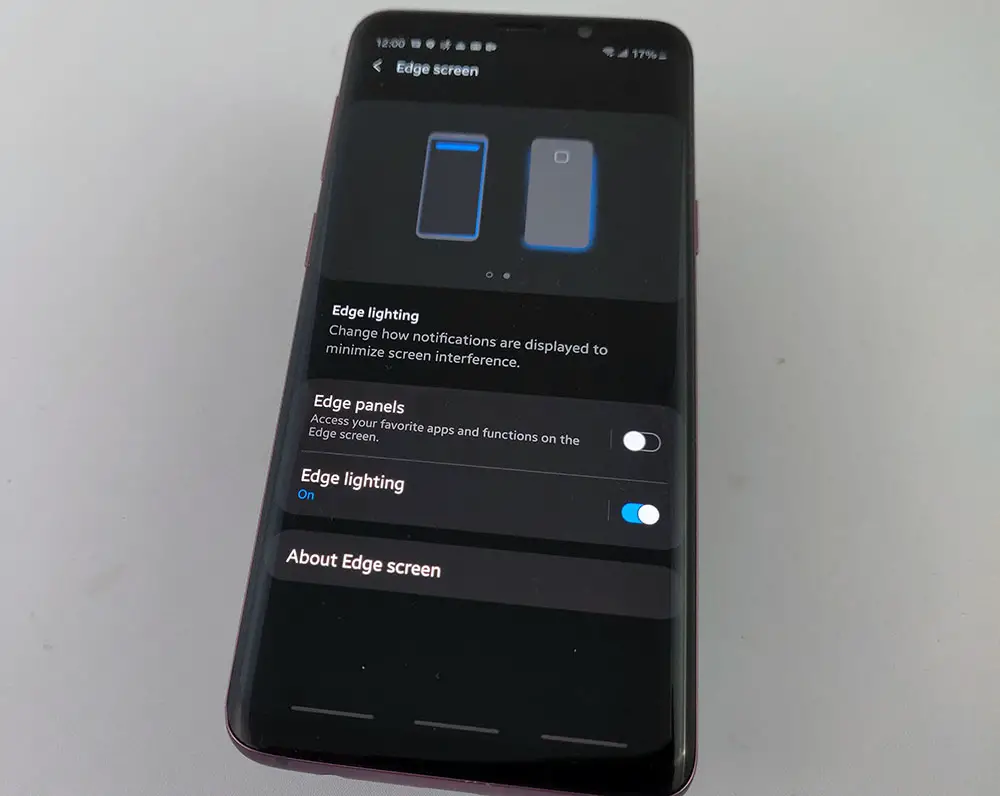
Edge lighting is a ring of lights that circles the perimeter of your screen when you get a notification. It’s a really nice effect that is pretty visually pleasing while not being over the top. If you’d like to turn this feature on and customize the lighting, here’s where you go:
- Open Settings
- Press Display
- Pres Edge screen
- Press “Edge lighting”
- Press the toggle to turn the feature on
Customize Edge lighting
The default Edge lighting effect is pretty cool, but if you want to customize it, follow the previous steps then press “Edge lighting style”. From here you can adjust the effect, color, transparency, width, and duration. If you hit the back button once, you can also select which apps trigger Edge lighting by pressing “Manage notifications”
Turn off Accidental touch protection
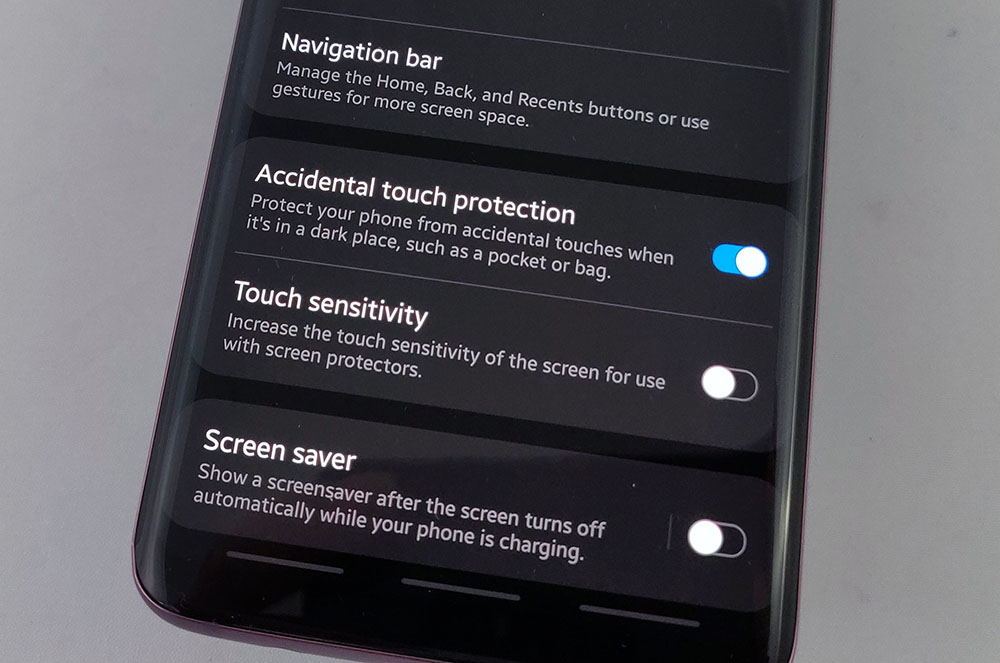
With bigger (curved) and more sensitive screens, accidents happen. Sometimes we press something with the side of our finger or hand that we didn’t mean to. Samsung is pretty good at detecting these accidental touches and discarding them. But, sometimes it does away with intentional touches as well because it thinks they were an accident. If this is happening too much, you can turn off the Accidental touch protection like so:
- Open Settings
- Press Display
- Toggle “Accidental touch protection”
Even if you don’t have an issue with missed touches, it’s still interesting to turn this off from time to time to see exactly how many presses it discards during normal use.
Make your display even more sensitive
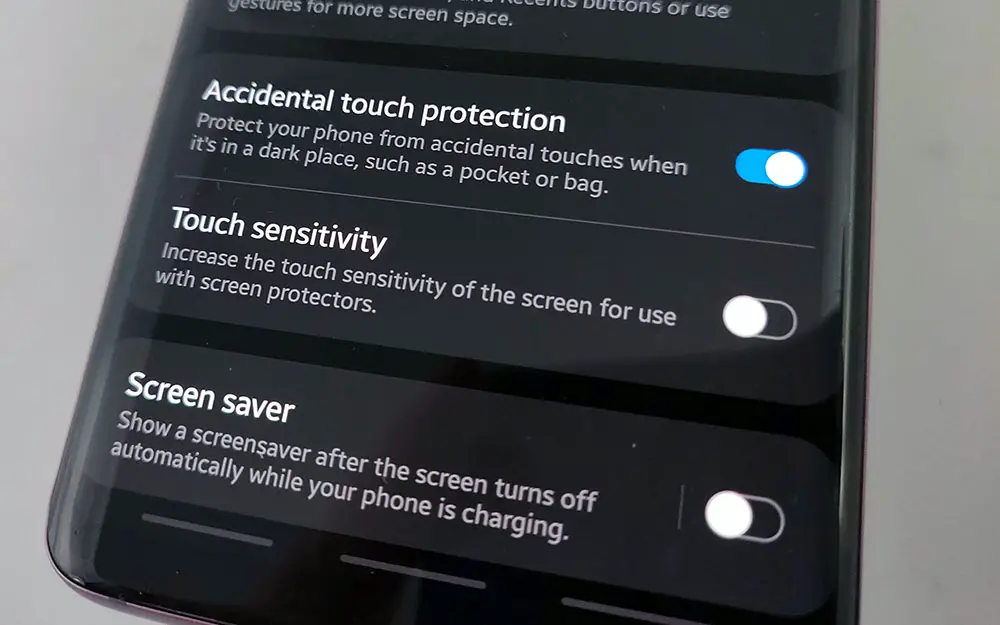
This one is for everyone rocking a screen protector. Whenever you put a piece of glass or plastic between your display and your finger, there’s a possibility that the display just won’t recognize your input. To get around this, Samsung included a setting that’ll make your display a little more sensitive so you won’t have any missed press. Here’s how you turn it on:
- Open Settings
- Press Display
- Toggle “Touch sensitivity”
Toggling this option on or off will not affect the Accidental touch protection we mentioned previously. We haven’t seen much of a difference with this setting on or off when not using a screen protector so you might want to skip this one if you’re rocking a naked display.
Keep the kids tied to just one app
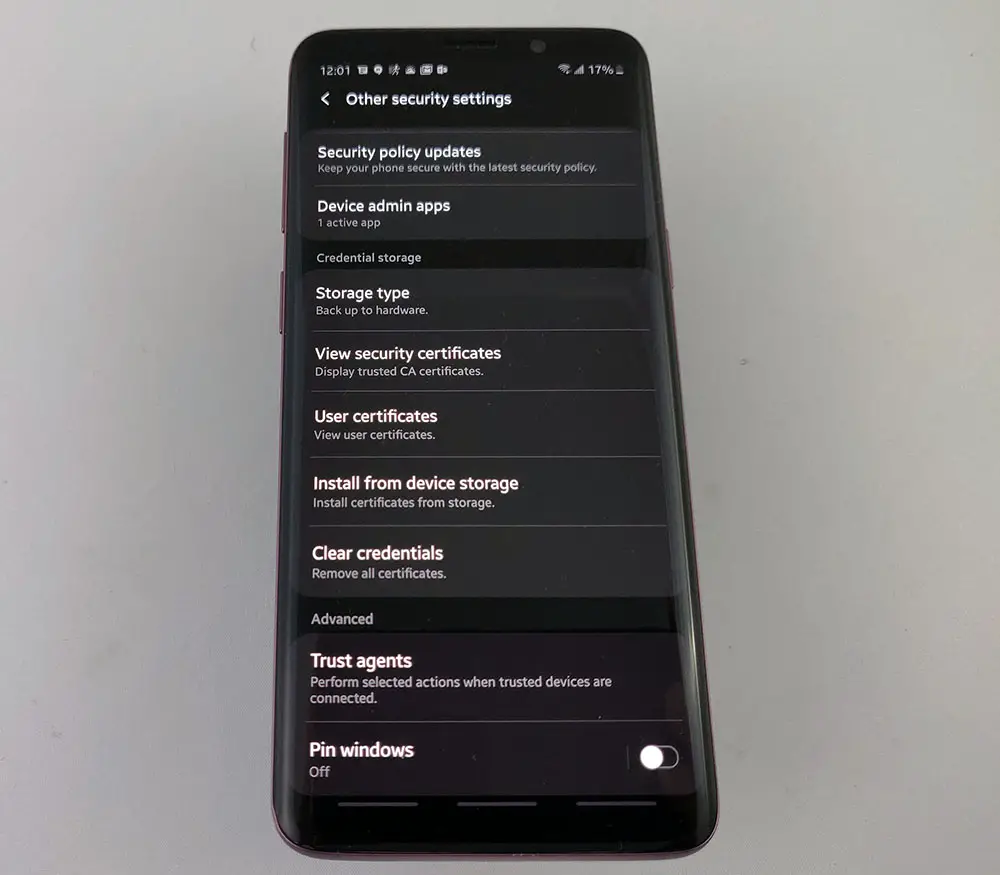
Should you find yourself lending someone your phone — be it to play a game, or place a phone call — window pinning (screen pinning) is a secure way to lock someone down to a specific app and prevent them for wandering elsewhere through your phone. Here’s how you can enable it:
- Open Settings
- Press Biometrics and Security
- Press Other security settings
- Scroll down and press “Pin Windows”
- Toggle on
- Hit the home button
- Open your app of choice
- Press the recents button
- Tap the icon above the app then select “Pin this app”
This activates screen pinning and will only allow that screen to be pinned. If you chose the “Ask for PIN before unpinning” option, whoever you hande your phone to will not be able to do anything else with your phone unless they have your PIN.
Turn Data Roaming off
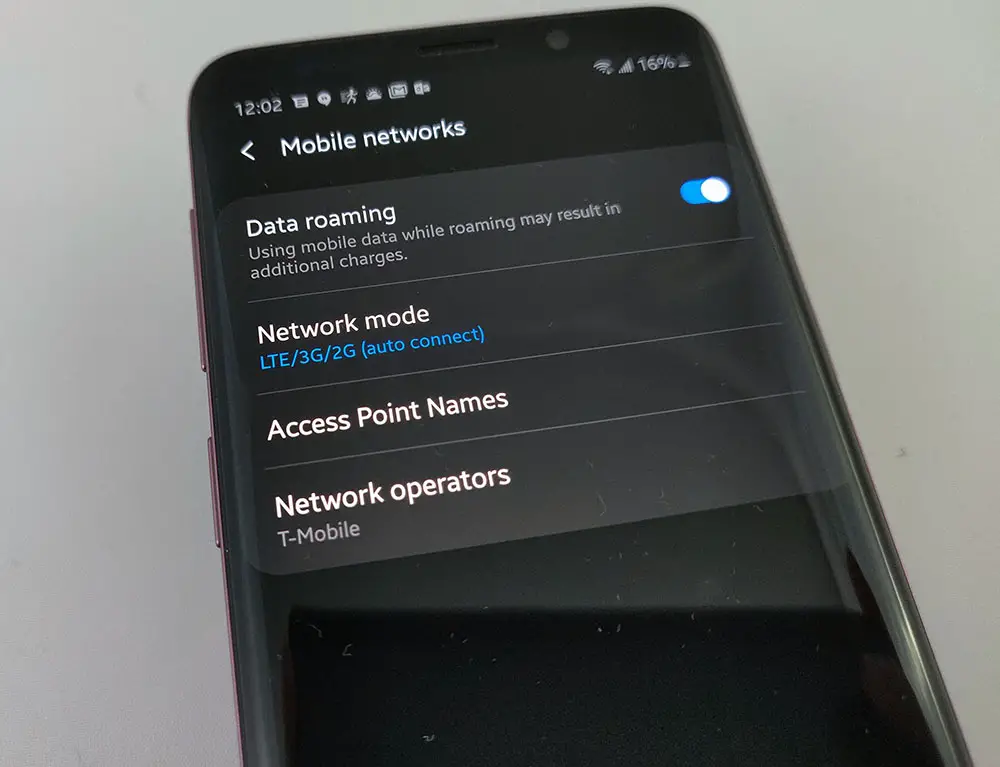
Coverage seems to be getting better every day but there are still some cellular dead zones out there. To address this, most carriers give customers a small amount of roaming data for free just in case. But, once you’ve eaten through that small allotment, you’ve gotta pay. To avoid using roaming data, you can simply turn the feature off.
- Open Settings
- Press Connections
- Press Mobile Networks
- Toggle “Data Roaming”
Track your mobile data usage
If you’re on a metered data plan, this one is for you. Android has a built-in cellular data tracker that allows you to stay on top of how much data you use every month, as well as which apps are using the most data. Here’s how to access it:
- Open Settings
- Press Connections
- Press “Data usage”
Turn off Nearby Device Scanning
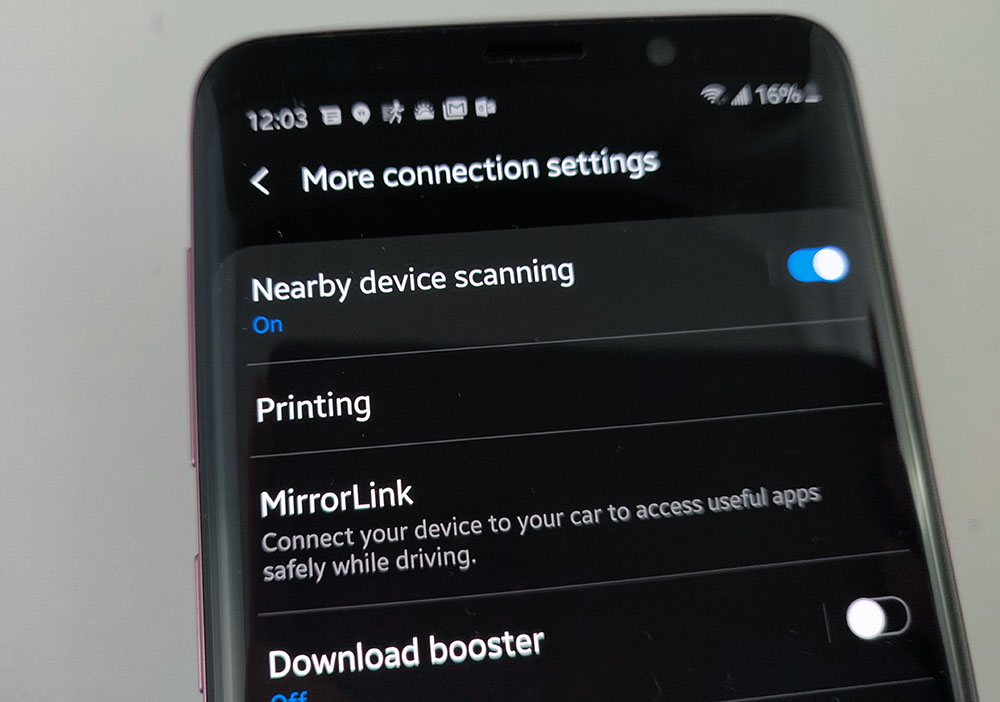
Nearby Device Scanning is a feature built into Android that helps it detect other devices using Bluetooth Low Energy (BLE) and the microphone. This can be useful, but some users report battery drain due to this feature. If you don’t find it useful, you can turn it off!
- Open Settings
- Press Connections
- Press More connection settings
- Toggle “Nearby device scanning”
Speed up your (large) downloads

More powerful phones mean that developers can create more advanced apps. More advanced apps mean bigger apps. These can be a bit of a pain to download if you’re using a slower connection, but Samsung has a fix for this. Download booster is a feature that uses both your Wi-Fi connection and your cellular connection to download larger files. It can be a little risky to use if you’re on a metered data plan, but if you’re not, there’s really no reason to have this feature turned off. Here’s how to make sure it’s turned on:
- Open Settings
- Press Connections
- Press More connection settings
- Toggle “Download booster”
Some carriers have asked Samsung to disable this feature to ease some stress on their networks so if you don’t see this option, that’s probably why.
Add a VPN
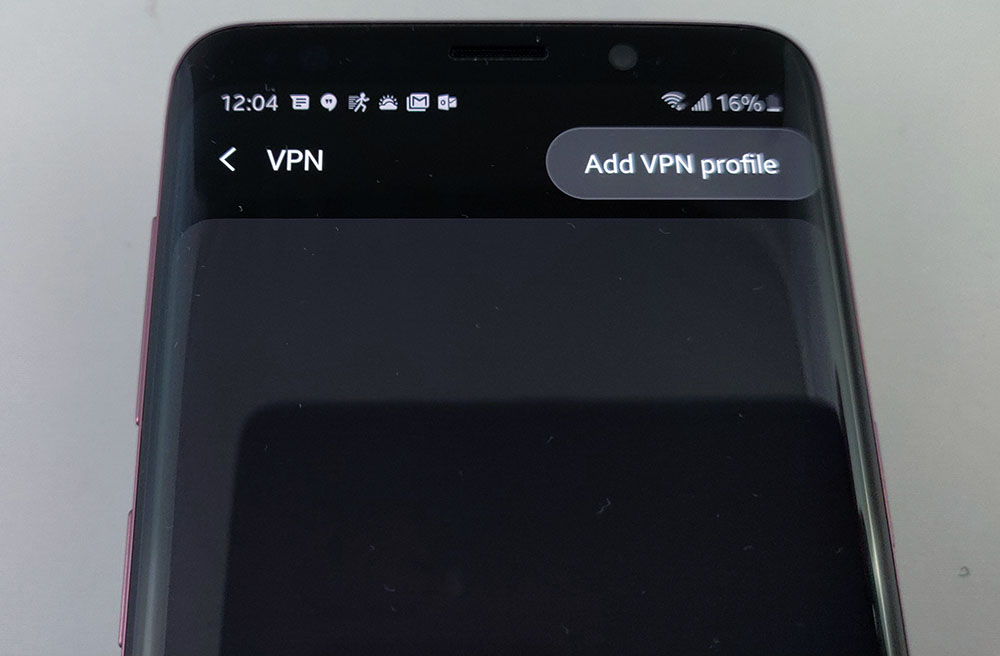
Virtual Private Networks (VPNs) have many advantages, the most important of which is securing your data from malicious actors. If you decide to sign up with a VPN, here’s how you add it to your mobile device:
- Open Settings
- Press Connections
- Press More connection settings
- Press VPN
- Press the Hamburger menu (three dots)
- Press “Add VPN profile”
When you sign up for your VPN, it should supply you with all of the information you need to enter here.
Change your DNS
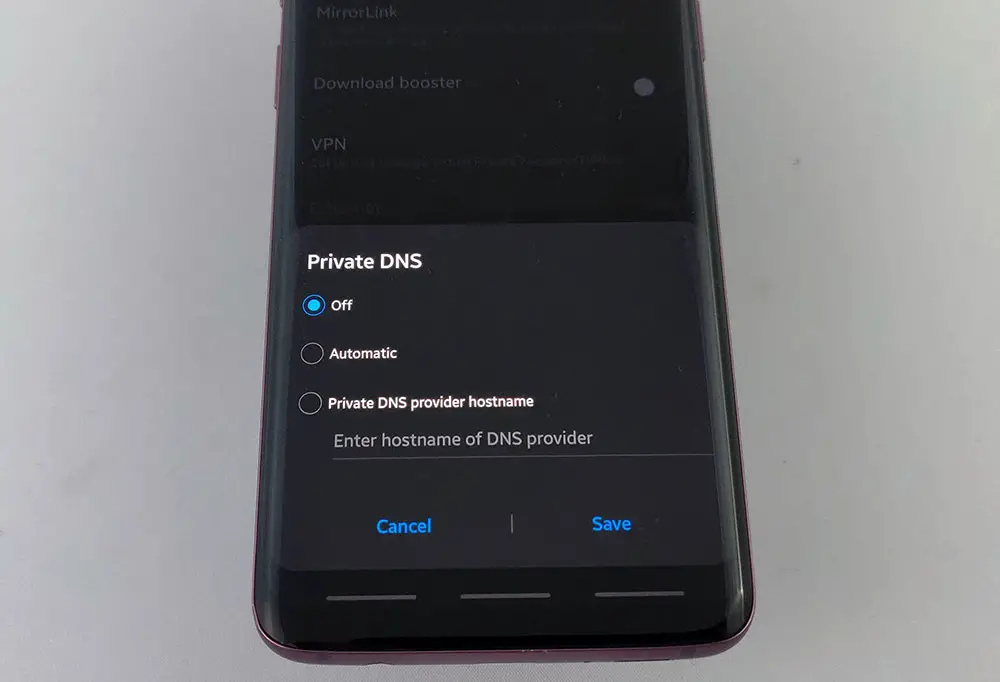
Your carrier supplies a DNS for you that allows you to access the web, but that doesn’t mean you have to use it. Using a third-party DNS can speed up your connection and provide additional security. If you’d like to set your own DNS, here’s how:
- Open Settings
- Press Connections
- Press More connection settings
- Press “Private DNS”
- Select “Private DNS provider hostname”
Google’s 8.8.8.8 and Cloudflare’s 1.1.1.1 DNS are two of the more popular options, but make sure you do your research before changing this setting.
Turn on Easy mode
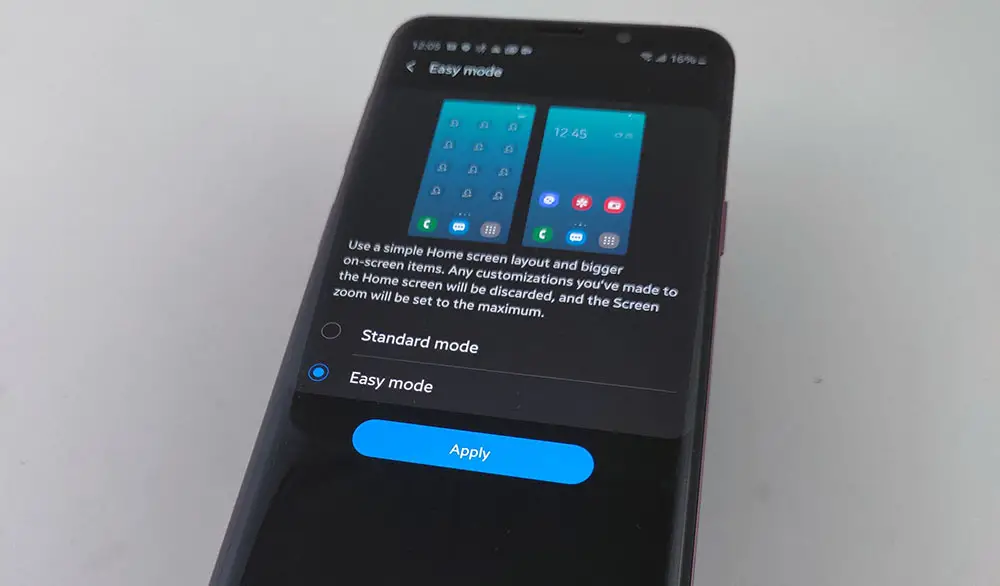
Not everyone has the best eyesight. For those that either struggle making out tiny fonts and icons, there’s Easy mode. It’s essentially an extremely simplified home screen without all the fluff and once activated, cranks the Galaxy S9’s zoom to maximum for enlarged fonts and buttons throughout the entire OS.
It’s great for people that don’t want or need complicated features, or those that have trouble seeing them. Here’s where you’ll find the option to activate it:
- Open Settings
- Press Display
- Scroll down and press Easy mode
- Select Easy mode instead of Standard mode and hit Apply
Enable Do Not Disturb mode

No-one likes to be woken up in the middle of the night because Dick’s Sporting Goods wants to let you know about their latest and greatest sale. So, that’s why we have Do Not Disturb mode. But, DnD is not turned on default, so some people don’t even know it exists! Here’s how to turn it on:
- Open Settings
- Press Notifications
- Toggle Do Not Disturb
There’s also a quick settings tile in your notification try to manually turn Do Not Disturb on and off. Just swipe down from the top of your screen twice to find it.
Customize Do Not Disturb
If you’d like to automate Do Not Disturb, there’s an option for that too. Head here:
- Open Settings
- Press Notifications
- Press “Do Not Disturb”
- Toggle “Turn on as Scheduled”
- Press “Turn on as Scheduled”
- Chose when Do No Disturb turns on and which days to enable it
Don’t miss an emergency call
One reason that people tend to not use DND is that they don’t want to miss an emergency call in the middle of the night. Luckily, Samsung lets you have the best of both worlds. Navigate to the Do Not Disturb settings in the above tip then press “Allow exceptions” and “Calls from” and make your selection. We also suggest toggling on “Repeat callers”.
Turn off the LED at night

Do you enjoy trying to sleep with the lights on? What about trying to sleep with a blinking light in your face in a dark room? Doesn’t sound very fun, does it? Well, you can nix the LED notification light at night to ensure it doesn’t wake you up or keep you from falling asleep.
- Open Settings
- Press Notifications
- Press “Do not Disturb”
- Press “Hide Notifications”
- Toggle “No LED indicator” under “When screen is off”
Apply a new theme
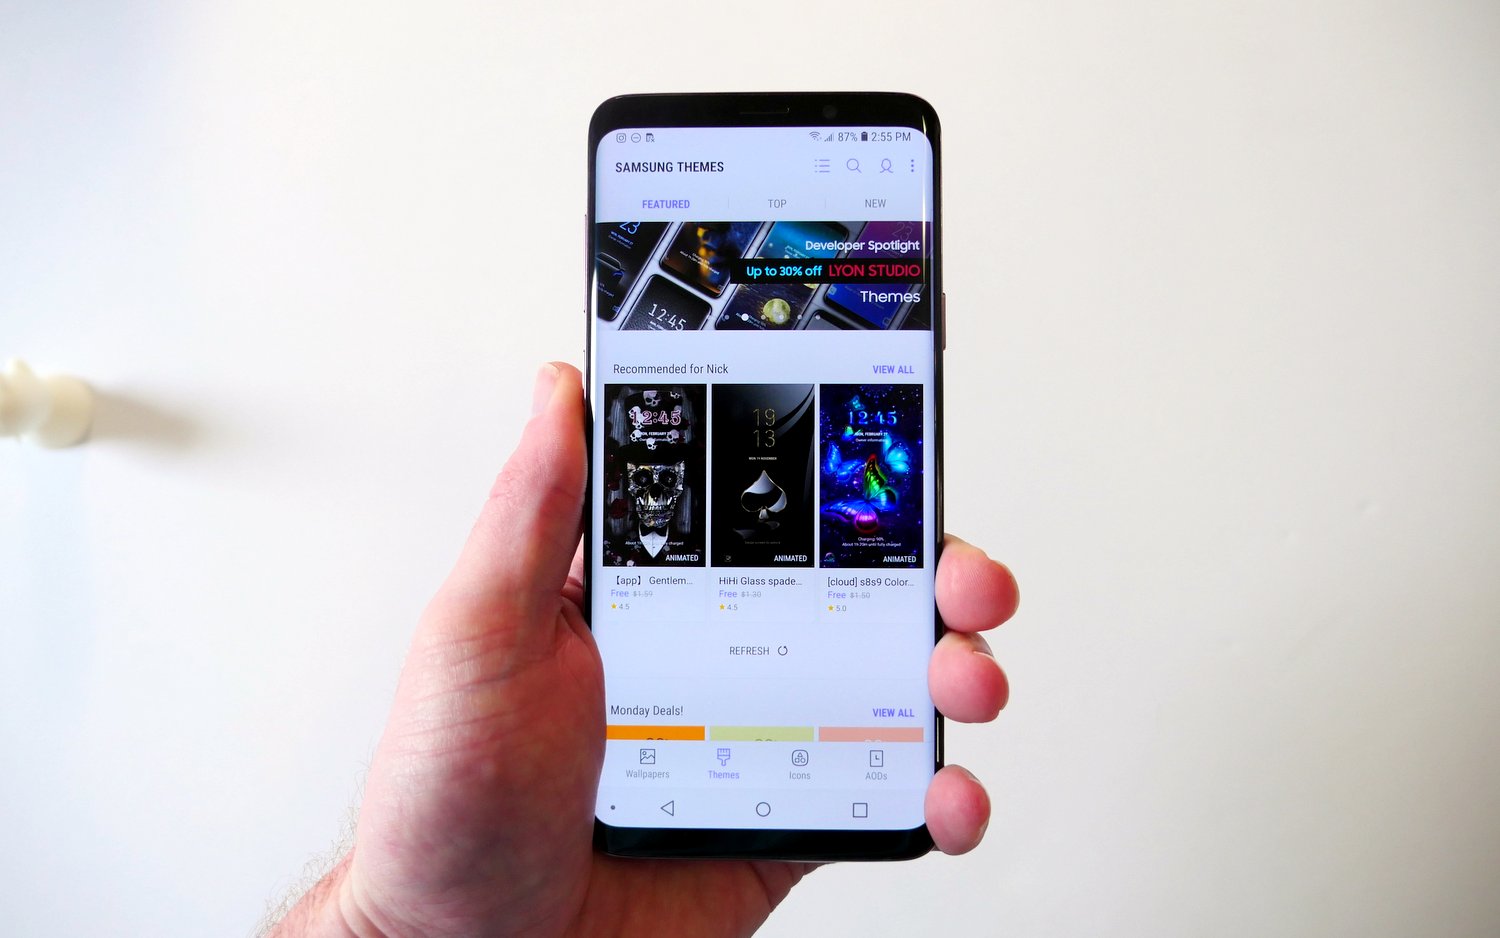
Most phones coming with a built-in theme engine and Samsung’s is one of the best. Not only is it powerful, but due to how many people use Samsung devices, there are a ton of different themes, wallpapers, and icons in its theme store. Here’s how to find and apply a new theme:
- Open Settings
- Press Wallpapers and Themes
- Press “Themes” at the bottom of the screen
- Find a theme and press it
- Press “Download” at the bottom of the screen
- Press “Apply” at the bottom of the screen once it has downloaded
To apply a previously downloaded theme, return to the Samsung Themes main menu and hit “view all” under “My themes”
Make those colors pop
There’s no question the Galaxy S9 features one of the most beautiful displays on the market. While the overly saturated colors might look nice, they’re nowhere near accurate. For those who like to do photo editing on their device — or anyone who prefers more accurate tones — you might want to play around with the color mode.
The Galaxy S9 features a few presets to choose from – Adaptive display, AMOLED cinema, AMOLED photo, and Basic. Switching between the modes will lower color saturation, slightly adjust the contrast, and warms up the display considerably. The most color accurate of the bunch is Basic, while Adaptive display is the only mode that gives you the Color balance option which allows you to tweak the white balance of the display.
Keep your phone unlocked at home
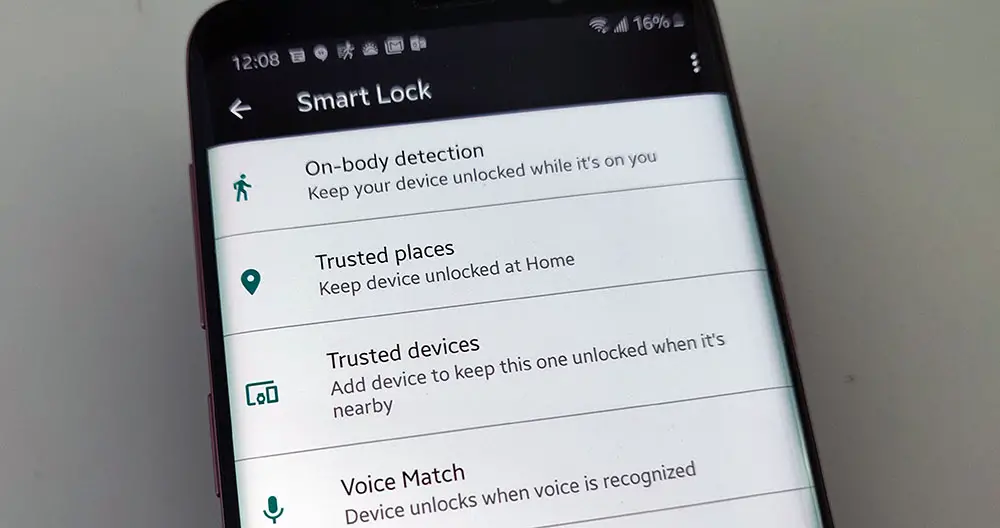
Screen locks are to keep unwanteds from accessing your phone so if you feel secure at home, there’s no reason to keep yours turned on, right? Google and Samsung make it easier than ever automate when your screen lock is enabled or disabled.
- Open Settings
- Press Lock Screen
- Press “Smart Lock”
- Enter your PIN
- Press “Trusted Places”
- Press “Add trusted place”
- Search for your address or press “Select this location” at the bottom of the screen
- Name your location (ie: “Home”)
You can repeat this process if you’d like to keep your unlocked while it’s connected to a device like your smartwatch or your car’s Bluetooth. Additionally, you can turn “On-body detection” on which will keep your phone unlocked when your phone is on you or Voice Match which will unlock your phone when it hears the “Okay Google” hotword.
Add widgets to the Always-on-Display
Samsung’s Always-on-Display is one of the better “at-a-glance” displays out there, but it can always be better. Off by default, there are a number of widgets you can add to the AOD to show more information or look more pleasing to the eye.
- Open Settings
- Press Lock screen
- Press FaceWidgets
- Toggle which widgets you’d like
- Press “Reorder” at the top right of the screen
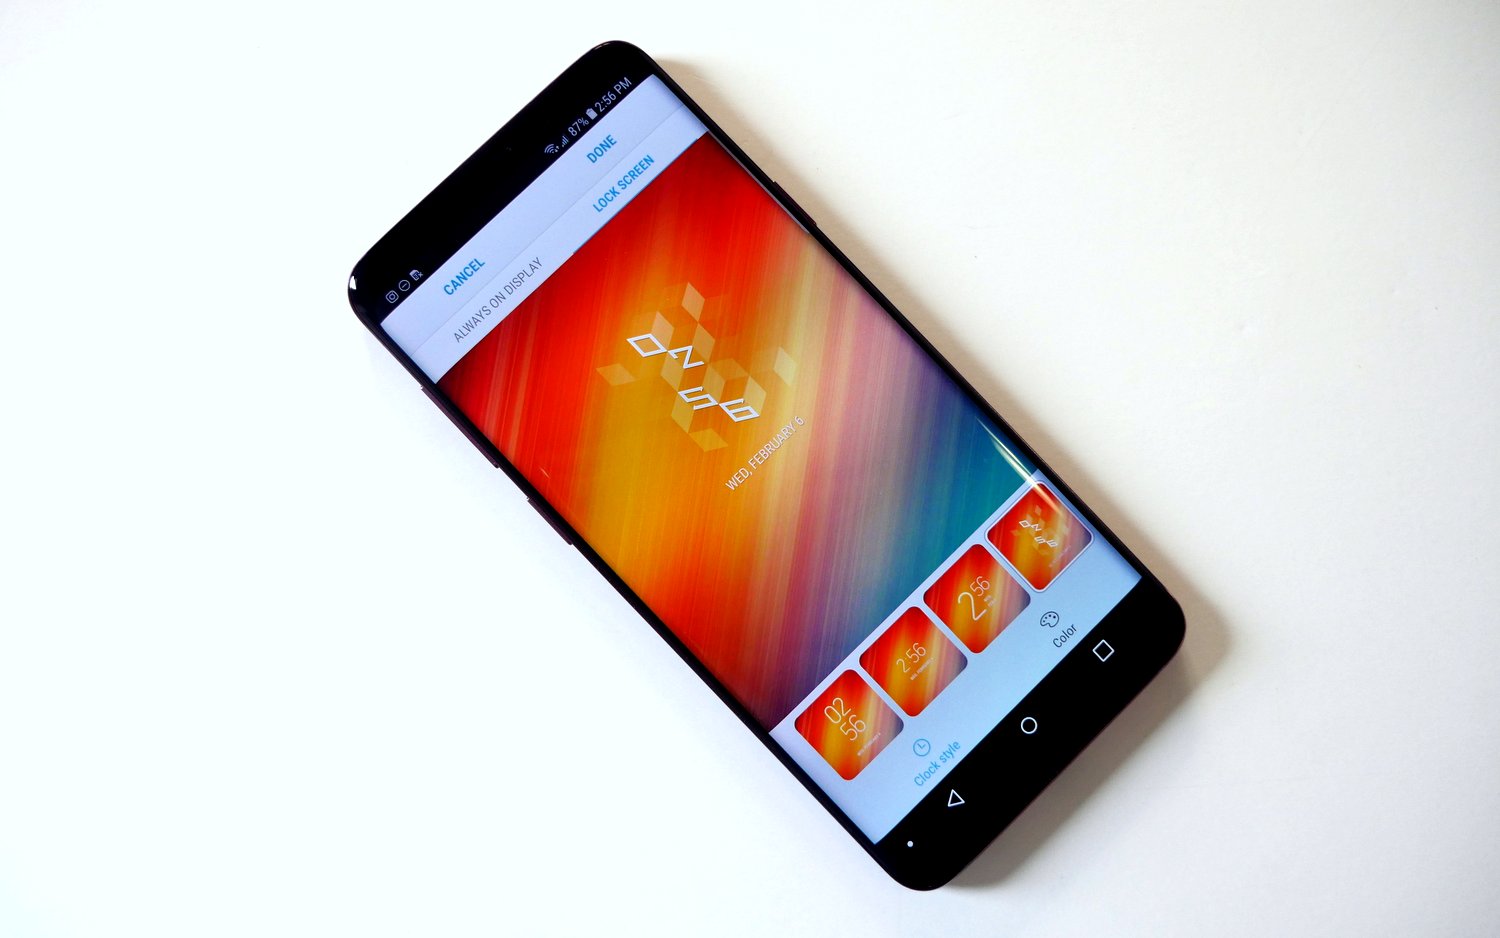
Change your Always-on-Display clock
This is another customization of the Always-on-Display so you can tune it to exactly how you like it.
- Open Settings
- Press Lock screen
- Press “Clock style”
- Press “Always on Display”
- Make your selection and hit “Done
Add app icons to the lock screen
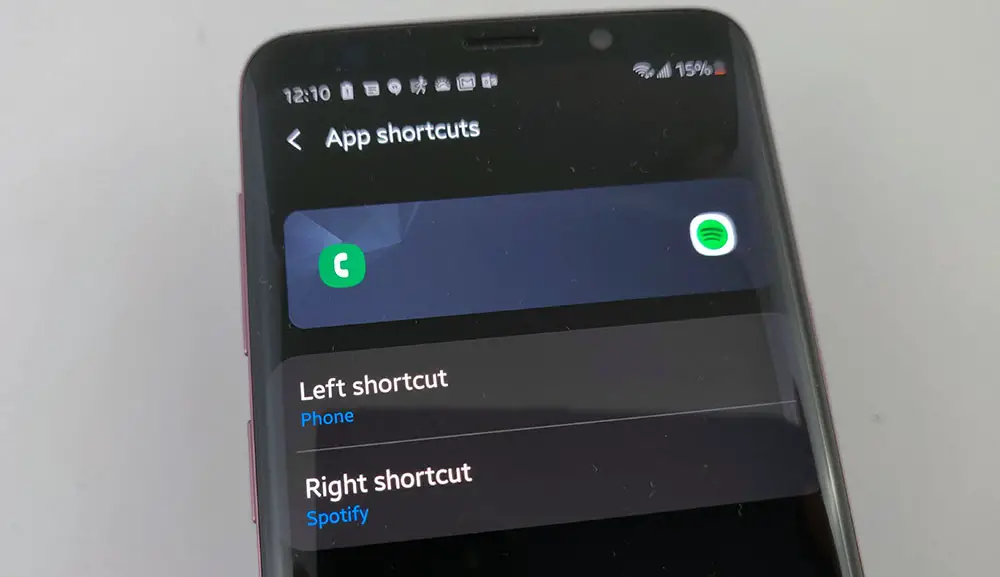
Getting into your apps quickly when you’re running out of time to capture a moment, send a text, or check-in can be frustrating. Samsung allows you to press the power button twice to open the camera, but what if you need to get into a different app quickly? For that, we have app icons on the lock screen and you can customize these with a couple of quick steps.
- Open Settings
- Press Lock screen
- Press “App shortcuts”
- Select which apps you’d like on the right and left app icons
Unlock your phone with your face
Pin or pattern? That’s so early 2000’s. Fingerprint unlock? Over it. But unlocking your phone just by looking at it? Now you’re speaking my language. Samsung has one of the most robust face unlock options out there with both iris scanning and face unlock. These two methods combine for Samsung’s Intelligent Scan. Here’s how you turn it on if you skipped this step during your phone’s initial setup:
- Open Settings
- Press Biometrics and security
- Press “Intelligent Scan”
- Enter your PIN
- Add your facial and iris data
Intelligent Scan can be used for more than just unlocking your device. It can be used in lieu of passwords or to open up your Secure Folder.
Factory Reset your Samsung Galaxy S9
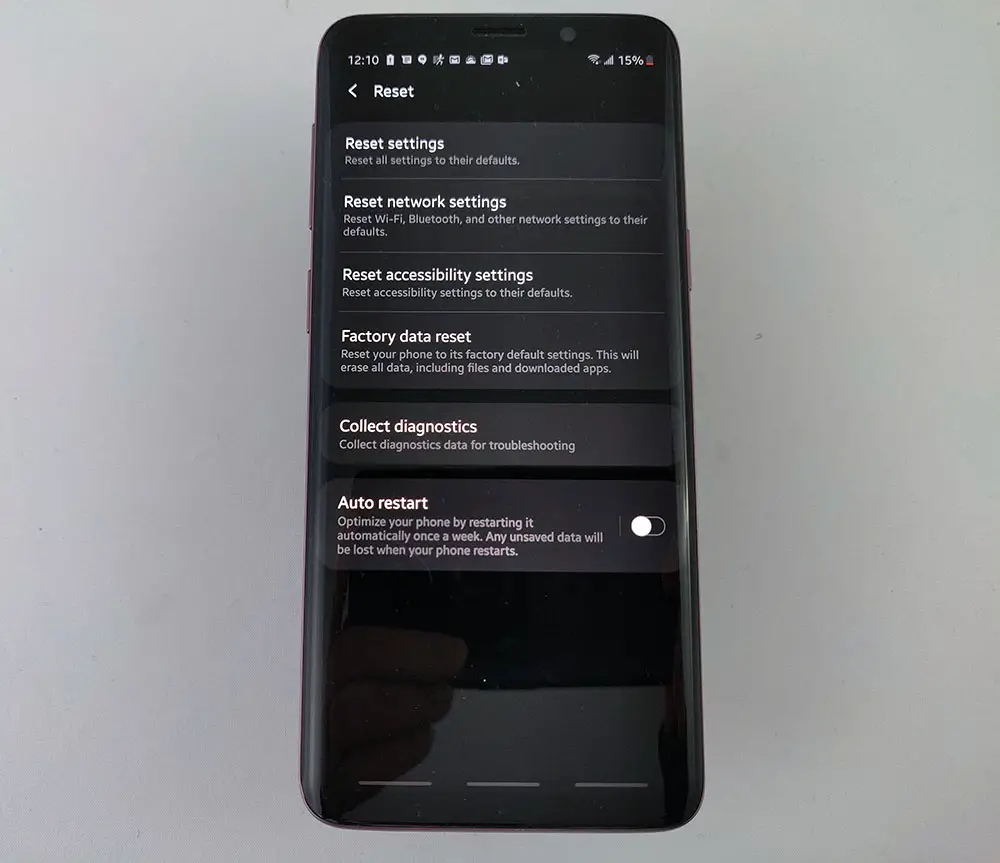
Are you selling your device and need to wipe it? Are you looking for a fresh start to speed up your phone? Factory reset is what you want. Here are the steps to starting over.
- Open Settings
- Press General Management
- Press Reset
- Press “Factory data reset”
- Scroll down and press “Reset”
Just a reminder, you will lose ALL of the data on your device that is not backed up before you start this process. Be absolutely sure you have everything you need off your device before you begin.
Automatically restart your device
Restarting your device is part of the routine maintenance that you should perform on your device to keep it in tip-top shape. This allows the phone to clear cache, delete temporary files and more. But, with all of living busy lives, sometimes we forget. So, Samsung added a feature to automatically restart your device at a time of your choosing
- Open Settings
- Press General Management
- Press Reset
- Press “Auto reset”
- Toggle Auto reset on at the top of the screen and select your schedule
As a reminder your device will not start if the screen is on, the phone is being used, the battery is below 30% or SIM card lock is turned on.
Put the battery percentage in the notification bar
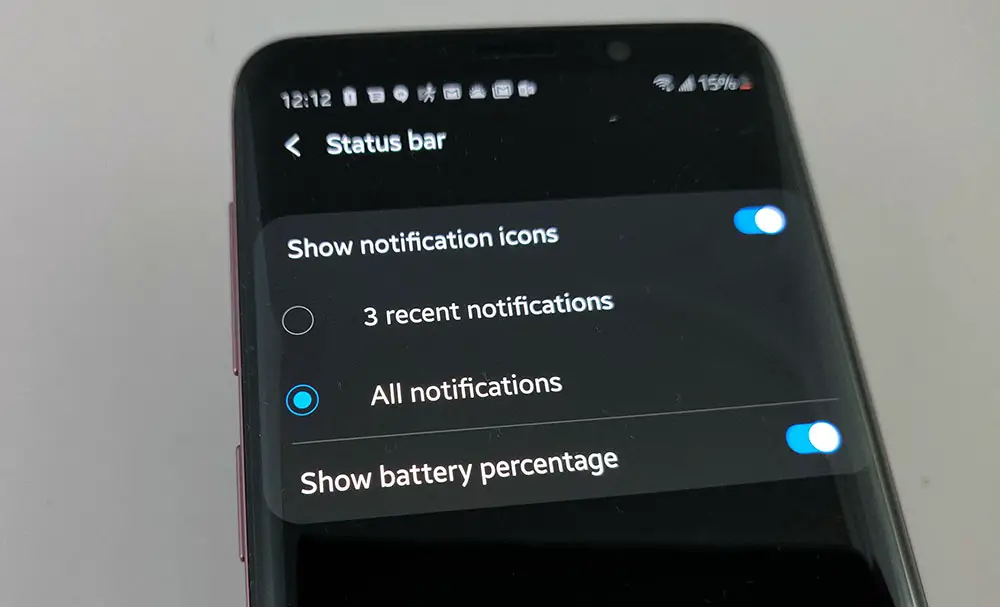
Staying on top of your battery life is important. Sure, the Galaxy S9 and S9 Plus have great battery life, but you want to make sure you’re not about to run dry before you head out of the house on some errands, right? Here’s how to add the battery percentage in the notification bar right next to your battery icon:
- Open Settings
- Press Notifications
- Press Status Bar
- Toggle “Show battery percentage”
Enable floating notifications
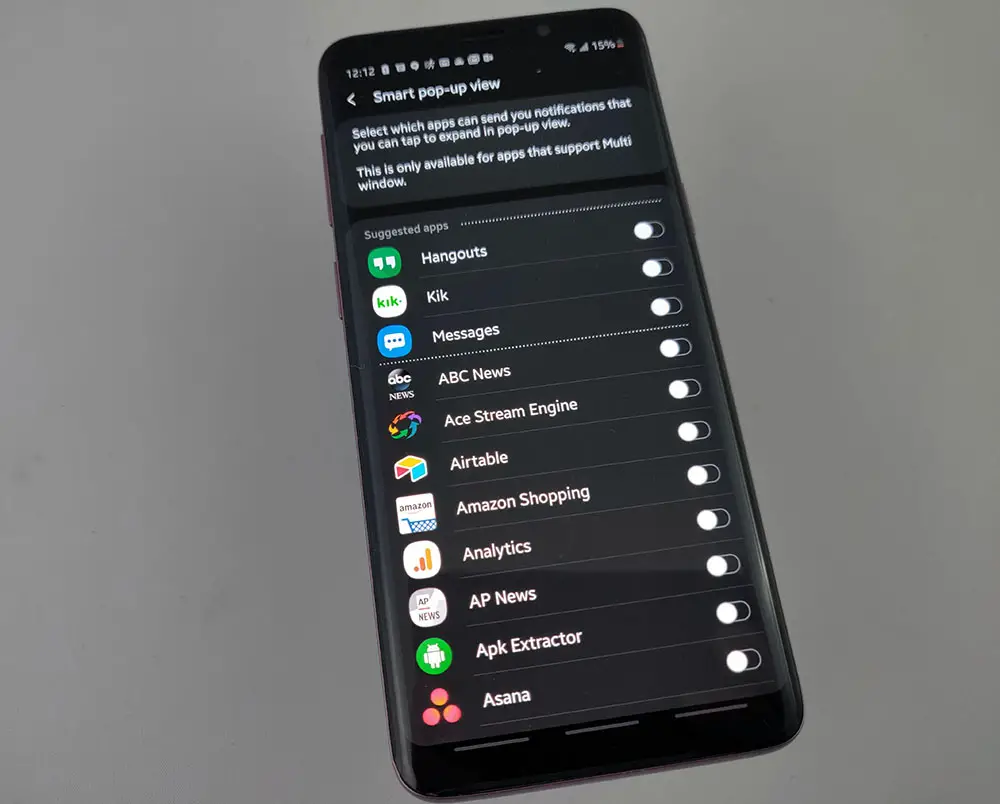
The notification shade is great, but there are other options out there. Facebook Messenger first popularized floating notifications for most Android users. Chat Heads have always been a huge hit and now Samsung has its own version called floating notifications. These show up near the top of your screen, but float on top of your other apps. Tapping one opens up a smaller version of the application that allows you to quickly reply to a message or read a headline then dismiss it and go back to what you were doing.
- Open Settings
- Press Advanced features
- Press “Smart pop-up view”
- Select which apps you’d like to add
Use two social media accounts in the same app
If you have two accounts for the same social networking, maybe a work Facebook page or a parody Twitter account, you can now use both without logging out. Samsung allows you to basically make a duplicate of your social media app of choice and log in twice. It’s extremely convenient and means you don’t need to hold all those passwords in your head.
- Open Settings
- Press Advanced features
- Press “Dual Messenger”
Avoid disaster
It’s something nobody thinks about until it happens, but one of the worst things that could happen to you is losing your smartphone or having it stolen. In the event that your device does go missing, you need to know exactly how to recover your device or erase any personal information stored therein.
Android’s built-in feature — “Android Device Manager” — is the perfect way to track down a lost device, you just need to know where to find it.
- Go to google.com/android/devicemanager
- Select your phone from the menu
- You’ll see the device on a map and a few options for finding it (ring), locking it (if it wasn’t locked already), or erasing all of its contents with a full factory reset.
Get rid of unwanted apps
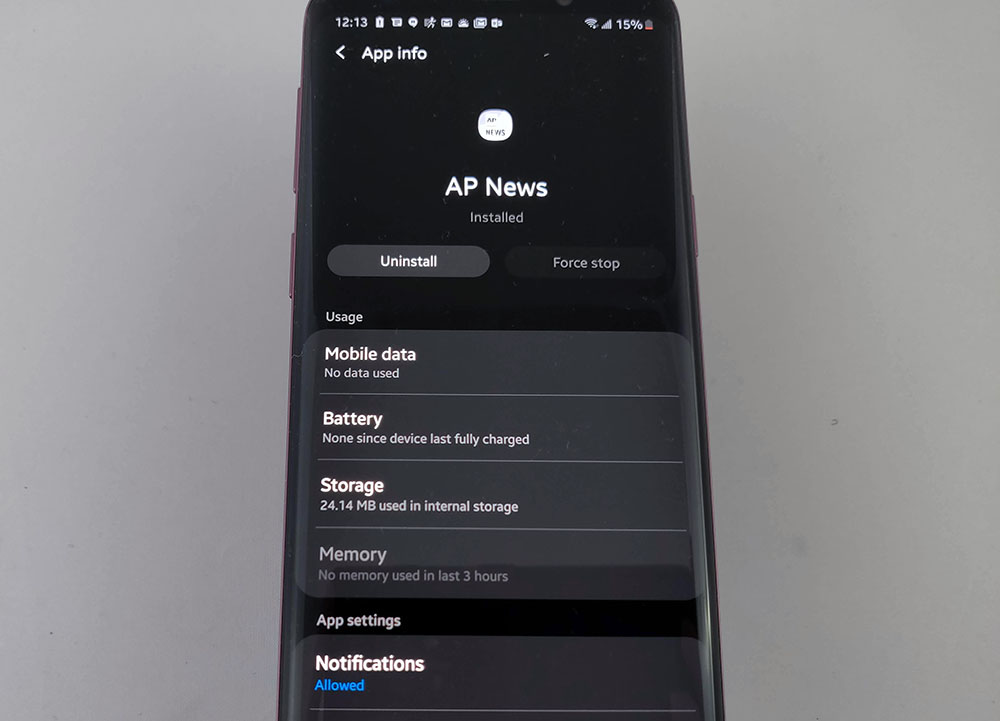
There are a couple of ways to go about deleting unwanted applications but the most comprehensive way is through the settings menu. You see far more of what’s actually on your device than going through your app tray.
- Open Settings
- Press Applications
- Tap the application
- Press “Uninstall”
If uninstall isn’t an option, you will probably see “disable”. Pressing this will disable and hide the application, but not remove it from the device entirely.
Make yourself into an emoji
Emojis are great to spice up a conversation or convey an emotion that would otherwise be lost when just using words. But, there isn’t always the perfect emoji out there for everything. Now, you can turn yourself into the emoji and convey exactly what you want. Other companies have similar features but Samsung’s is called AR (Augmented Reality) Emoji and it’s incredibly easy to create and customize yours.
- Launch the camera application
- Press “AR Emoji” at the top of the screen (next to Bixby vision)
- Tap the face symbol at the bottom of the screen
- Top “Create Emoji”
- Look at the camera and center your face in the middle of the screen
- Answer whether you’re male or female and wait for the app to create your AR emoji
After your AR Emoji is created, you’ll have the option to customize it as you see fit with different syle options.
Change your keyboard

Samsung’s very capable keyboard comes as the standard when you set up your phone, but you don’t have to stick with it. There are a ton of other options out there with Gboard and SwiftKey being two of the more popular options.
- Open the Play Store and download your keyboard of choice
- Open Settings
- Press General Management
- Press Language and input
- Press default keyboard
- Select your keyboard of choice
Prevent accidental Bixby launches
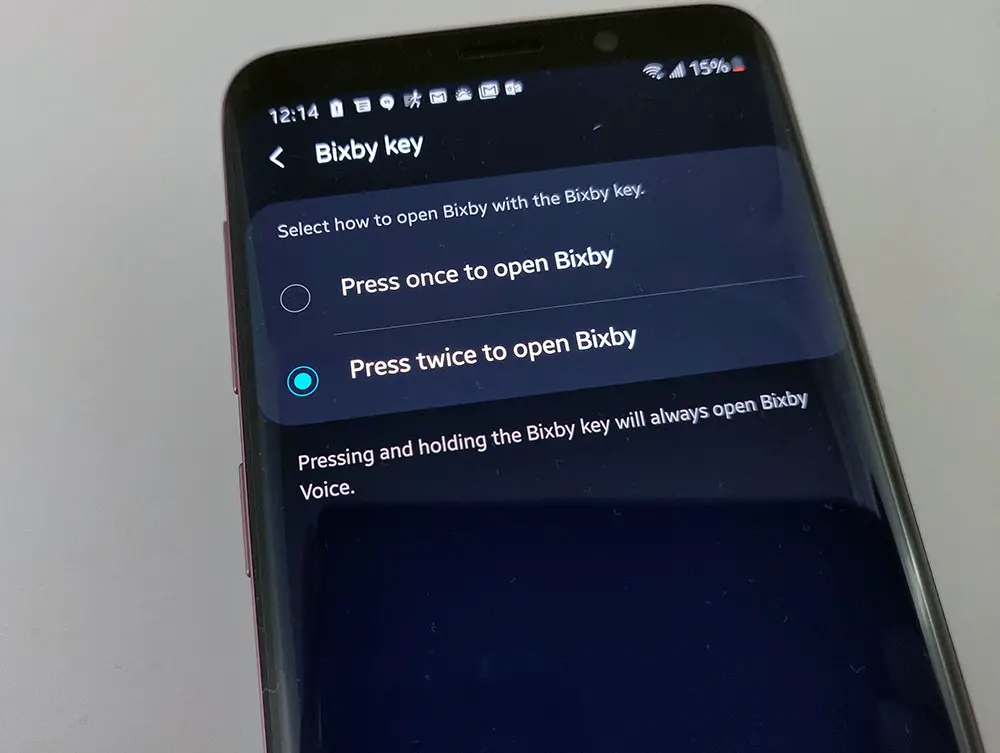
It’s great that Samsung added a dedicated assistant button on the side of its Galaxy S9 and S9 Plus, but it’s a real bummer that you can only use Bixby. Pressing that button is rather easy too, as it sits right under the volume rocker. You can’t completely disable the button without a third-party application (bxActions) but you can avoid an unwanted activation.
- Open Bixby
- (Optional) Go through the setup process
- Press the Hamburger menu (three dots) on the right side of the display about halfway down
- Press Settings
- Scroll down to “Bixby key” and select “Press twice to open Bixby”
Now to activate Bixby, you must double press the Bixby button instead of a single press. Now if Samsung would just let us remap the button entirely….
Keep the screen on while you’re reading
Samsung makes the best mobile displays out there and I love looking at them. I love reading on them too but I always seem to have my screen turn off while I’m reading, even with a one minute delay instead of the standard thirty seconds. Samsung has included a fix for this by detecting when you’re looking at the screen and keeping it awake.
- Open Settings
- Press Advanced features
- Press Motions and gestures
- Toggle “Smart stay”
Reorganize your quick toggles
![]()
Quick toggles, the buttons at the top of your screen in your notification, are a staple of Android at this point. Tapping them tuns a feature on or off and holding them can sometimes take you to a full menu. But, what if you want different toggles up there? Well, that’s an easy fix.
- Swipe down to reveal the notification shade
- Swipe down one more time to expand the notification shade further
- Press the Hamburger menu
- Press “Button order”
- Long press then drag your quick toggle of choice to the order you’d like it displayed
Keep in mind that your notification shade shows the first six quick toggles unless you expand it further so put your most used toggles in the first six selections.
Get more in your camera viewfinder
By default, the camera shows a 3:4 centered view of what your camera lens sees, but that’s not your only option. If you’d like to fill up your display or change the aspect ratio of your pictures, follow these simple instructions.
- Open the camera
- At the top of the screen, tap the small rectangle with “3:4” in the middle of it
- Change this to 16:9 or Full to fill up your viewfinder
Keep in mind that changing this will also alter your end product. You may not be able to get as much in the picture if you select one of these options.
Catch the perfect action shot
Historically, one thing smartphone cameras have struggled with is action shots. Depending on what you’re shooting, the subject might be moving too fast for the camera to catch a solid shot. Part of how Samsung and others have addressed this by creating the “Motion photos” feature. This captures a little bit of video before and after you press the shutter button so you have a little clip rather than just a blurry photo.
- Open the camera
- Tap the gear icon
- Turn on “Motion photos”
Create a gif
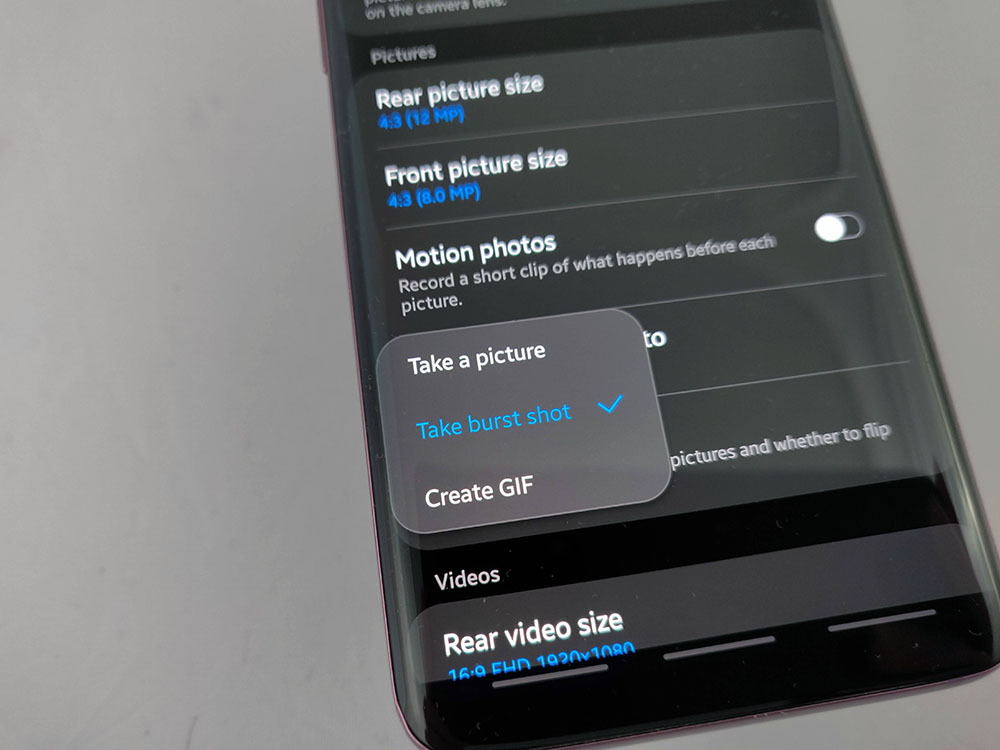
Pictures and videos are great, but there’s room for other options too. Gifs (pronounced “gyf”) are the perfect compromise of small file size, good resolution, and action. You can create gifs directly from the camera viewfinder, too.
- Open the camera
- Tap the gear icon
- Tap “Hold shutter button to”
- Select “Create a gif”
Hide unwanted camera modes
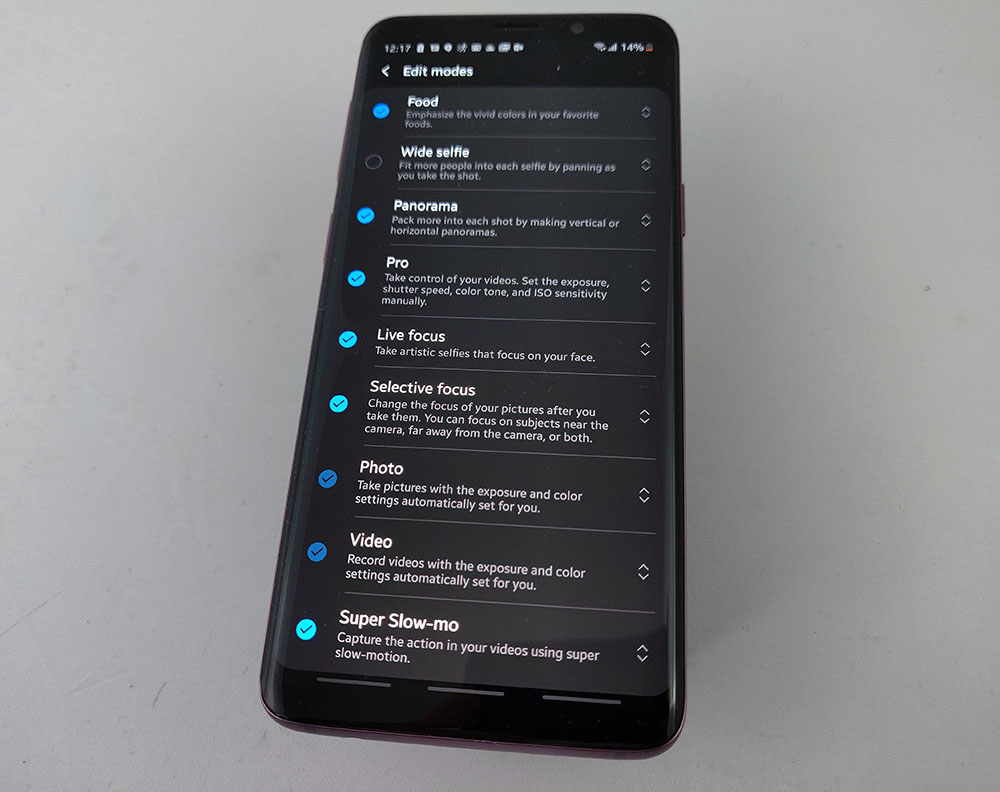
Samsung ships with a TON of camera modes. That’s great if you love taking photos, but most people won’t use these modes. Luckily, you can re-arrange and hide certain modes that you’ll never use.
- Open the camera
- Tap the gear icon
- Scroll down to “Camera modes”
- Tap “Edit modes”
- Uncheck those you don’t want to use
- Reorder the modes you use most by tapping on the double arrow and move them up or down
Extend your battery life
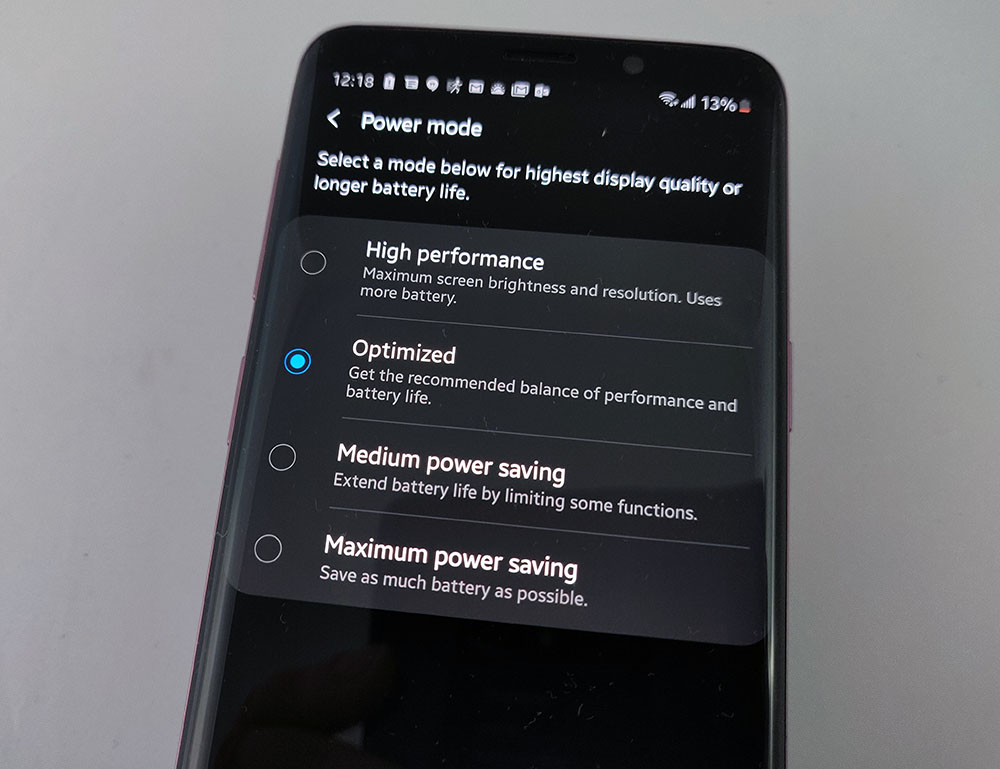
Even if your phone has the best battery life out there, there are always going to be times where you’re running on fumes. Samsung has included two different power saving modes that will help dramatically extend battery life on your Galaxy S9 or Galaxy S9 Plus.
- Open Settings
- Open Device care
- Press the Battery icon
- Press “Power mode”
- Select either “Medium power saving” or “Maximum power saving”
Medium power saving mode will bring down the brightness, turn off some animations, and a few other tweaks to extend your battery life. Maximum power saving mode basically turns your phone into a dumb phone. You can still call and text, but that’s about it. This a fantastic if you’re getting near the end of your battery life and you know you won’t be near a charger for several hours.
Make your phone feel faster
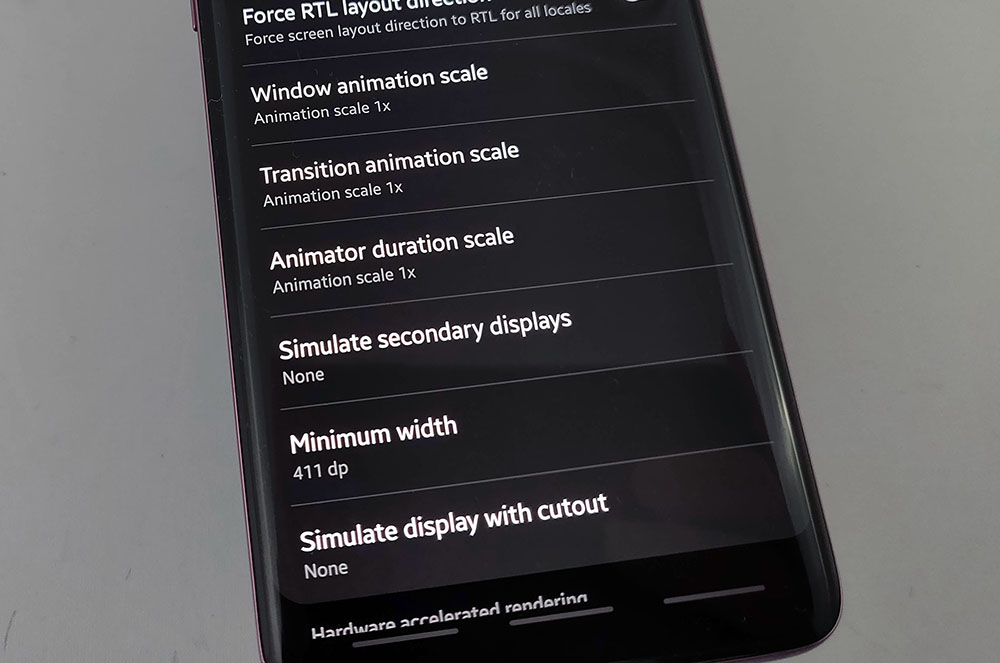
This tweak won’t make your phone any faster, but it sure will feel faster. Speeding up animations is purely superficial but it’s also one of the easiest tricks on this list and has a very noticeable effect.
- Open Settings
- Press About phone
- Press Software information
- Tap “Build number” seven times until a toast notification at the bottom of the screen tells you that you’ve unlocked the Developer options menu
- Enter your PIN
- Hit the back button twice
Now that Developer options are unlocked, we’re headed there
- Open Developer options
- Change Window animation scale to .5x
- Change Transition animation scale .5x
- Change Animator duration scale to .5x
This will reduce how long it takes each animation to play on your phone. While it doesn’t sound like much, you’ll notice the difference.
Keep your personal files personal

We live our lives on our devices so it’s not that uncommon for people to have personal files and pictures on their devices. Screen locks and biometrics are great for keeping people out but Samsung has added an additional layer of security named Secure folder. Secure folder is exactly what it sounds like, a folder that holds applications, files, pictures, and videos that you don’t want anyone else to find.
- Open the app drawer
- Open the Samsung folder
- Press “Secure folder”
There’s a little bit of setup, but it’s quick and easy.


Comments