
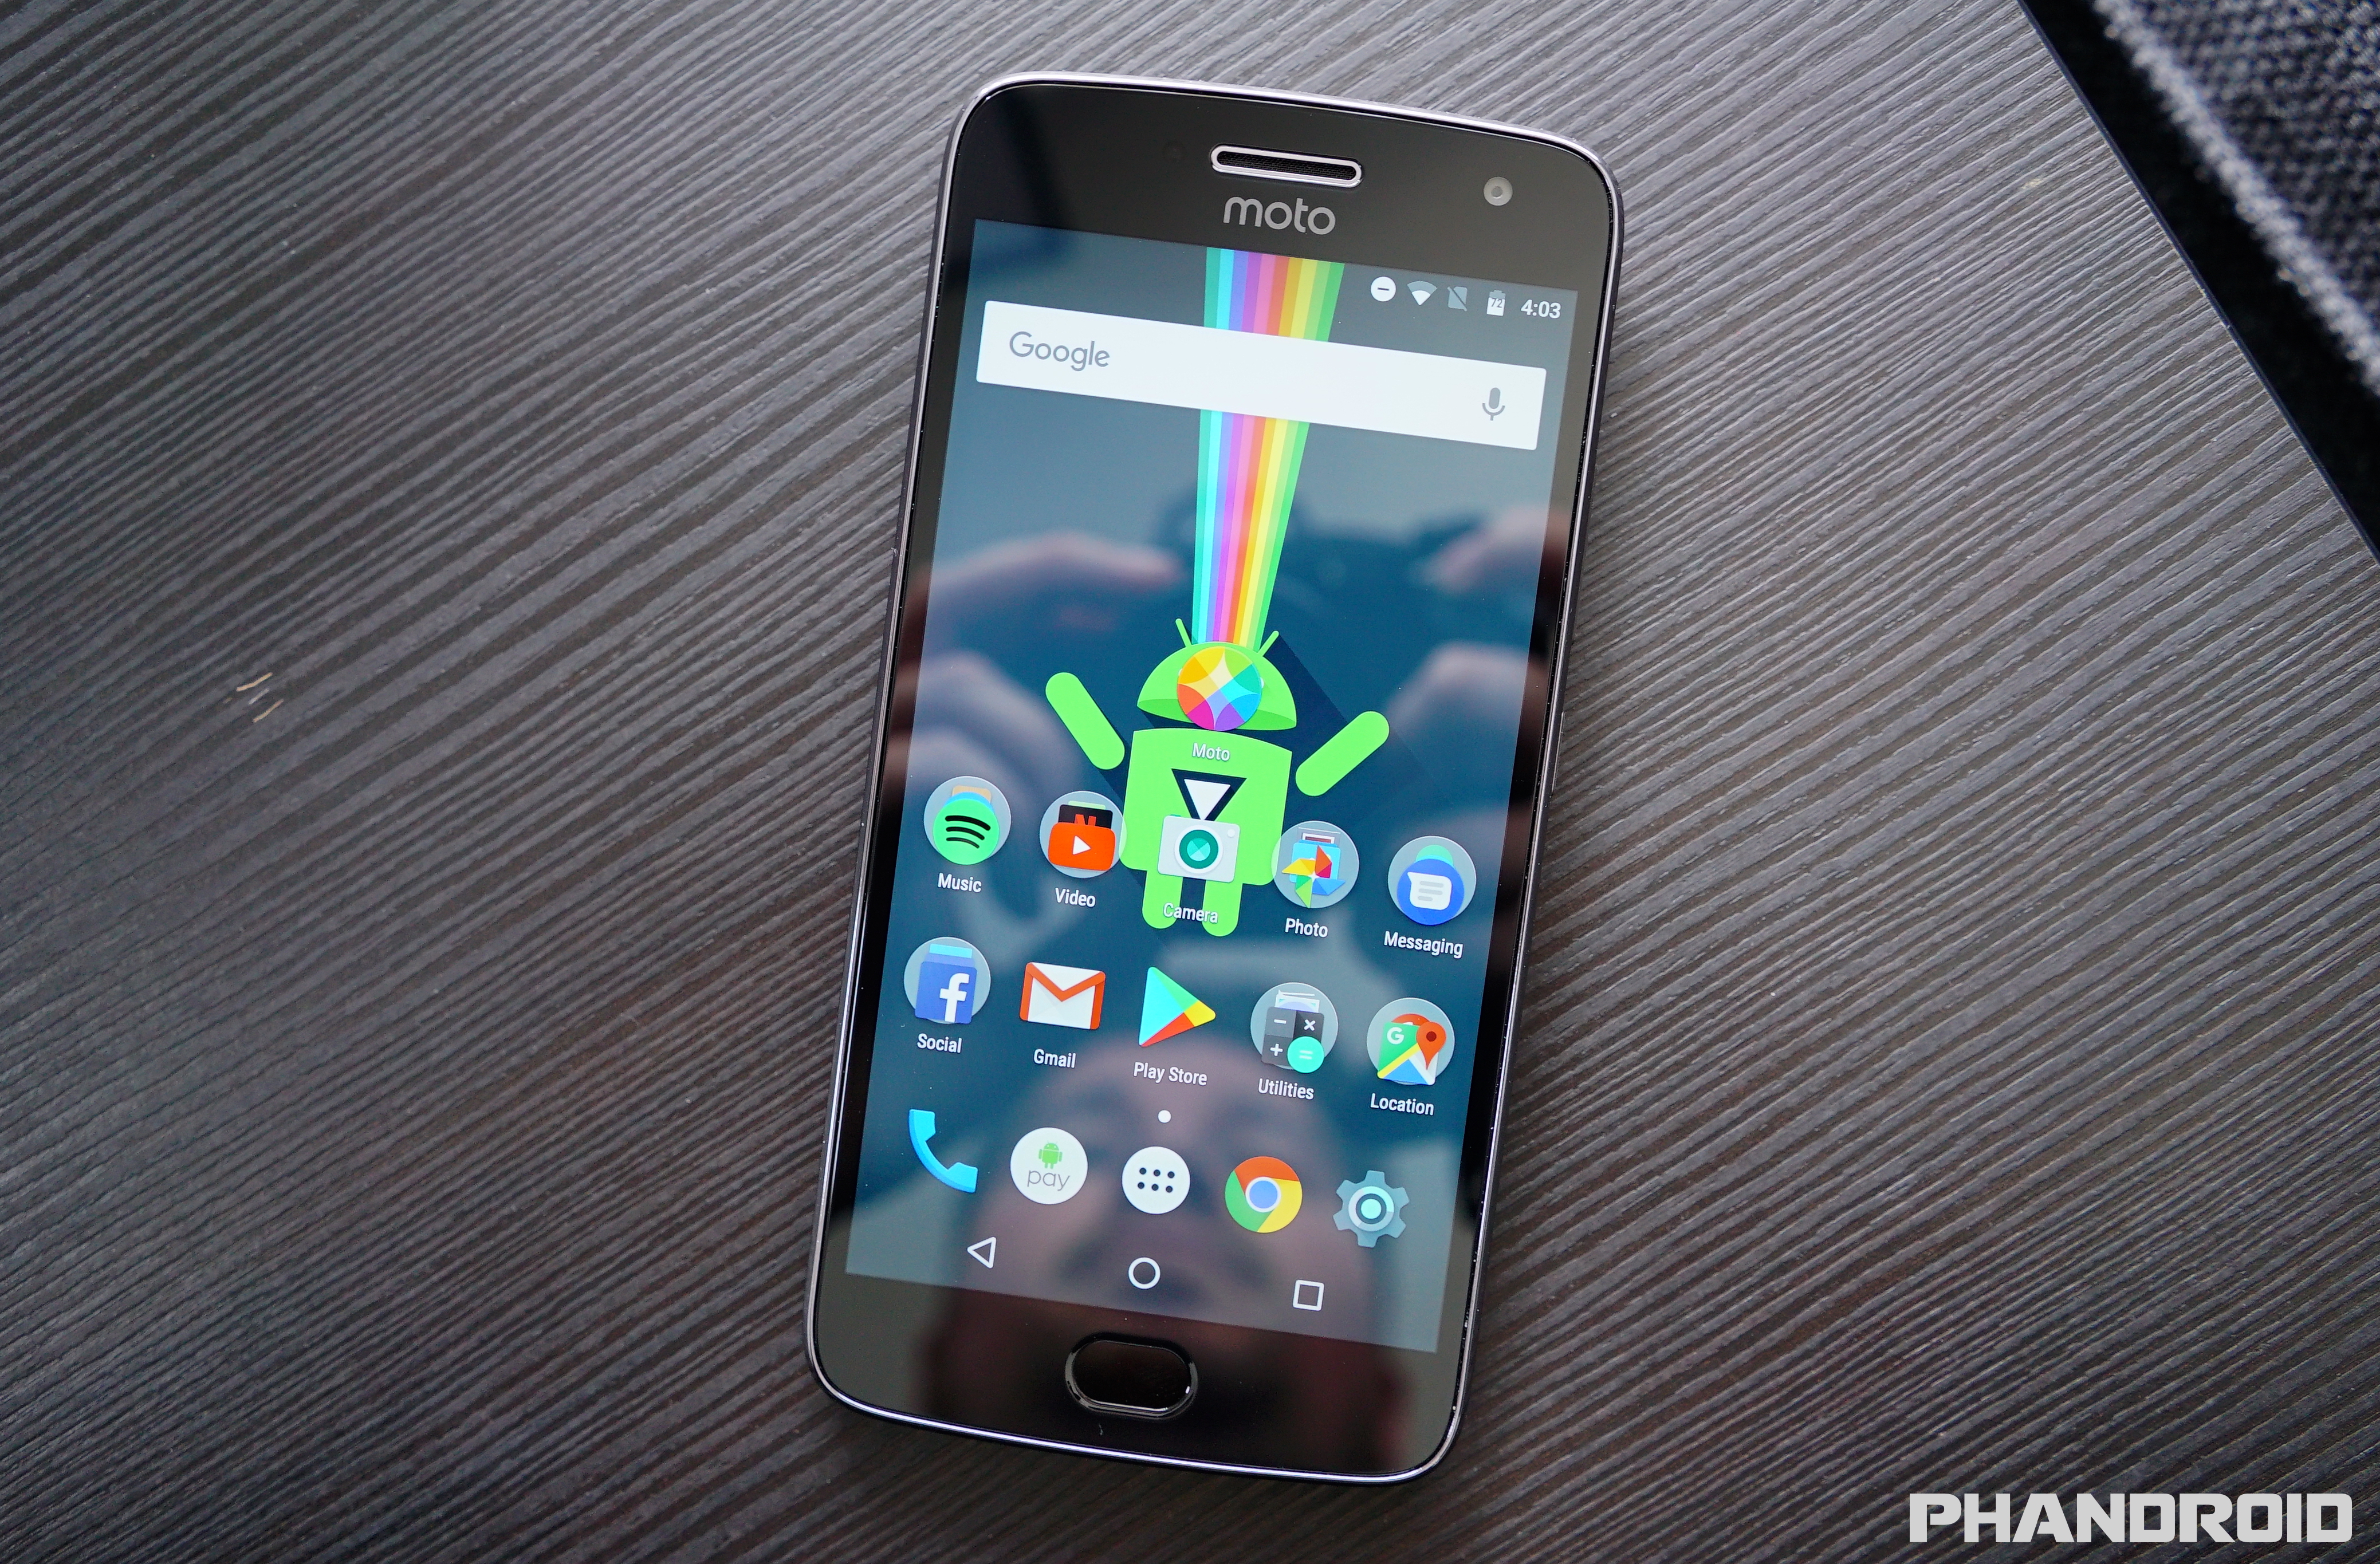
Motorola’s done it again, they’ve built another fantastic smartphone that wont break the bank. Whether you’ve recently purchased (or still plan on picking up) the Moto G5 Plus, we’ve put together a list highlighting the absolute first things every owner should do. Check it out.
Protect your phone with a case

By far the most important thing you should do with any new smartphone is purchasing a protective case. Sure the Moto G5 Plus isn’t the most expensive smartphone on the market, but that doesn’t mean you want to throw your money out the window in the event it suffers from an accidental drop.
The good news is cases don’t have to cost a ton of money, with TPU cases providing the best combination of protection, thinness, and all around bang for your buck. We found a couple that come in various colors and finishes, with nice matte cases from Cimo (black, clear, and blue) running a reasonable $8. If you’re looking for something a little more transparent and glossy, you can’t go wrong with LK cases (coming in black, clear, purple, and green) also only $8 with free Prime 2-day shipping.
Get a glass screen protector
 In addition to an inexpensive case, a glass screen protector will ensure your is basically protected from head-to-toe. Sure you can get those cheap plastic film protectors, but those are hard to install, scratch easily, don’t resist fingerprints, and they wont give your display a premium 2.5D glass feel. You really can’t go wrong with glass screen protectors which are getting less expensive all the time.
Take this 2-pack from Omoton. At only $7, it gives your phone’s display full coverage and clarity for about as much as a #1 a McDonald’s. I really can’t recommend something like this highly enough.
Expand your storage with a micro SD card
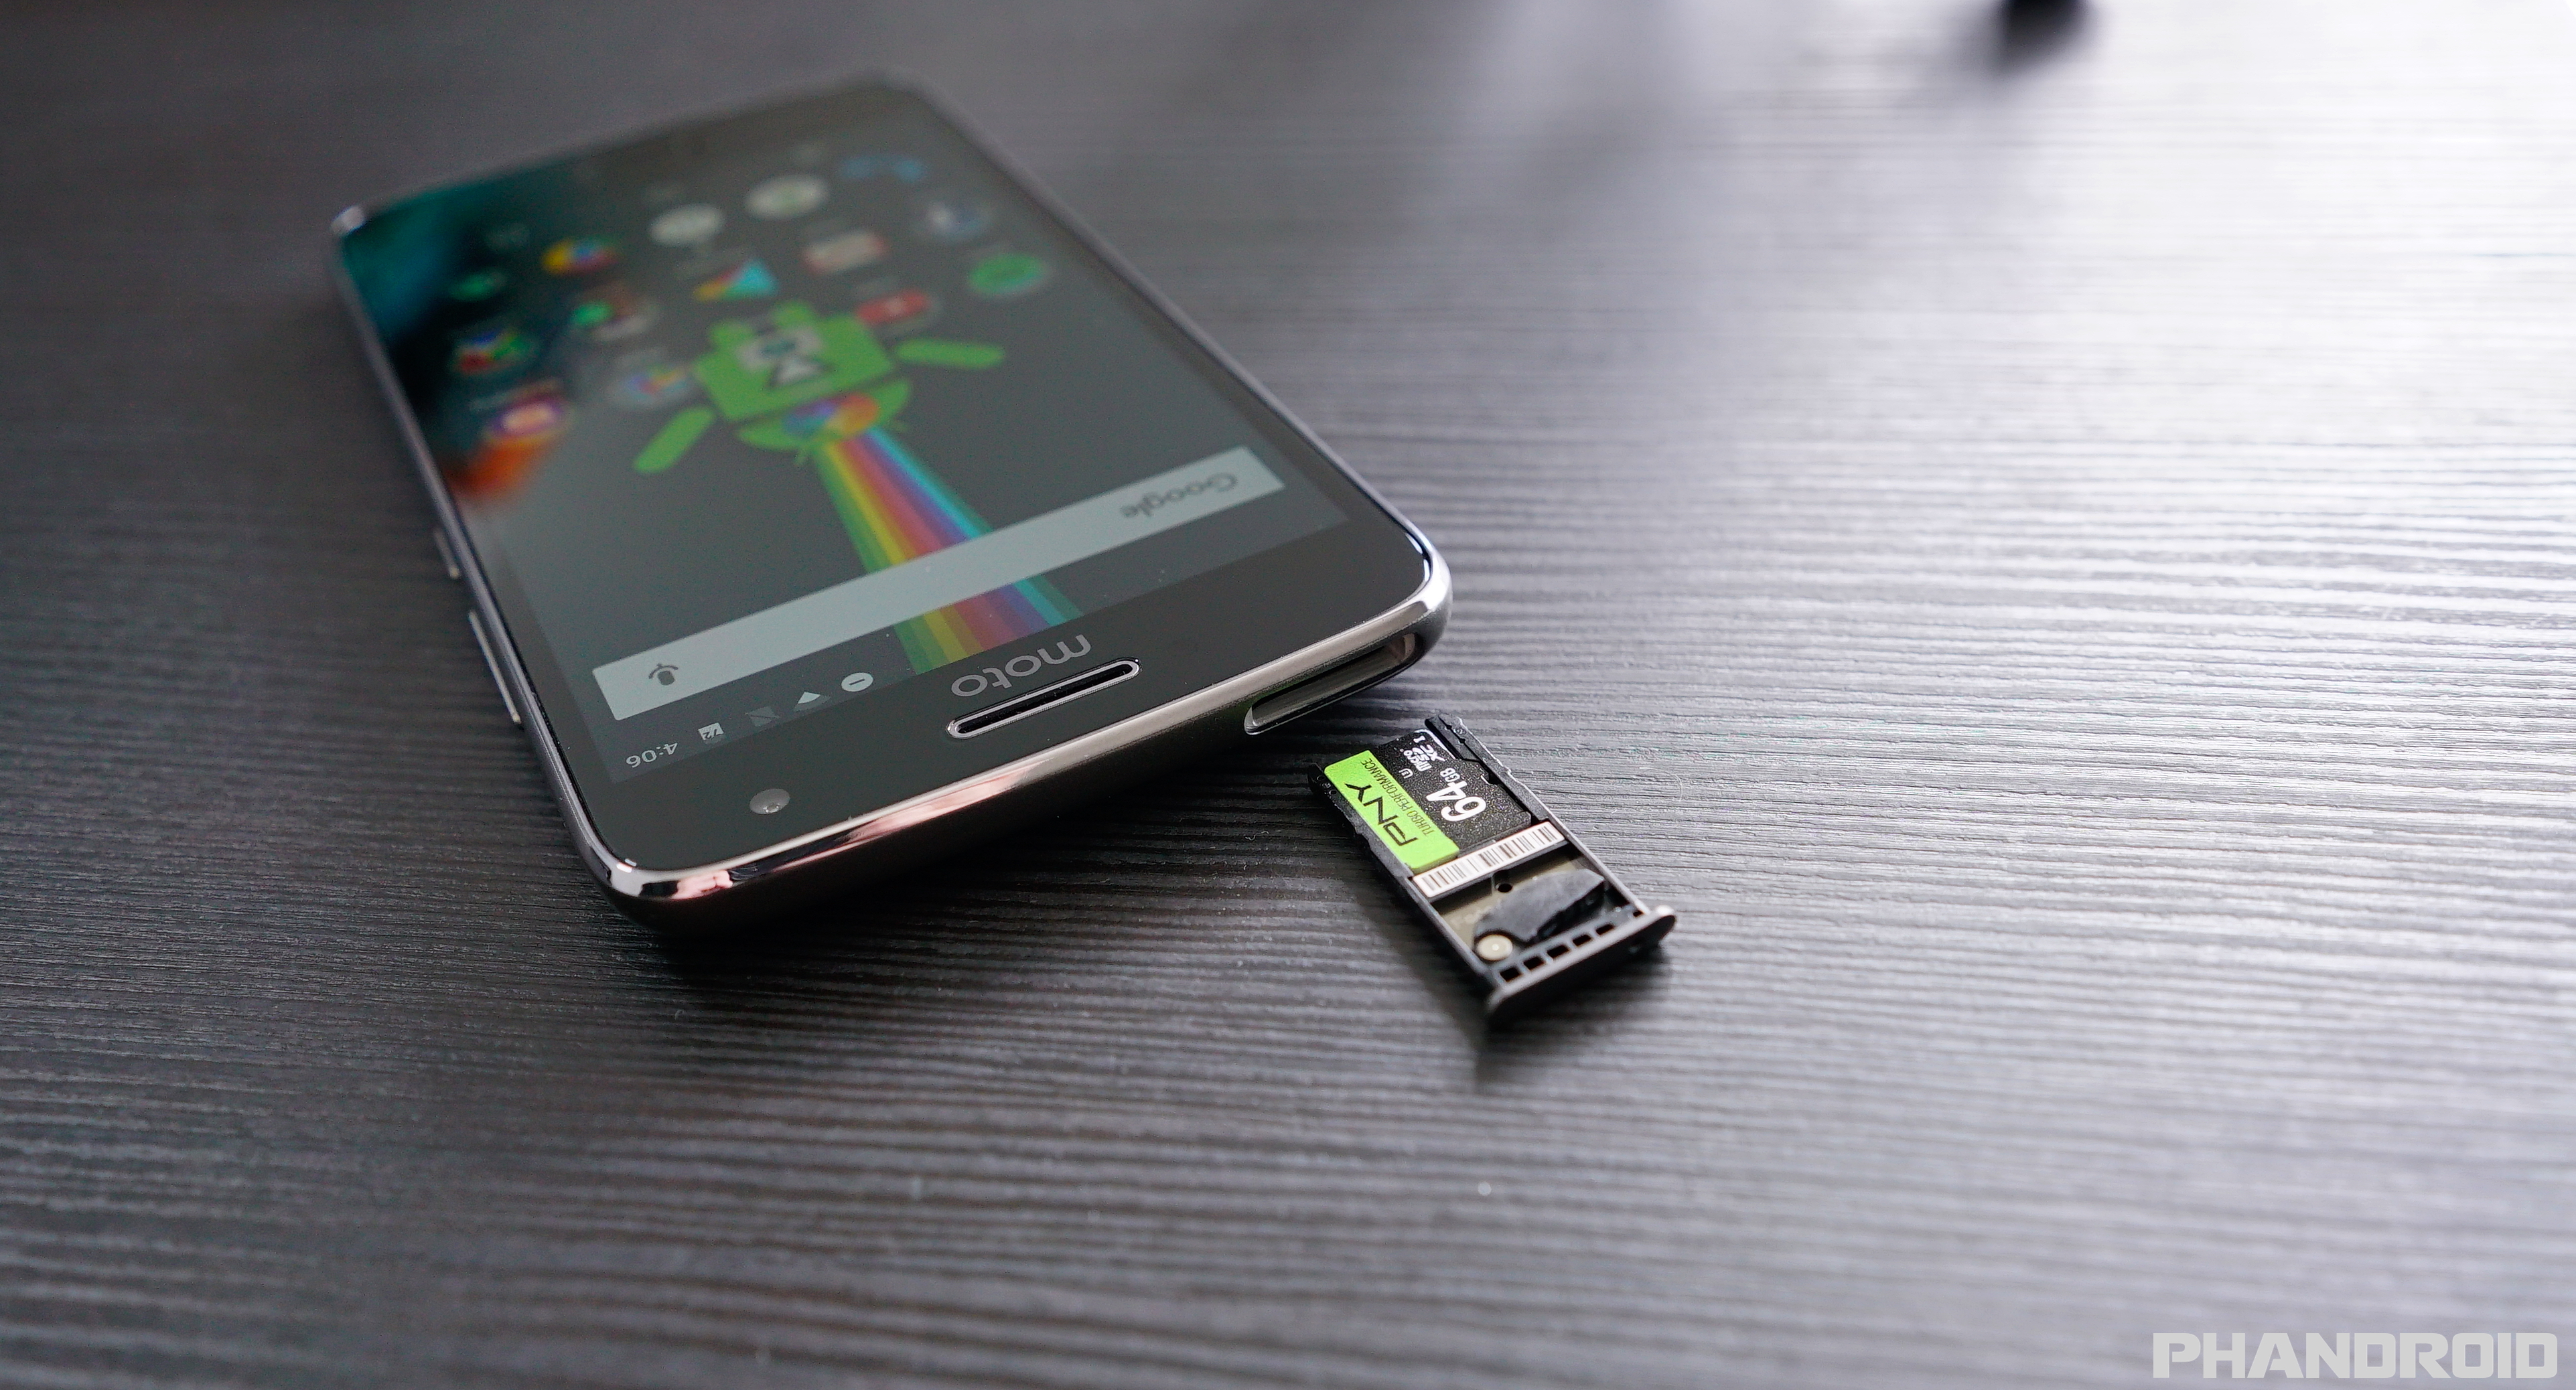
Those of you who have already picked up the Moto G5 Plus, you probably know the phone comes in two different storage/RAM configurations: 32GB/2GB, or 64GB/4GB. Even at the minimum storage configuration, 32GB should provide enough wriggle room for most folks to stretch their legs and download whatever apps and games they’d like. At least initially. Overtime you may notice things becoming a bit more cramped, especially considering the OS already occupies 8GB of the phone’s storage out of the box.
Thankfully you can expand the storage on the device up to 128GB using a micro SD card, with the phone giving you two ways of using it: either as portable storage or internal storage. When using the SD card as portable storage, it basically works the same way as inserting an SD card into your computer, giving users the ability to offload photos, videos, and other media to the SD card for easy removable.
Internal storage is much more permanent, requiring a full formatting/encryption of the SD card along with high performance transfer speeds. In fact, using anything below a UHS-1 U3 class 10 micro SD card and the phone warns users of diminished performance when choosing to use the card as internal storage. Don’t worry, we found a good, inexpensive SD card with the correct specifications to avoid this warning. Link provided below.
-
Recommended: SanDisk UHS-1 U3 Class 10 micro SD card 32GB ($19) | 64GB ($30)
Buy a reversible micro USB cable

One of the downsides of the Moto G5 Plus is that it features a traditional micro USB port. It’s a tad bit disappointing as micro USB isn’t nearly as convenient as using a reversible Type C port. And while the device comes with micro USB cable inside the box, you may want to consider investing in a fully reversible micro USB cable of your own.
We took a look at these awhile back and they’re flexible, high-quality and are compatible with Quick Charge 2.0 so you don’t have to worry about any weirdness. In fact, I personally have been using them with my Moto G5 Plus since I’ve received it and haven’t run into a single issue.
The best part is the cables are reversible on both ends, so you’ll never again have to worry about the trial-and-error that normally comes with inserting cables into the charger or your device. At only $11 for a 2-pack, they’re pretty affordable too.
Lock your phone down using your fingerprint

One of the most important and convenient features you’ll find on modern day smartphones is the ability to secure and unlock your device using your fingerprints. With a fingerprint button located on the front chin of the device, registering your fingerprints is extremely easy on the Moto G5 Plus. You can either set up your fingerprints during the set up process, but if you skipped over that section for whatever reason, here’s how you can set it up from inside the Settings app:
- Open the Settings app
- Scroll down to Security
- Tap on the Fingerprint option (confirm lock method if you already set one)
- Tap Add fingerprint
- Follow instructions to scan your prints
- Rinse and repeat
Mute that obnoxiously loud boot up sound
One of the first things you’ll notice upon powering up the Moto G5 Plus is it’s incredibly loud “Hello Moto” boot animation. The last thing you want is for your phone to reboot during church, work meeting, or any other function that requires complete silence, in which case you should turn this off immediately. The good news is it’s incredibly easy. Here’s how you mute the boot:
- Open the Settings app
- Scroll down and select Sound
- Tap on Power up sound so that it’s switched to OFF
Change the annoying default notification ringtone
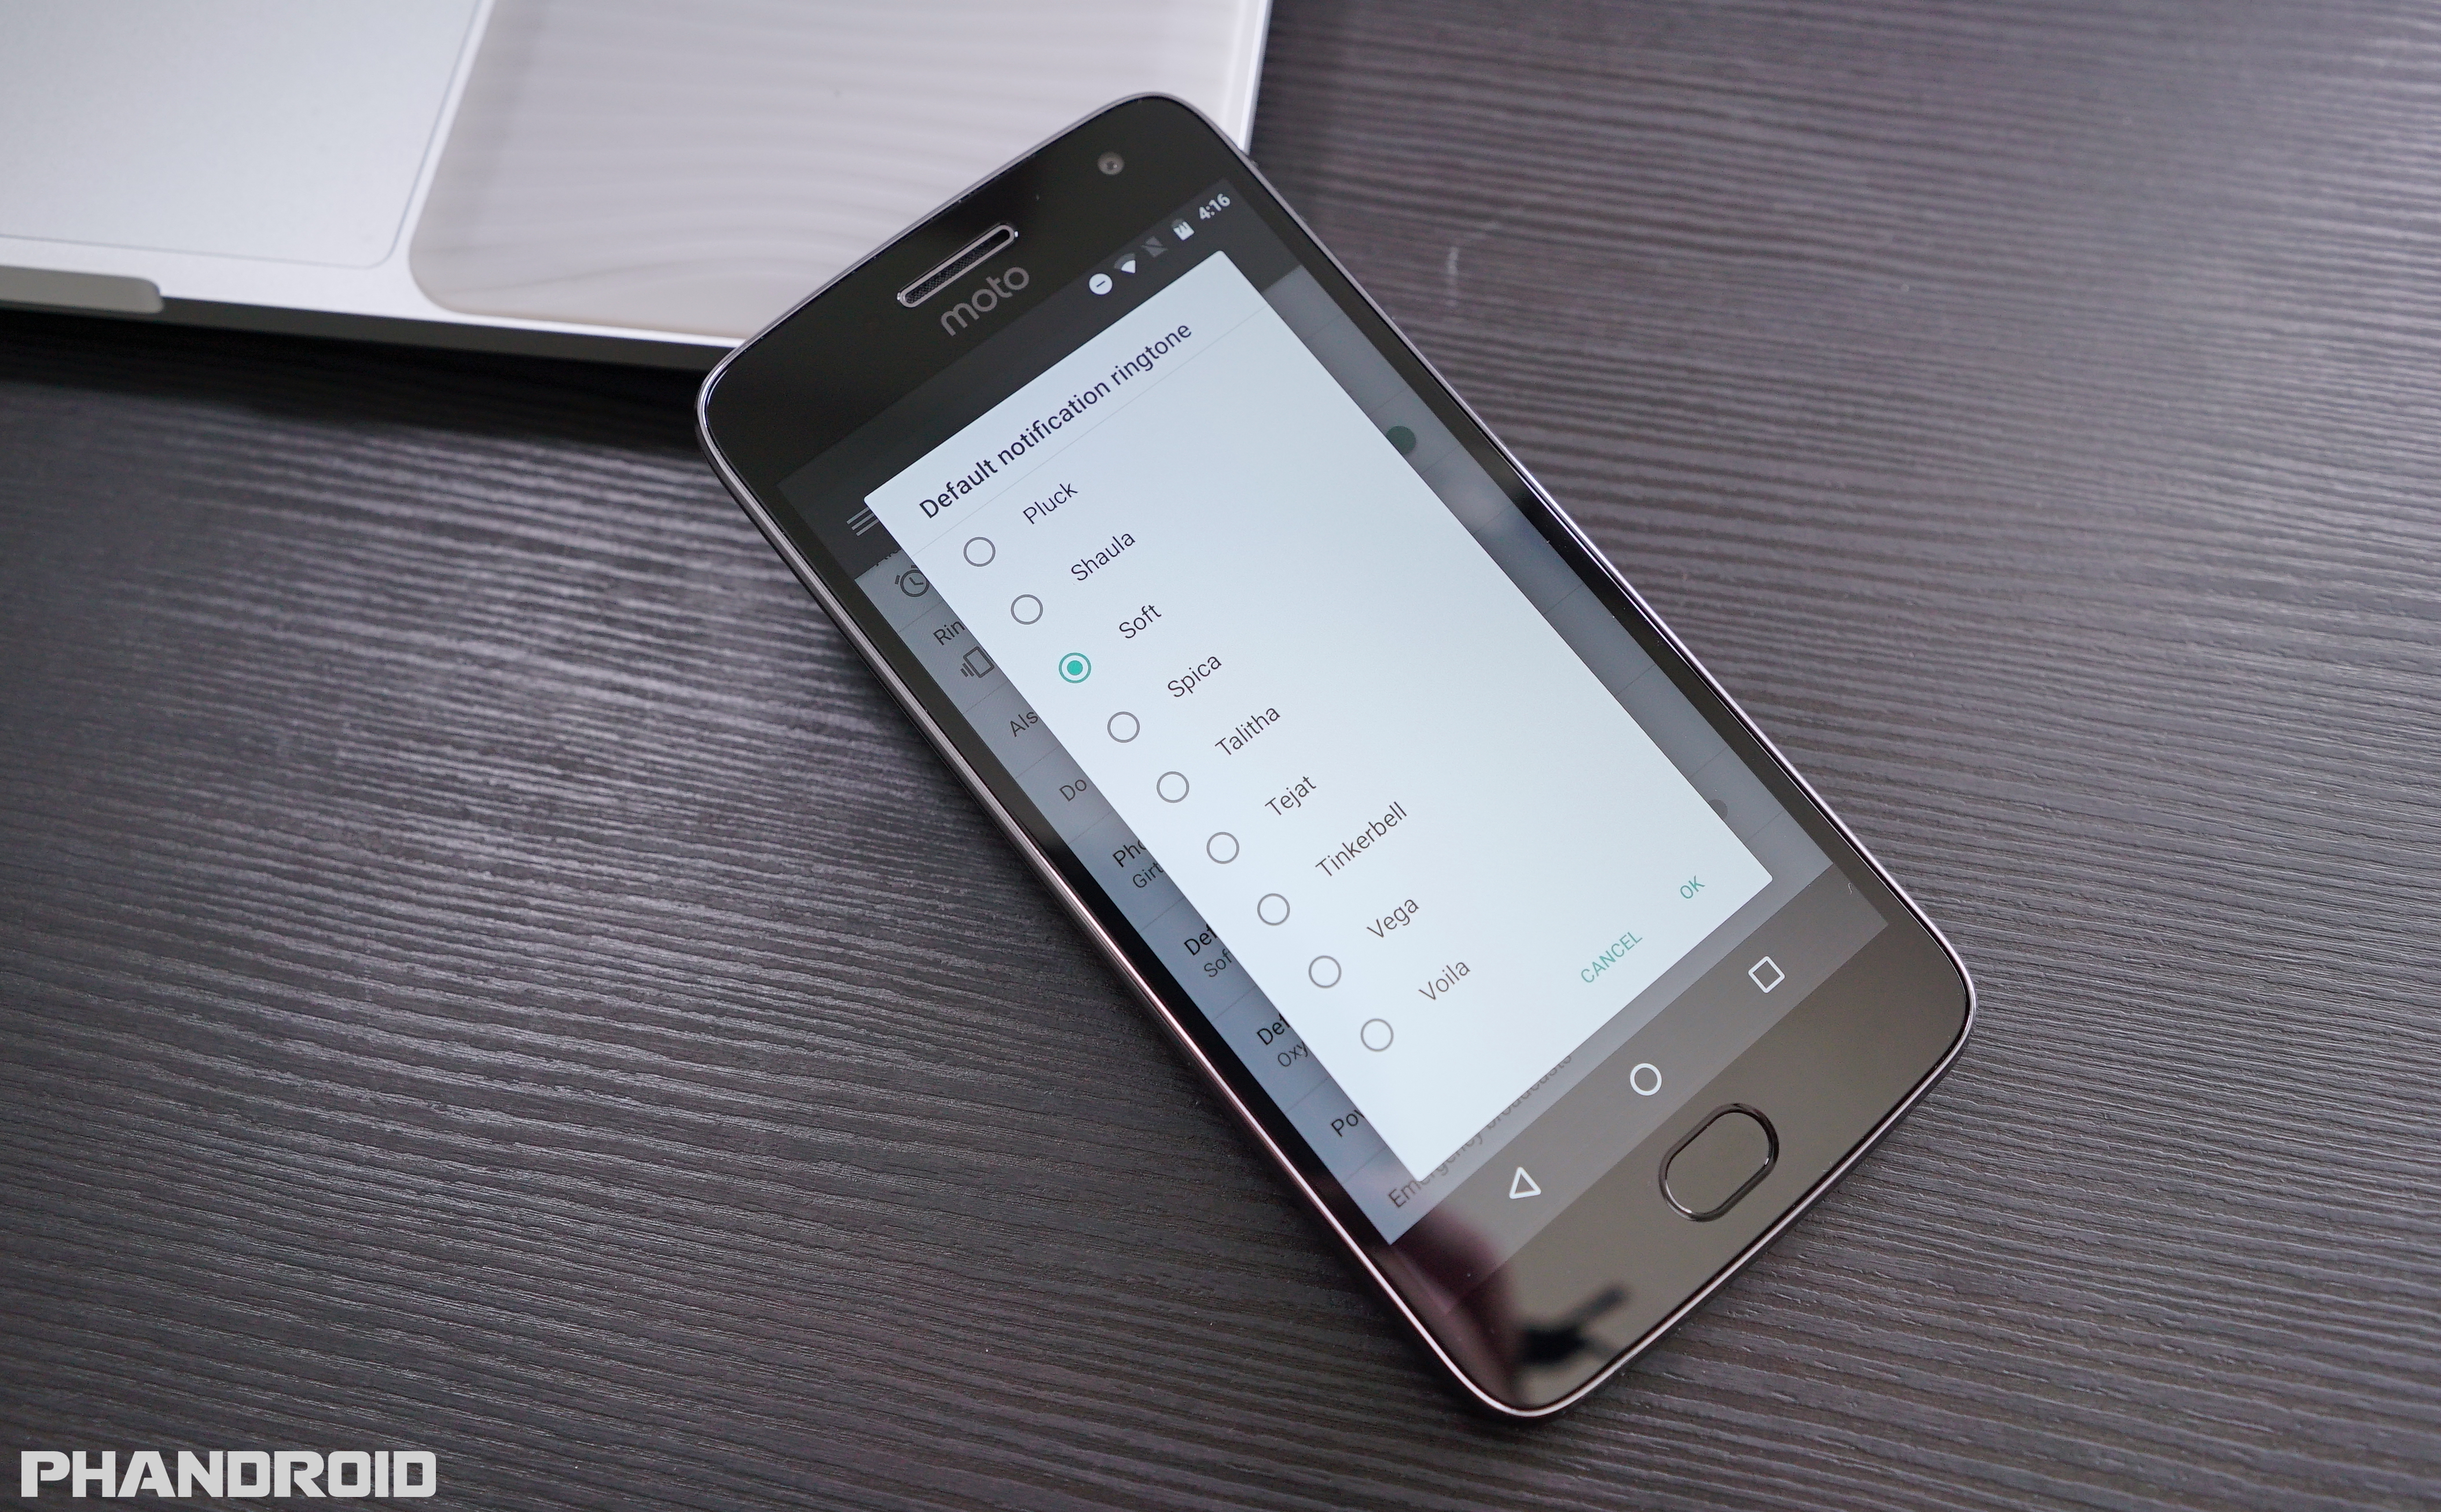
Well you’re at it, it’s probably best to change that obnoxious notification ring tone that’s no doubt putting you on edge. Not sure why Moto went with this as their default, but you can easily change the default notification tone inside Settings > Sound > Default notification ringtone > desired tone.
Show the battery percentage inside the battery icon

By default, the Moto G5 Plus will show you how much battery you have left in the form of a slowly depleting battery icon in the status bar. If you’re looking for a little more detailed info, you can actually have it show the actual percentage inside the battery icon. It’s actually hidden inside a special setting called System UI tuner, but here’s how you enable it:
- Slide open the notification panel
- Hold the Setting gear icon until you feel a vibration
- When released, you’ll see message “Congrats! System UI Tuner has been added to Settings“
- Open the Settings app
- Scroll down and select System UI Tuner
- You’ll see the “Fun for some but not for all” warning, tap GOT IT
- Tap on Status bar
- Scroll down and select Battery
- Select Always show percentage
Open hidden settings to speed up the UI

Easily one of the best things the Moto G5 Plus has going for it is its surprisingly nimble performance. To kick things up another notch and make the UI feel even more snappy, you can actually decrease the animation scale duration from inside the Settings app. It’s not available by default, so you’ll need to first enable the hidden Developer options by following these steps:
- Open the Settings app
- Scroll down and select About phone
- Scroll down and tap Build Number 7 times
- “You are now a developer” message will appear
- Press back and you’ll see a new setting: Developer options
Then…
- Open Developer options
- Scroll down select Window animation scale and choose .5x
- Select Transition animation scale and choose .5x
- Select Animator duration scale and choose .5x
Once you’re all done, go back to the home screen and turn off the display using the power button. Wake your phone to enjoy a speedier, more kicky fast UI. Keep in mind that the setting is persistent, so you don’t have to worry about having to redo anything after a reboot or system update.
Shoot 4K UHD video
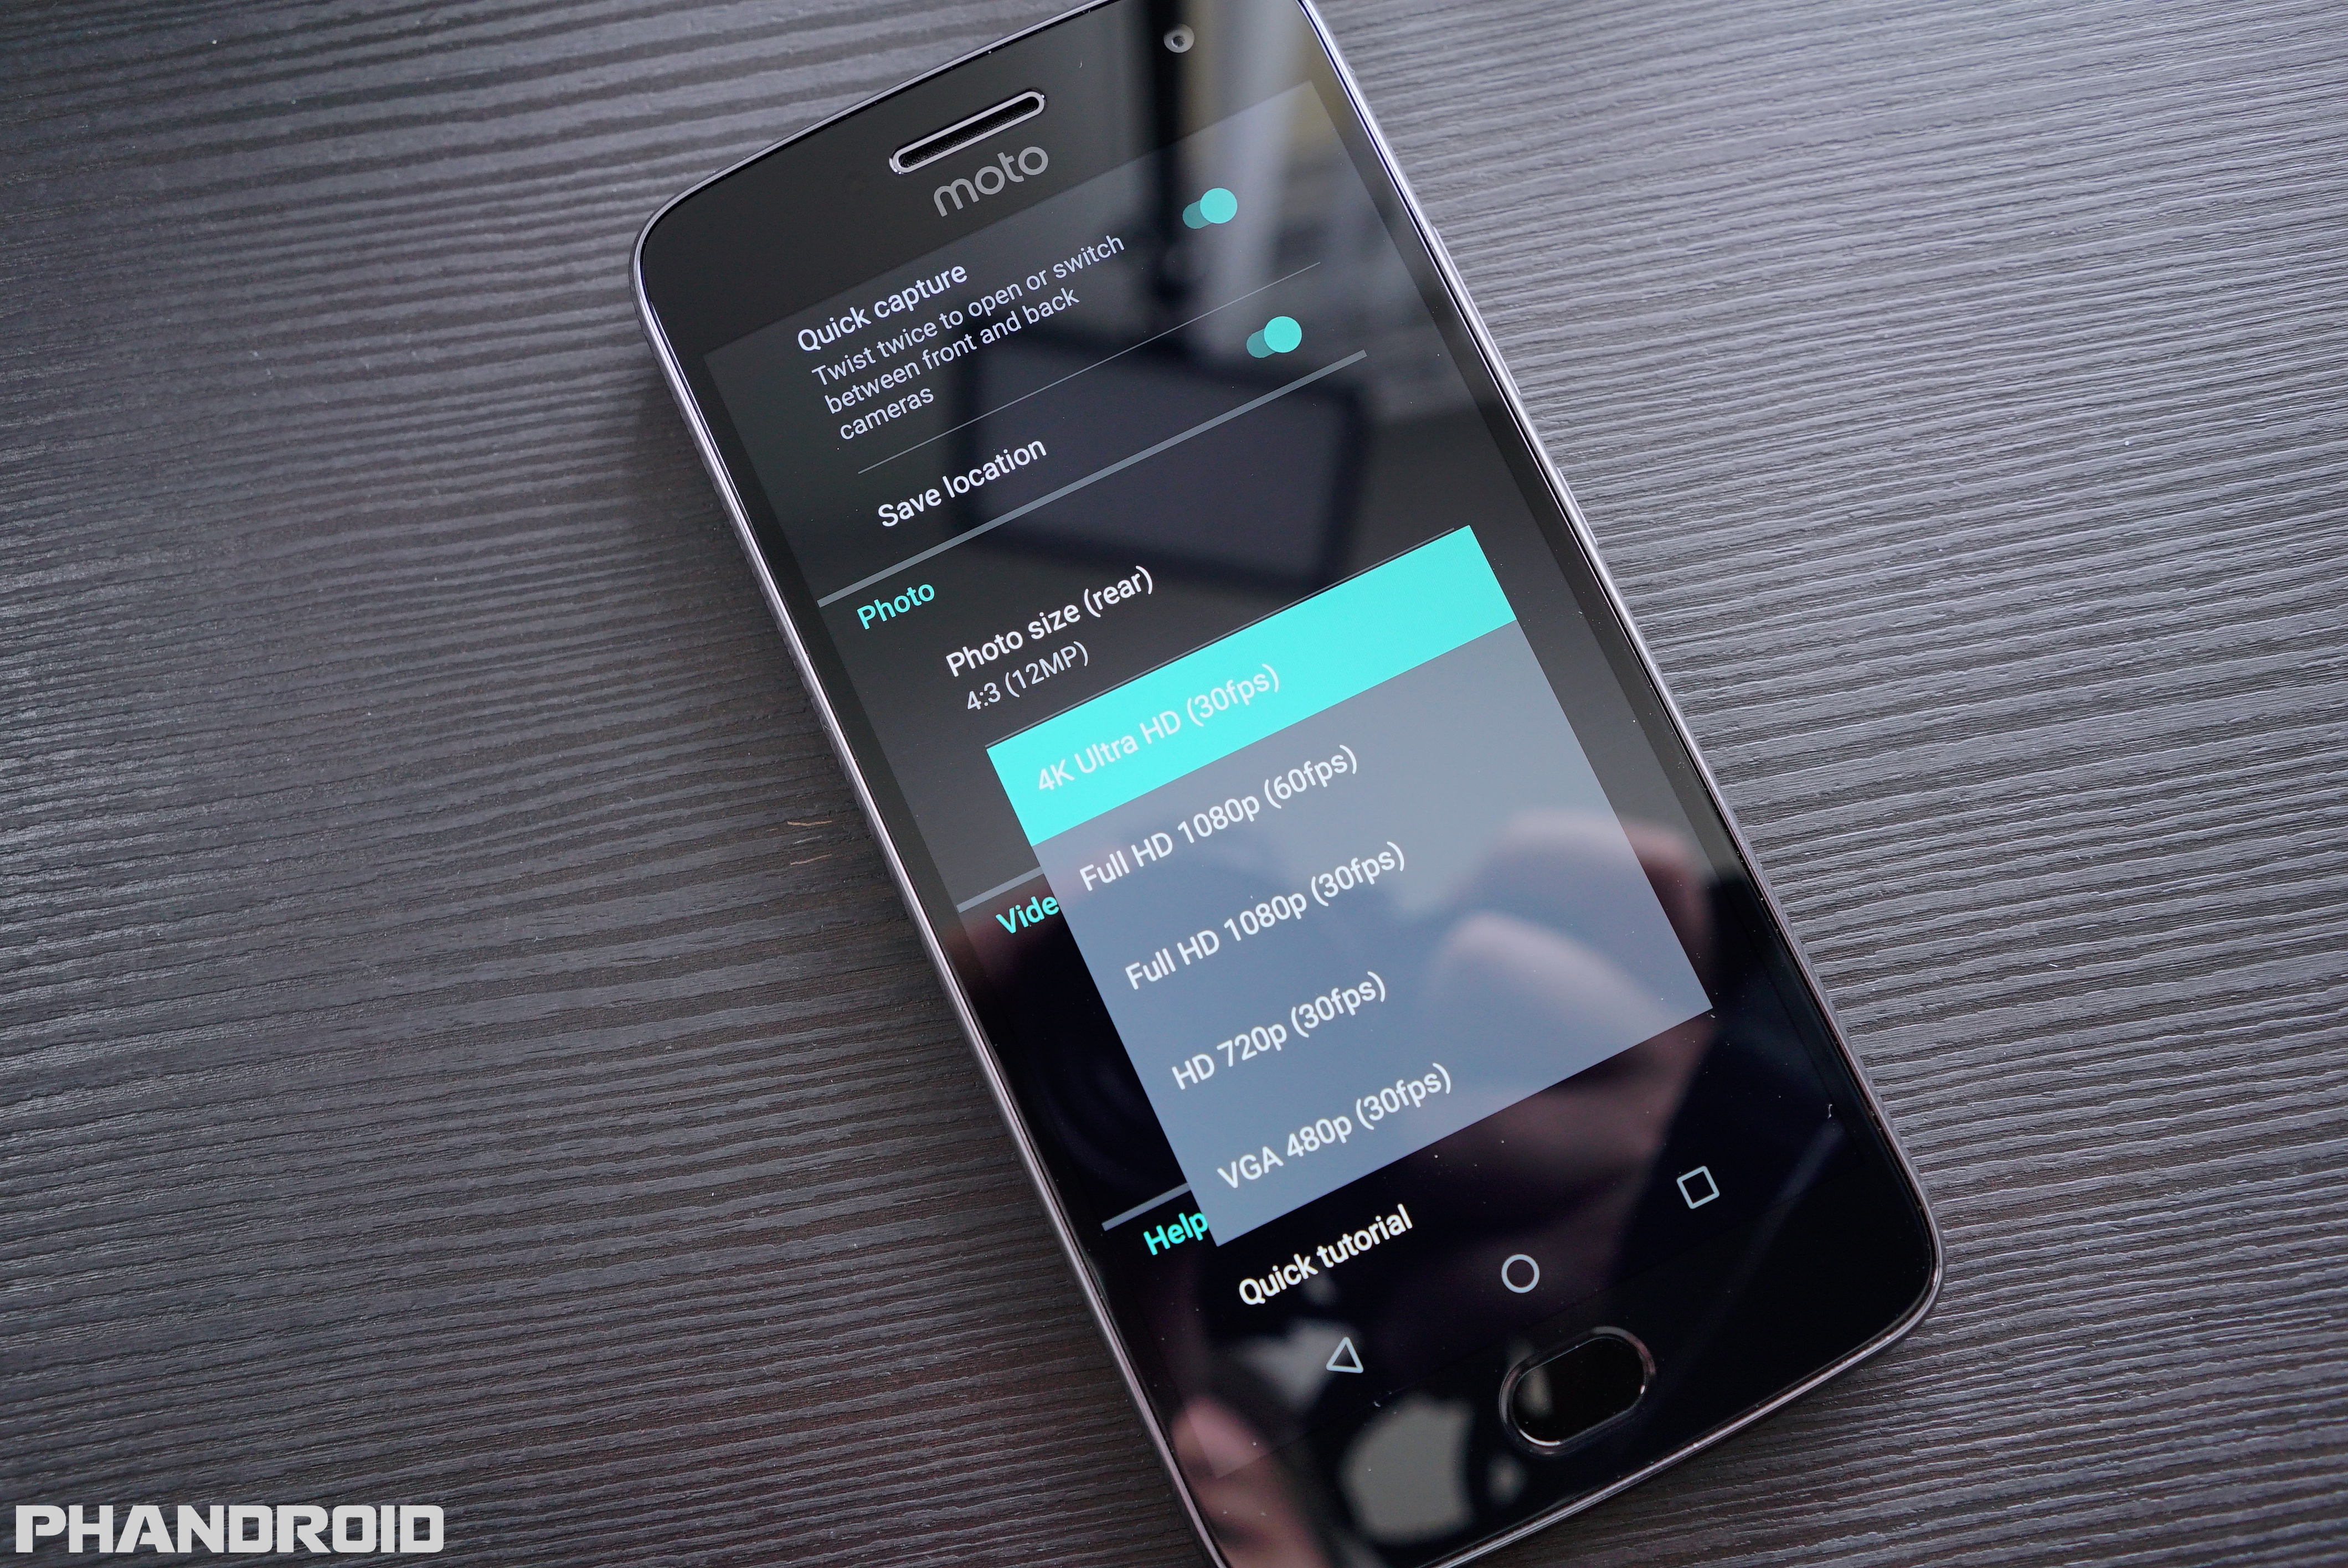
To shoot or record 4K video with the Moto G5 Plus, you just have to open the camera app then do the following:
- Swipe right from the left most edge of the display to open the camera settings.
- Scroll down and under Video select Video size (rear).
- Tap 4K Ultra HD (30fps).
- Close the camera settings
- Tap the camera icon in the bottom right corner
- Select Video
- Tap the red record button to begin shooting in 4K
Keep in mind that shooting in 4K will use significantly more storage space than a regular Full HD 1080p video, so it’s best used with the 64GB Moto G5 Plus, or when using an SD card as your method of storage (change this inside your camera app settings).
Backup unlimited photos/videos for free
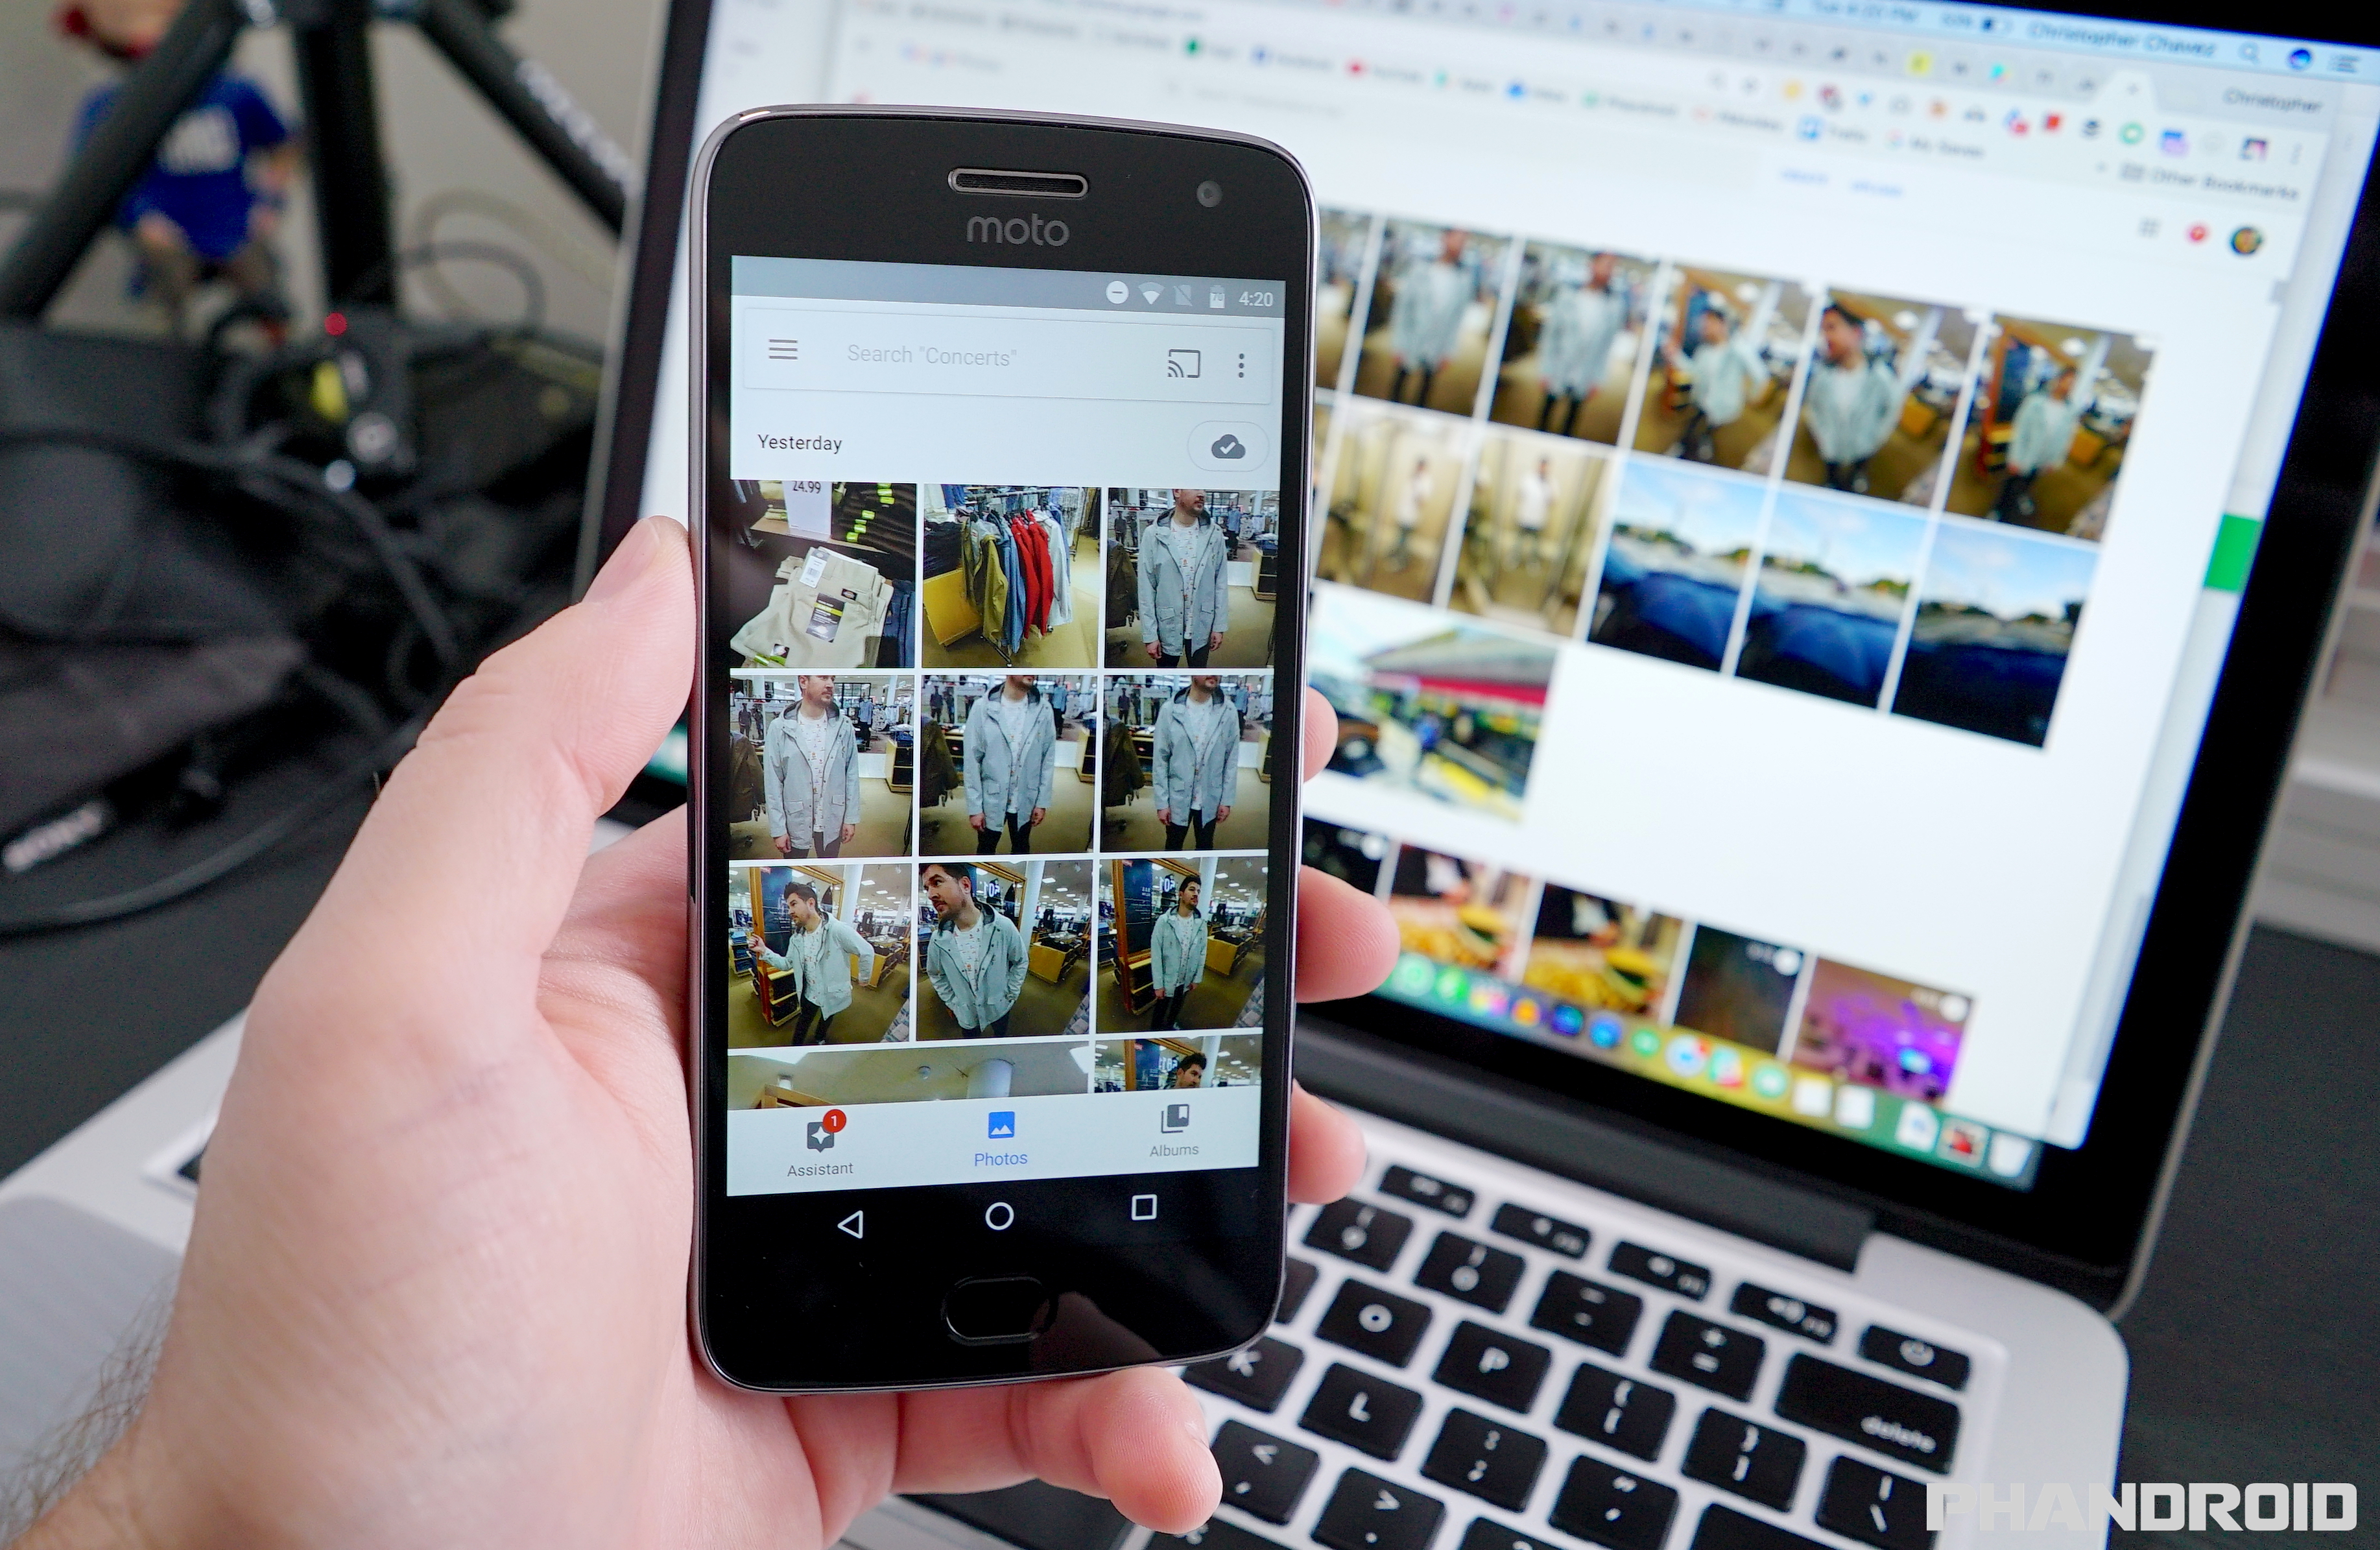
In the event your phone gets ever becomes lost or stolen, it’s important that you have all your photos and videos backed up safely online. Google is providing Moto G5 Plus owners with 2 years of unlimited full, original quality backups via the Google Photos app.
All you have to do is open the app and agree to the terms and you’ll be all set. You can further tweak your backup settings (for instance, to only backup while your device is charging and/or connected to WiFi) by opening Google Photos > menu > Settings > Back up & sync. It’s there you can fine tune and customize your backups:
- Choose between High quality photo/video backups (unlimited), or original quality (will use up your Google/Gmail/Drive storage)
- Back up photos Over Cellular (unlimited data plan recommended) or only when connected to WiFi.
- If you choose to back up photos over cellular, you can also choose whether to back up videos separately over cellular or WiFi.
- While charging only is a nice option so that backups wont use up precious battery (it also give you time to delete photos/videos before you plug in for the night).
- Select Choose folders to backup… to pick specific folders you want to also back up (by default, all your camera photos are backed up).
Once backed up to Google Photos, all your photos will be stored in the cloud and immediately accessible from all your devices, computers, or other web connected devices. After the promotional 2 years have expired, you will still have unlimited backups in high-quality for photos or 1080p for video.
Get Android’s regular lock screen notifications back
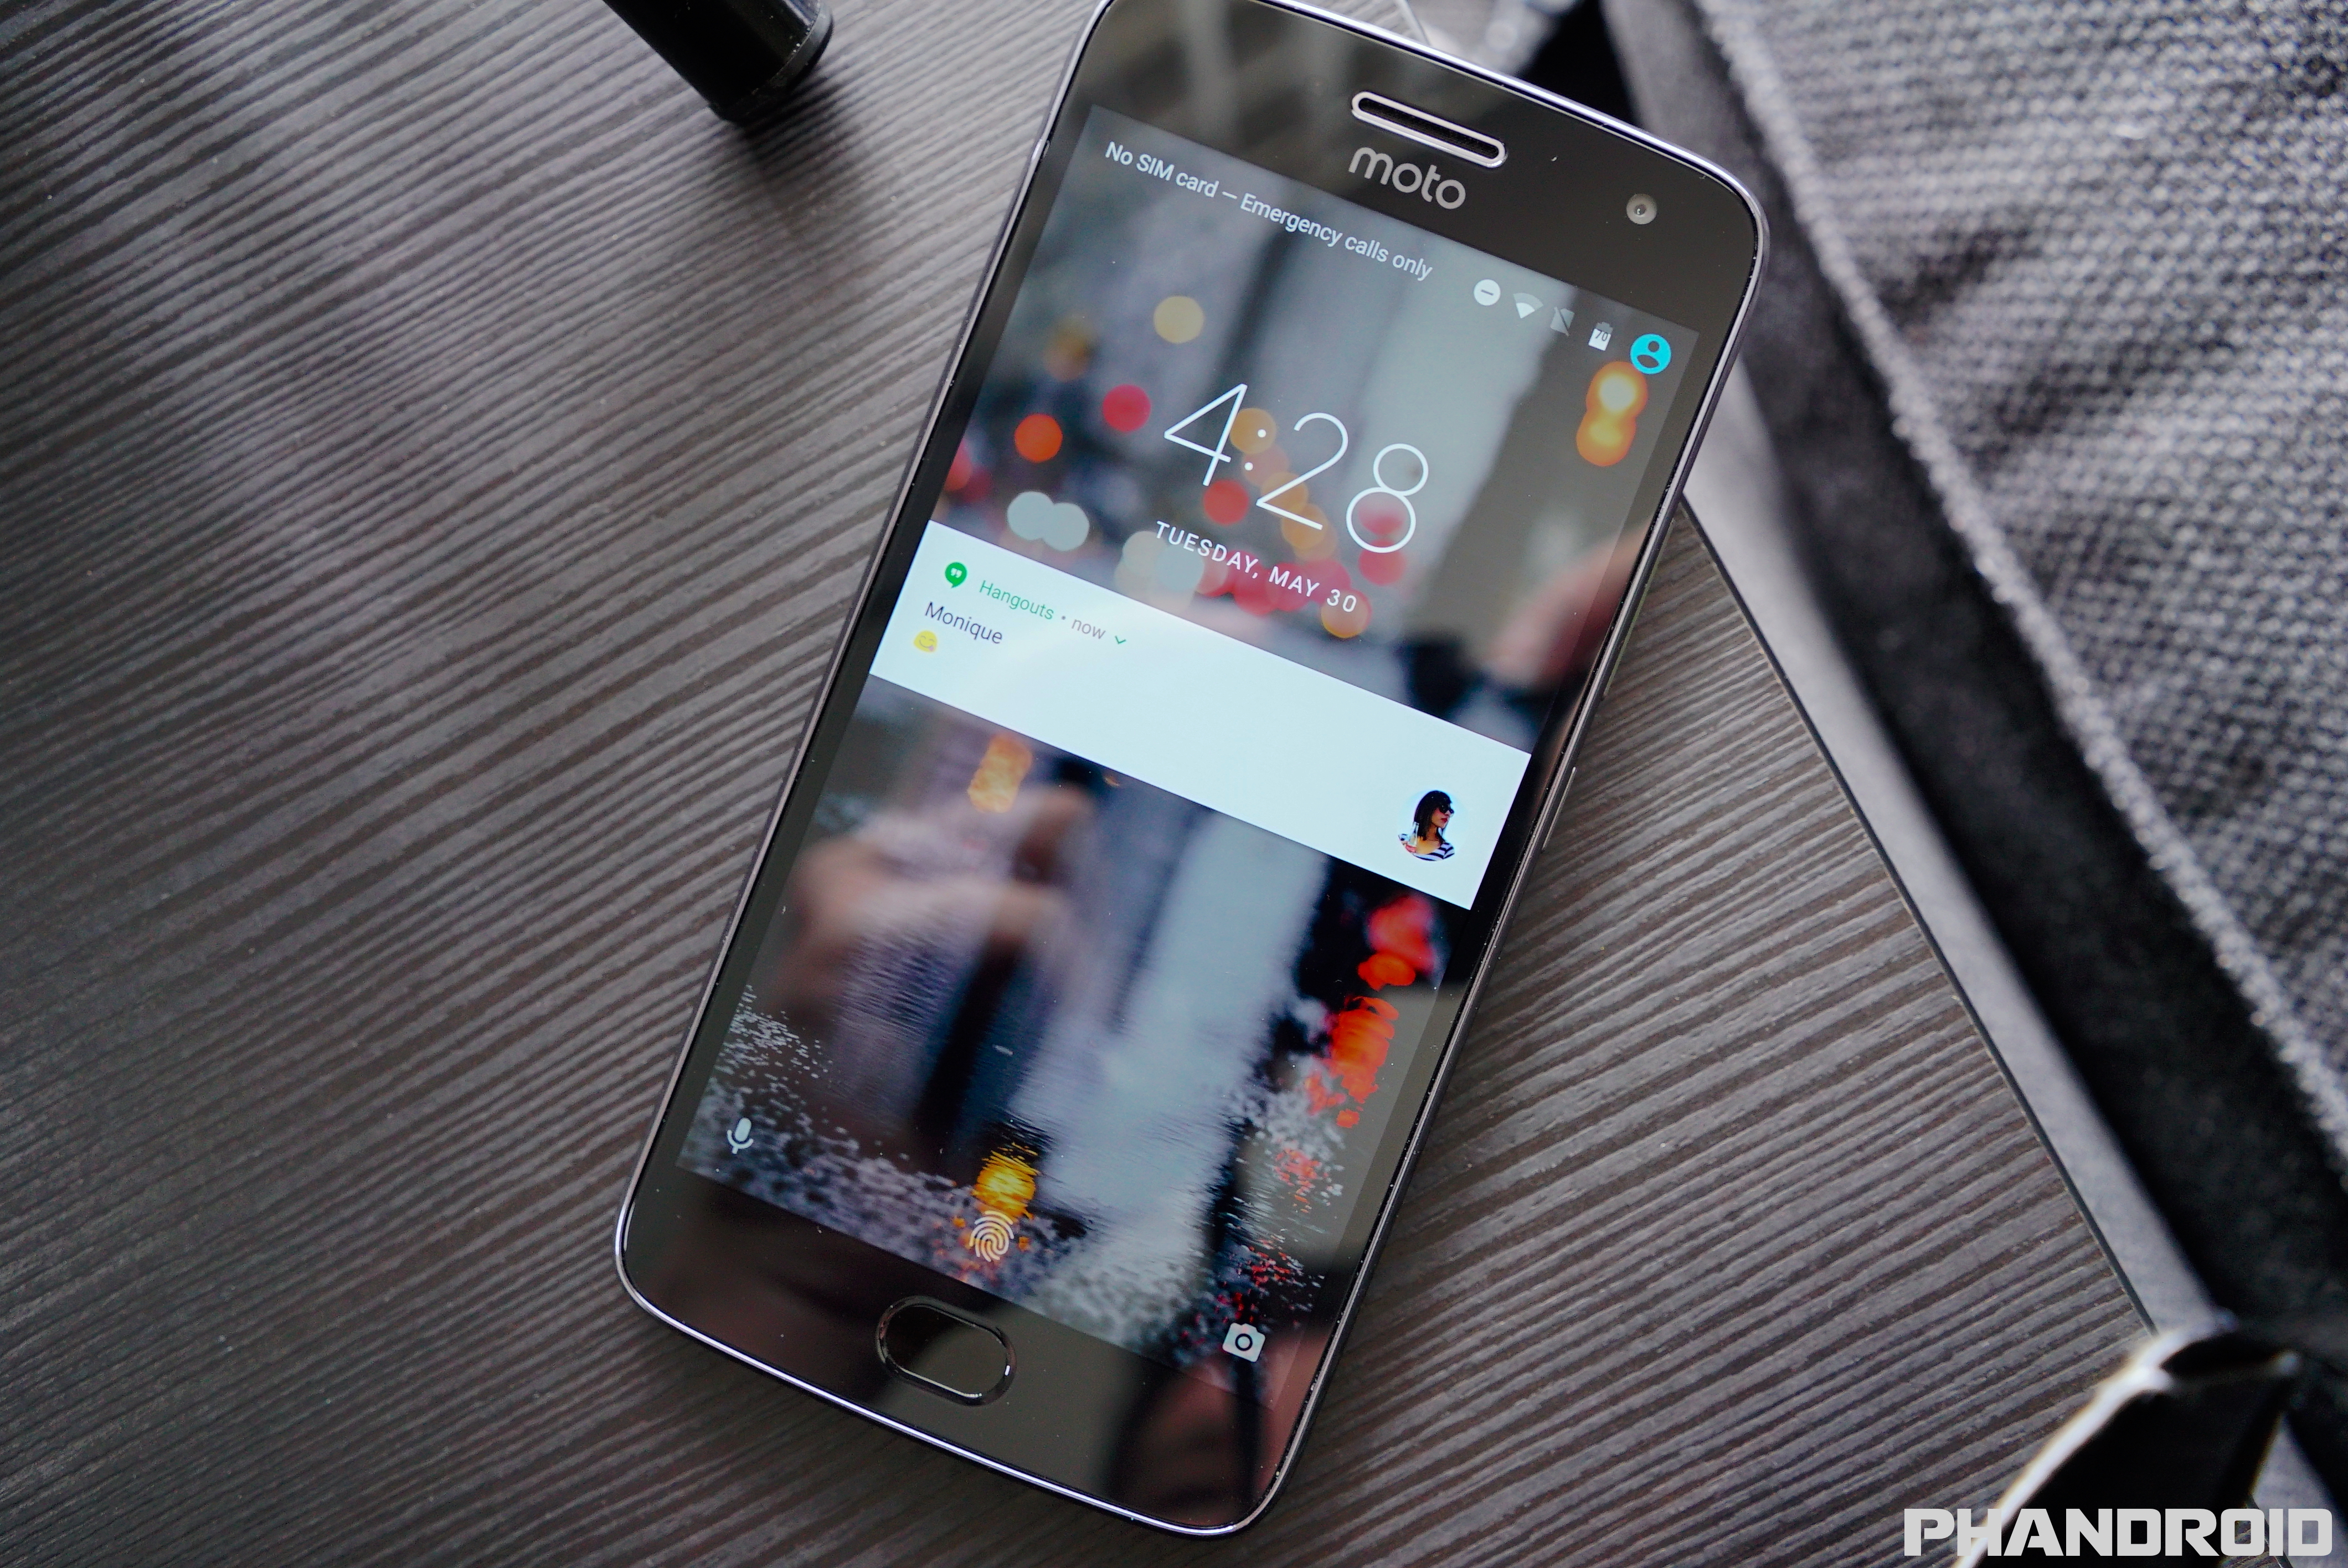
By default, the Moto G5 Plus uses their own specialized lockscreen called “Moto Display.” This provides battery friendly notifications that fade in/out when your screen is off, so you can quickly see which apps sent you a notification at a glace. On AMOLED devices, this can help conserve battery life thanks to the display being mostly black, but it doesn’t have the same effect on LCD devices like the Moto G5 Plus. To help keep things simple (and save some battery in the process), you can turn this off:
- Open the Moto app
- Tap on Display
- Switch off the toggle for Display
Schedule automatic “Do not disturb” times
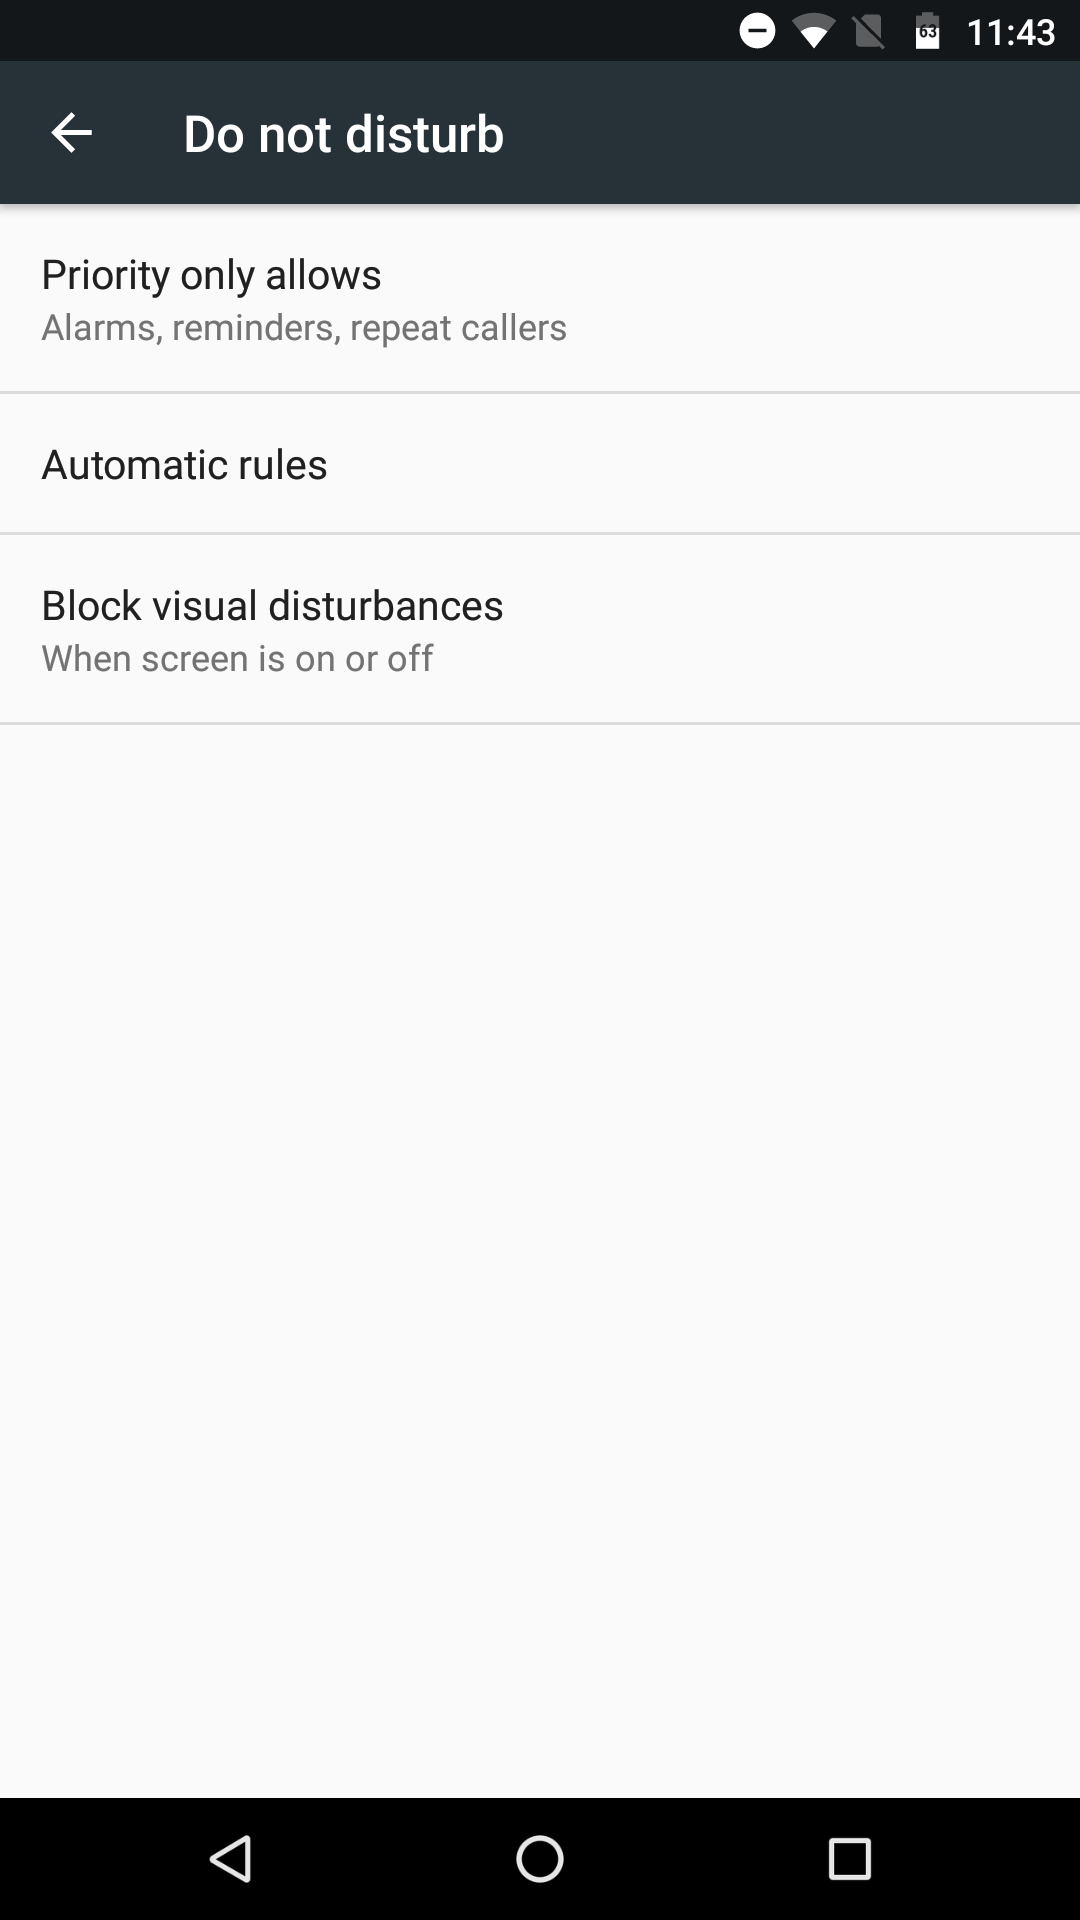

There’s no reason your phone’s notifications should ever interrupt a good night’s sleep. While you can always manually set your phone to silent every night (providing you remember), you could also automate this entire process by setting up automatic Do Not Disturb schedules. This will mute your phone, but still allow some high priority notifications to come through (calls from specific contacts for instance). The best part? You’ll never again have to remember to mute your phone before bed. Here’s how you can set it up:
- Open the Settings app
- Scroll down and select Sound
- Tap on Do not disturb (Make sure your ringtone volume is on)
From here, you can choose between always having it on everyday, setting specific times and days you want DnD to activate (Automatic rules), and what notifications you would still like to come through (Priority only allows). For instance, you may want to only allow calls from your contacts, your favorite contacts, or repeat callers to come through in the event of an emergency.
Learn how to find a lost or stolen Android phone

It’s something nobody thinks about until it happens, but one of the worst things that could happen to you is losing your smartphone or having it stolen. In the event that your device does go missing, you need to know exactly how to recover your device or erase any personal information stored therein.
Android’s built-in feature — “Android Device Manager” — is the perfect way to track down a lost device, you just need to know where to find it.
- Go to google.com/android/devicemanager
- Select your phone from the drop-down menu.
- You’ll see the device on a map and a few options for finding it (ring), locking it (if it wasn’t locked already), or erasing all of its contents with a full factory reset.
Read More: How to find a lost or stolen phone
Visit Android Forums to learn more

We’ve covered a ton of ground here, but we’re only just getting started. Although tutorials like this are certainly helpful, sometimes the best way to learn more about your device is by chatting it up with others.
AndroidForums is a great place to get started on your new smartphone journey. It’s there you’ll find plenty of tips, tricks, and discussions relating to your specific device. If you have any questions, sometimes the best place to ask them is there, where you’ll connect with other like-minded Moto G5 Plus owners like yourself. Along with countless “how to” posts detailing the phone’s best features, here are a few posts to help get you started on your journey:


Comments