14 things every Moto G 2015 owner should do

After learning everything you need to know about the Moto G 2015, you decided to drop a couple hundos and make the purchase. You’re about to tear open the box – or maybe you already have – and are now wondering where to start. Why right here, of course: these are the first 14 things every Motorola Moto G 2015 owner should do.
(1) Make room for all your stuff
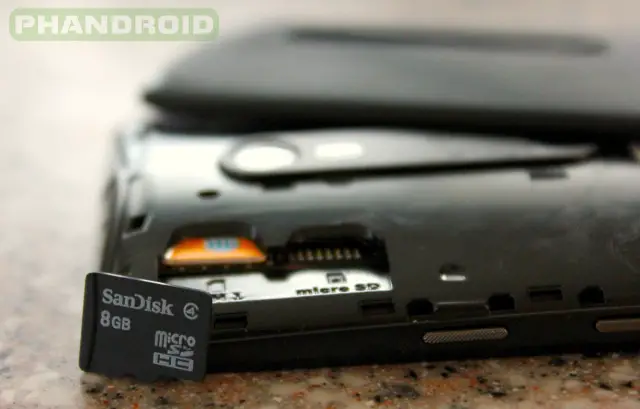
Depending on which variant of the Moto G you bought, you’ll either have 8GB or 16GB of storage. A healthy portion of that will be taken up by the Android Lollipop operating system, leaving you with even less space for your own use. Thankfully, the Moto G has a removable cover and microSD slot, allowing us to make room for up to 32GB of additional space.

Amazon often has deals on microSD cards and we’d personally recommend San Disk for their combination of reliability and price:
- 8GB microSD by San Disk (Amazon)
- 16GB microSD by San Disk (Amazon)
- 32GB microSD by San Disk (Amazon)
There is a good chance that 64GB and 128GB cards will also work in the Moto G 2015, but Motorola is only officially supporting up to 32GB cards, so that’s all we can safely recommend.
(2) Avoid mayhem with 5 taps
Now that your phone’s blank canvas is prepared for an influx of apps and games, let’s make sure that you don’t accidentally auto-download those over your cellular connection, eating up gigabytes of mobile data and hitting your wallet with overage fees.
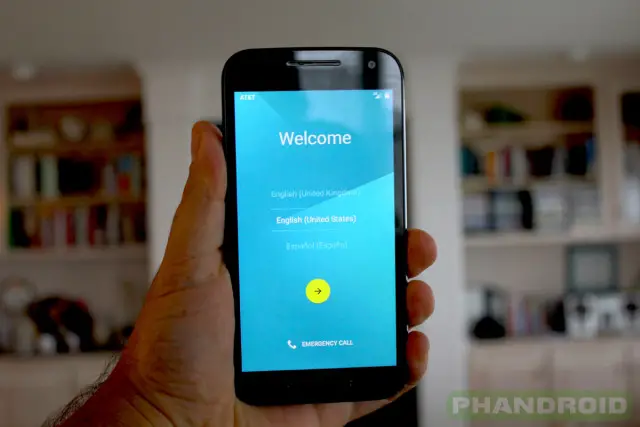
Google will ask you, during the setup process, if you want to connect to a WiFi network (you should, if you can). Better yet, Google will remember the names and passwords of previous WiFi networks you’ve used in your account.
But what if you’re not within range of a Wi-Fi connection? And you really, really, really want to set up your phone? Or maybe you’ve accidentally skipped the Wi-Fi step and apps are downloading in rapid fire and panic has set in? No problem…
- Open the Google Play Store
- Tap the menu icon in the top left
- Tap “Settings”
- Make sure “Auto-update apps” is set to “over Wi-Fi only”
- Make sure “Add icon to Home screen” is unchecked
Another option: turn mobile data off just to be sure.
This will ensure that huge files aren’t downloading over your mobile data connection. And when they do download – over Wi-FI – your home screens won’t be overflowed with an unorganized tyranny of endless app icons.
(3) Transfer stuff: old phone to new phone
Chances are you’ll want to take all of the stuff from your old phone and bring it to your new phone. There are two ways to do this and you’ll want to use both:
- Android Lollipop’s new “Restore” feature
- Motorola Migrate on the Moto G 2015
Android’s new “Restore” feature is fantastic, allowing you to choose a recently used Android Phone and clone the apps, games, and settings to your new phone. You’re able to manually select from a list of apps to sync which means you’ll download exactly what you want to your new device: no more, no less.
This all takes place during the initial setup process, so make sure you don’t overlook or skip the “Get your apps & data” screen. Make sure you select the right source device and modify the list of apps so it only installs what you want. To be safe, you may want to wait until you’re at home and connected to a Wi-Fi network to complete this step. When you’re done, here is what will be restored:
- Google Calendar settings
- Wi-Fi networks & passwords
- Home screen wallpapers
- Gmail settings
- Apps installed through Google Play (backed up on the Play Store app)
- Display settings (Brightness & Sleep)
- Language & Input settings
- Date & Time
- Third-party app settings & data (varies by app)
Motorola Migrate will get you the rest of the way, restoring items that were on your old phone and ONLY your old phone (not saved in the cloud). Like those awesome vacay pics you never got around to posting on FB/IG.
- Contacts
- Messages
- Photos
- Videos
- Music
- Call logs
You can complete Motorola Migrate during Android’s initial set up process (it’s the last step) or afterwards. All you need is the Motorola Migrate app which you can download from the Google Play Store.
The process couldn’t be simpler:
- Download Motorola Migrate on both phones (old and new)
- Launch Motorola Migrate on the new phone
- Choose to migrate data TO this device
- Launch Motorola Migrate on the old phone
- Use the old phone to scan the QR Code
The two devices will form a peer-to-peer connection and beam over everything you selected through a direct Wi-Fi connection. And by the way… iPhone users can also use Motorola Migrate.
(4) Update all the things
From the time you custom designed your phone on Moto Maker to the moment it arrived at your doorstep, the apps on your Moto G have been collecting dust. Many of the apps that come pre-installed on the device will have important updates waiting on the Google Play Store, from bugs and security patches to completely new features and functionality. You set up Automatic Updates (over Wi-Fi only) in a previous step, but there’s a good chance that apps with new permissions are waiting for your approval.
Make sure all of your apps are updated:
- Open the Google Play Store
- Tap the menu icon in the top left
- Tap “My apps”
- Tap the “Installed” tab
- Tap the “Update All” button
There you go. Now everything is super fresh and up to date.
(5) Download the Best Apps & Games
Yay! Now that you’re back and up to date (or at least all your stuff is), it’s time to become better than ever.
In the steps above we’ve taken all the your favorite stuff from the past and brought it into the present. Now we’ll bring your phone into the future with our lists of best apps and games.
When it comes to the Best Games for the Moto G 2015, let’s be honest: it doesn’t have the most beefy processor in the world. Get any delusions of playing first person shooters with crystal clear graphics out of your head now and let’s pick some simple games that we know will run just fine. Here are some recent Phandroid favorites:
- 12 Grapes
- Agar.io
- Outpost Command
- Piloteer
- Prismatica
- Quadrush
- Spin Commander
- Sword of Xolan
- Zero Punctuation: Hatfall
MORE: Best Games of the Month
When it comes to the Best Apps for the Moto G 2015, the world is your oyster. There are always brand-spanking new apps and games, bigger and better improvements, and crazy new concepts that will blow your mind. To keep on top of the best new apps and games, we suggest you follow our regularly published series of best apps. Here are some great ones to start with:
- Nova Launcher (Home Screen Replacement)
- MyRoll (Gallery replacement)
- Google Camera (Camera replacement)
- Noyze (Volume controls)
- My Paid Apps (View paid app purchase history)
- Push Bullet (Get Android notifications on your computer)
- Viral Lite (Floating YouTube player)
MORE: Best Apps of the Month
(6) Clear out redundant notifications
All those apps and games could cause a you-know-what storm of notifications if you’re not careful. By default, two completely useless tidbits are needlessly stuffed into your notification tray, taking up space and looking ugly: carrier branding and the icon of the app you’re currently using. You can easily remove both of these, leaving more room for things that actually matter.
To remove carrier name from notifications:
- Open Settings
- Tap “More” in the “Wireless & networks” section
- Tap “Cellular networks”
- Uncheck “Show mobile network”
To remove current app icon from notifications:
- Open the “Moto” app from the app tray
- From the “Hello” Screen tap the 3-dot overflow icon in the top right
- Tap “Settings”
- Uncheck “Notifications: Show the current activity in the status bar”
There may be times you want these features enabled (roaming, new apps, etc…), so if you prefer them enabled, just leave them enabled.
(7) Prepare for disaster
When your phone is lost or stolen it feels like the world might end. Nothing could be worse. You’ve lost everything and there is no way to get it back. And oh my god, all the sensitive information that would spell disaster if it fell into the wrong hands!
This is your friendly reminder to prepare RIGHT NOW!
- Download the Android Device Manager app
- Enable Motorola ID in Settings > Motorola ID
- Set a screen lock in Settings > Security > Screen lock
- Add contact info to home screen in Settings > Security > Owner info
For more on the topic, read our full guide to finding a lost or stolen Android Phone.
Don’t worry, we’ll wait patiently right here while you complete the above. You’ll thank us later.
(8) Setup the world’s easiest unlock
Your phone is now a treasure chest of highly secured awesome. The only thing between you and its magical powers are the lock screen. Trust us, you DO want to protect your phone with a lock screen, but the Moto G has some secret features that allow you to completely bypass the lock screen when it knows you – and only you – are using it.
After setting up your lock screen of choice:
- Go to Settings > Security > Smart Lock
- Trusted Devices: auto-unlock when within range of a bluetooth device that you own
- Trusted Places: auto-unlock when at specific address you designate (home, work, etc…)
- Trusted Face: unlock with your face using selfie camera
- Trusted Voice: let “Ok Google” unlock your device when voice matches yours
- On-body detection: keep unlocked when in your pocket
I’d personally recommend using trusted devices and places (voice is a toss-up). Trusted face is too cumbersome to be practical and I found on-body detection to cause too many errant butt-dial style mistakes.
(9) Protect your privacy
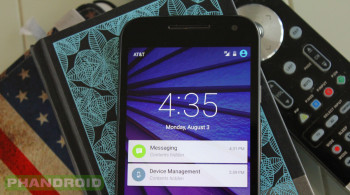
Getting messages on your lock screen is a beautiful thing, especially with Moto Display, but sometimes personal or private notifications slip through the cracks. Whether you’ve got someone looking over your shoulder or your phone is sitting on the table, getting the wrong notification at the wrong time can cause great embarrassment (or worse).
The Moto G 2015 has a feature that prevents you from showing confidential information but still let’s you enjoy the benefits of lock screen notifications.
Here is how you can keep your top-secret information top-secret:
- Open the Moto app
- Tap “Display (I notify you at a glance)”
- Tap “Wake screen when notifications arrive” and select “Moto Display”
- Tap “Block apps” and choose apps you NEVER want to display notifications
- Tap “Select how much detail shows” and select “Hide sensitive notification content”
If you get a notification you wish had been added to privacy settings, simply long press on the notification for more options and then the “i” icon for more information. From here you’ll be able to completely block certain apps from showing ANY notifications. You can access this option for any app at any time by going to Settings > Sound and notifications > App notifications > Select an app.
(10) Do not disturb
We’re on a roll with keeping unwanted people out, so let’s continue with that theme by enabling “Do not disturb” mode. It’s called “Interruptions” on the Moto G but I don’t personally care for that naming- who wants to enable interruptions? That seems confusing. I’d prefer Google/Motorola call it “Do not disturb” and allow for “exceptions” in the settings, but I digress.
After one quick click of the Volume rocker, you’re able to toggle between three notification types: None, Priority, and All. The first and last are obvious. The middle one – Priority – is essentially the “exceptions” that are allowed while in Do not disturb mode.
Here is how to best set it up:
- Go to Settings > Sound & notification > Interruptions
- Choose what interruptions you want (Events/Reminders, Calls, Messages)
- Choose what contacts are allowed to interrupt
- Choose downtime days/hours (pre-scheduled “Do not disturb” time)
You can also use Moto Assist to prevent interruptions while you’re sleeping (manually set sleep times) and during meetings (based on selected calendar). The sleep schedule seems a bit redundant and inconvenient, but the “Meetings” feature in Moto Assist is definitely worth a shot.
You can also add Places to Moto Assist so that you never get calls or messages when you’re in important places like a movie theatre, church, etc… simply add a “Place” to Moto Assist through the Moto App and select “Custom”.
(11) Make Google Now your personal butler
If you swipe to the right from your Moto G home screen you’ll be taken to Google Now. If you’re new to Android, Google Now is essentially a personal assistant that attempts to show you what you want to see, before you even ask for it. If you’re already a Google Now user, take this time to update your preferences to make it even better.
- Swipe right from the home screen to open Google Now
- Tap the menu icon in the top left
- Tap “Customize” and personalize your options
- Go back to the menu and tap “Settings”
- Tap “Voice” and turn on all options
- Tap “Phone search” and include all options
- Tap “Show cards” and make sure it’s turned on
Google Now is only going to get better. And if you’re not you’re not using voice commands then you’re missing out: it’s one of Android’s best features. That being said, you’re free to turn off Google Now altogether if you’d like: go to Google Now > Settings > Now Cards > Show Cards (off). This will also remove the Google Now page from your home screen.
(12) Optimize for better battery life
Some things on this earth are precious. Battery life is one of those things. To get the most distance from your Moto G, we recommend a few battery saving tips:
- Go to Settings > Battery > Menu > Battery Saver > Turn on automatically at X% battery
- Go to Settings > Display > Adaptive brightness > On
- Go to Settings > Display > Sleep > and choose the lowest duration that’s not irritating
- Black wallpapers drain less battery: put your finger over the camera lens, take a picture, and set it as your wallpaper
- Go to Settings > About phone > Build number (10 times) to enable developer mode. Then go back, select developer options, scroll down to the “Drawing” section, and turn all of the “Animation scale” options to “Animation off”
- Turn on Airplane Mode whenever you don’t plan on using your device for extended periods (this turns off Wi-Fi, Bluetooth, and Cellular Data). Turn them off selectively if you need one or two active.
These are just a few battery saving tips and tricks, but if you really want to be prepared, try keeping an external battery pack handy.
(13) Master Moto G Tips & Tricks
There are a handful of tips and tricks that are exclusive to Motorola and the Moto G 2015. Among them are an awesome way to quickly access your flashlight and camera while your phone is off.
To turn on and off the flashlight, make a “chop” motion two times.
To launch the camera, twist your wrist twice while holding the phone. Twist twice again to switch from rear camera to front camera.
I didn’t particularly like this feature because I found its success spotty and also found it sometimes launched the camera accidentally (like while running). However… useful to know if you can get the hang of it. My success rate was improved after mentally changing my approach from “Twist wrist twice” to “Do the cupped hand Ms. America wave”.
Stay tuned for a full list of Moto G 2015 Tips & Tricks in the coming days.
(14) Get help: the Moto G 2015 Forums
It’s impossible for everyone to know everything. And with the combination of devices, carriers, apps, games, locations, settings, etc… you’re sure to run into unique problems that you just can’t find the answer to online. That’s why you’ve got the Moto G 2015 Forums on where else but AndroidForums.com.
Head over there for everything related to the Moto G 2015 including Help/Support, Tips/Tricks, Rooting, and Downloads.
MORE: Moto G 2015 Forums
