How to upgrade PlayStation 5 SSD storage
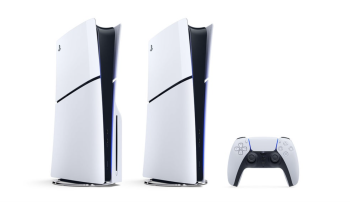
Sony launched the PlayStation 5 (slim) with 1TB SSD internal storage and nearly 842GB is available for users. The storage space is even lower for users with the original version which comes with 825GB SSD. This version offers about 667GB of space available to users. While this may sound like a lot of space, it is not when you consider how big games have started to become.
It is now common to see games requiring at least 100GB of free storage space. This means you cannot keep a lot of games installed together with internal storage space provided by Sony. It is the reason PlayStation 5 supports storage expansion. The best part is it is a simple and easy-to-follow process for PS5 storage expansion.
PlayStation 5 SSD Storage Requirements
Sony has strict requirements for what kind of SSDs can be used for PlayStation 5 storage expansion. It is to ensure players do not get performance issues while playing their favorite games.
- Interface: PCIe Gen4 x4 M.2 NVMe SSD
- Capacity: 250GB to 4TB
- Sequential Read Speed: Minimum 5,500MB/s
- Form Factor: 2230, 2242, 2260, 2280, or 22110
- Socket Type: Socket 3 (Key M)
- Total Size Including Heat Sink: Width up to 25mm, Length: 30/40/60/80/110 mm, and Thickness up to 11.25mm
Here are some PlayStation 5 SSDs you can consider:
- BLAZING SPEED. COOL VICTORY: Consider this a cheat code; Our Samsung 990 PRO Gen 4 with Heatsink SSD helps you reach near max...
- REACH THE NEXT LEVEL: Gen4 steps up with faster transfer speeds and high-performance bandwidth; With a more than 55%...
- NEXT-LEVEL PERFORMANCE W/MAXIMUM HEAT CONTROL: The integrated heatsink disperses heat to maintain speed, power efficiency,...
- MAXIMUM SPEED: Powered by an in-house controller designed to harmonize the flash memory components and the interface for top...
- Extreme Gen4 Storage Performance on PS5: Expand your PS5 storage capacity with a PCIe Gen4 x4 SSD that delivers up to...
- High-speed PCIe Gen4 x4 M.2 NVMe 1.4 Interface: Using PCIe Gen4 technology for maximum bandwidth, the MP600 PRO LPX delivers...
Upgrade PlayStation 5 SSD Storage
- Turn off your PlayStation 5 and unplug all cables including power and HDMI.
- Place the PlayStation 5 on a flat surface with its backside facing towards you. The side with the PS logo should be facing down.
- Remove the back plate by lifting up the right corner (towards you) and sliding to the left. You may hear a clicking sound while lifting up but that’s normal.
- You will see a White colored storage expansion slot adjacent to the cooling fan. There is only one screw holding it up which you need to remove.
- Keep the expansion slot cover in a safe place nearby.
- There is a screw and spacer underneath which you need to remove.
- You need to adjust the spacer to your M2. SSD’s size.
- Align your SSD with the connector and push it in gently. Use the screw you took out in Step 6 to hold the SSD in its place.
- Put back the expansion slot cover and use the screw from Step 4 to fix it in its place.
- Reconnect all the cables and power on the PlayStation 5.
- The console will show you a message to format the newly attached SSD storage. If you don’t see it, unplug the console and check if you have installed the SSD storage properly.
- Follow on-screen instructions to format the SSD.
- Once formatting is done, it will also show you the drive’s read speed which should be at least 5,500MB/s.
This is how you can upgrade your PlayStation 5 SSD storage easily. Visit Settings > Storage > Installation Location to move your games and apps to the newly added storage.
Note: This article may contain affiliate links that help support our authors and keep the Phandroid servers running.