

NordVPN is one of the leading VPN services and it keeps adding new features. It has now announced another new feature called Meshnet. It is aimed at allowing users to connect to devices directly without routing their traffic through a NordVPN server. It lets you create a private network server via your own devices.
What does NordVPN Meshnet do?
It offers the same level of encryption to internet traffic as a NordVPN server. The private network is accessible from anywhere in the world and you can connect with the device anytime you want. Each device has its own IP address instead of the usual NordVPN IP address.
Meshnet is available for Windows, macOS, Linux, Android, and iOS. However, only Windows and Linux devices can allow routing traffic through them for now. You can connect up to 10 devices of your own and up to 50 external devices to a private network. The latter is done by sending invitations which those device owners have to accept. In other words, it is not possible to connect with an existing private network without the required permission.
The company says while Meshnet can be used for various purposes, there are three major use cases: file sharing, LAN gaming, and internet traffic routing. The first one is where you can use the private network to share files and documents with your family, friends, and colleagues. The second one is aimed at those who love online gaming with their friends. The last one gives you the freedom of routing your traffic through another device while you use the internet on some other device.
How to use NordVPN Meshnet on Android?
If you are on Android, the first step is to ensure that you are using the latest NordVPN app version. It can be done by visiting the Google Play Store and checking if there is an update download pending. Next up, follow the instructions given below.
- Launch the NordVPN app and tap the Meshnet icon in the middle of the navigation bar.
- The app will give you a brief description of the feature. Tap Turn on Meshnet to proceed.
- It will take a few moments and a notification alert will confirm that Meshnet is now active.
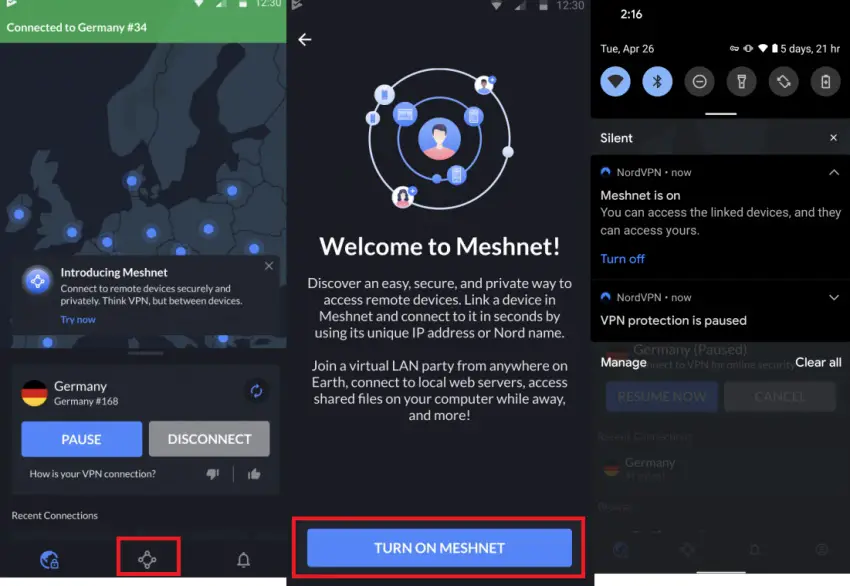
It means now you can access all linked devices and your device can also be accessed by them. The app will show your device’s IP address and a unique NordVPN device name. These are needed when you want to add this device to a private network.
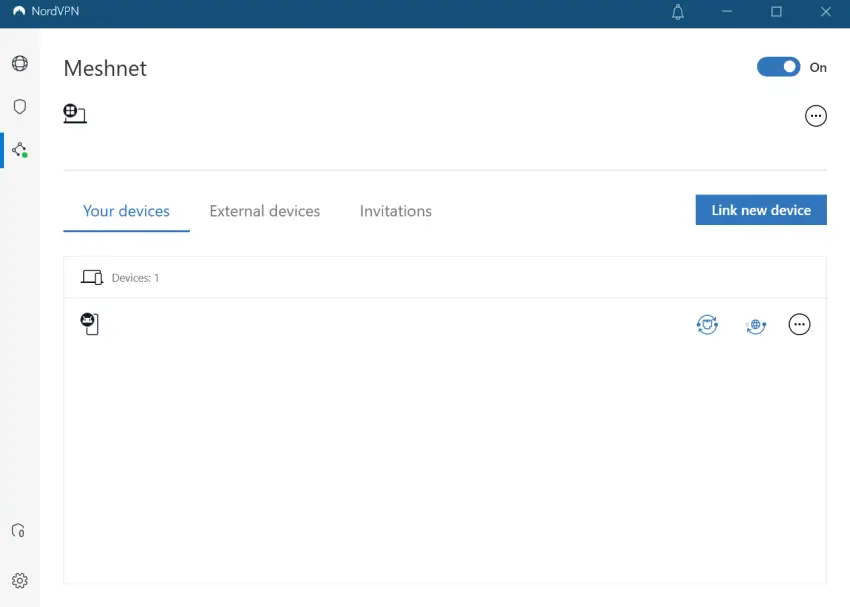
How to use NordVPN Meshnet on Windows?
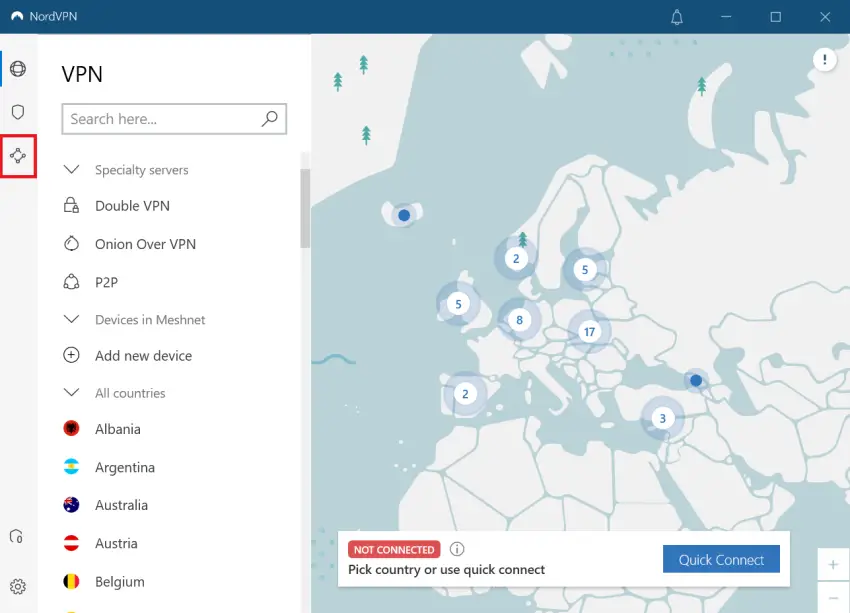
- Launch NordVPN on your PC/laptop and click the Meshnet icon from the left sidebar.
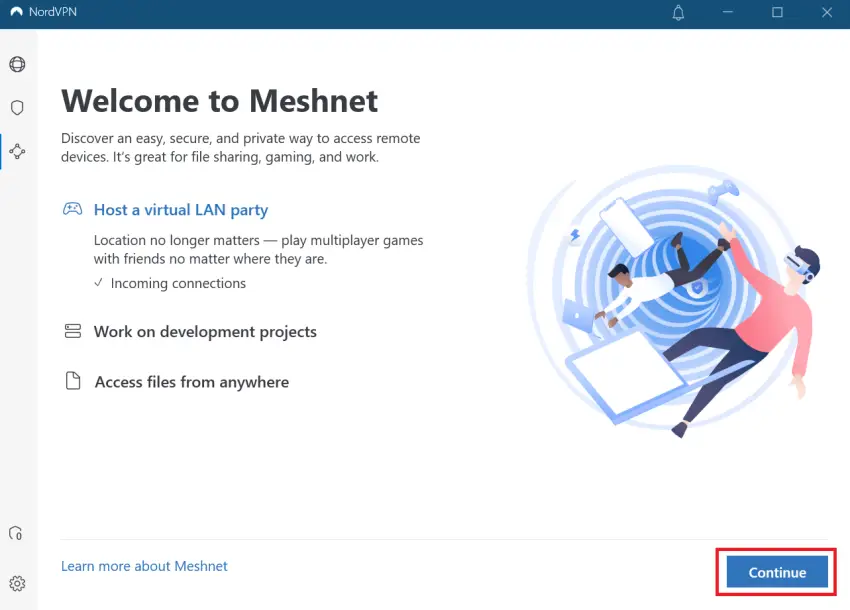
- There will be a brief intro to Meshnet where you need to click Continue.
- On the next screen, click Turn on Meshnet to bring your private network online.
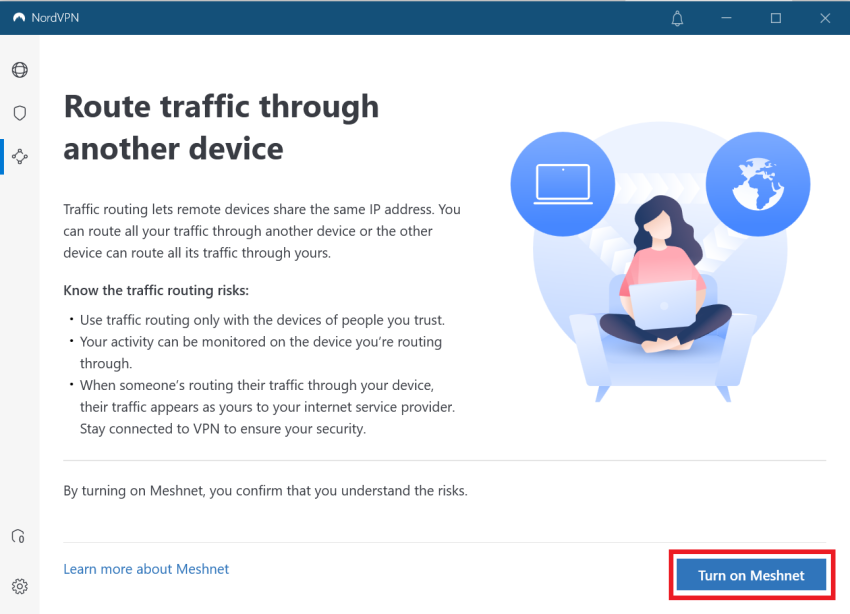
- It will then show you the device management interface where you can check details about devices that are connected or want to connect.
You may see a pop-up while enabling Meshnet that will tell you to switch to NordLynx protocol. This will happen if you are connecting with TCP or UDP protocol. In such a situation, just click Continue to confirm the switch because Meshnet works only with NordLynx protocol.


Comments