
How to change your default browser on Windows 11
When Microsoft first launched Windows 11, there were some changes Microsoft made to the operating system that was a little weird. One of them was the somewhat complicated and roundabout way you had to go about if you wanted to set new default apps like your browser, where you basically had to tell Windows to associate all protocol handlers with the app.
This is versus back in Windows 10 where it was easy and straightforward, but there is good news on that front. Microsoft has pushed out a new update for Windows 11 in the form of build 22000.593 (KB5011563). With this update, it has become super easy to change your default browser in Windows 11, and here’s how.
Changing default browser in Windows 11
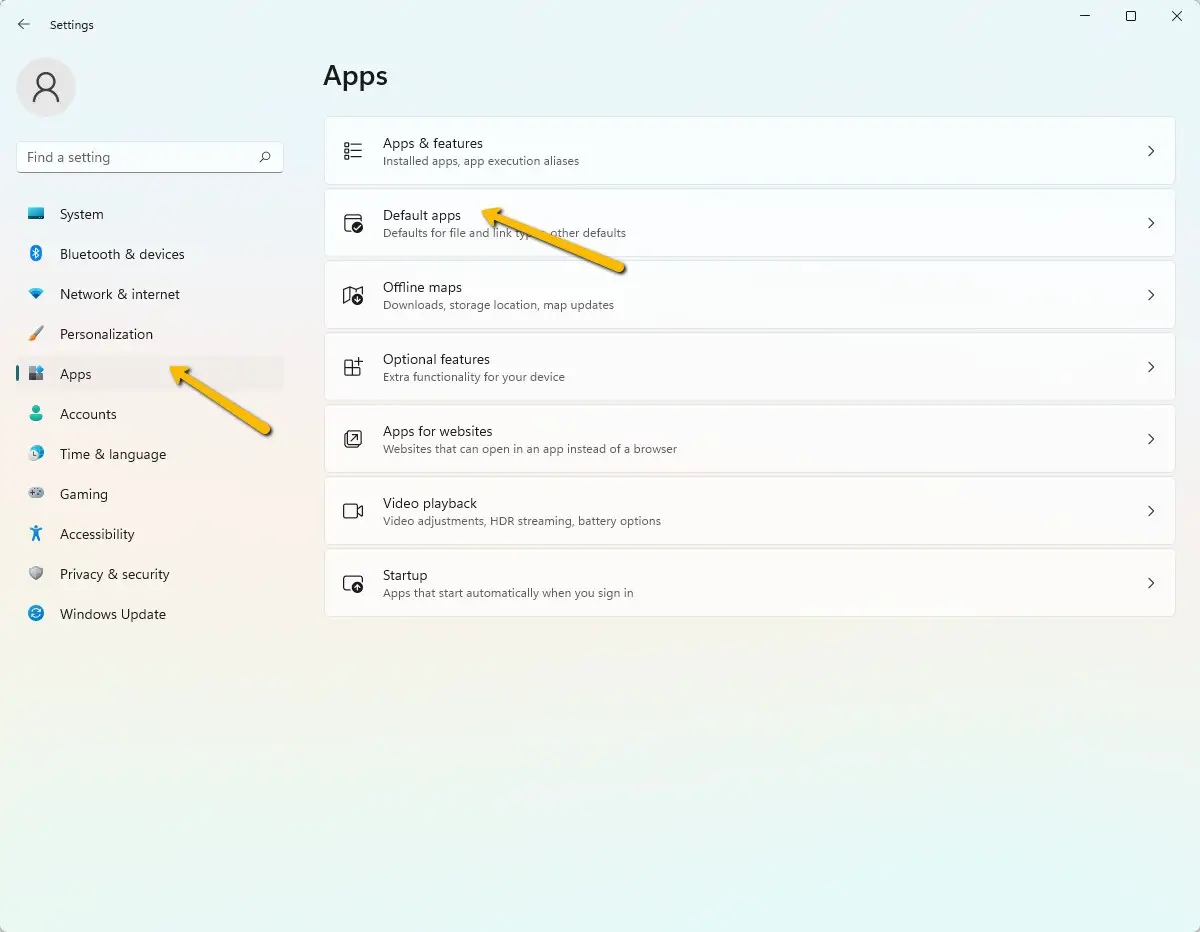

- Launch Settings
- Click on Apps on the side
- Click on Default apps
- Scroll to the browser you want to make your default
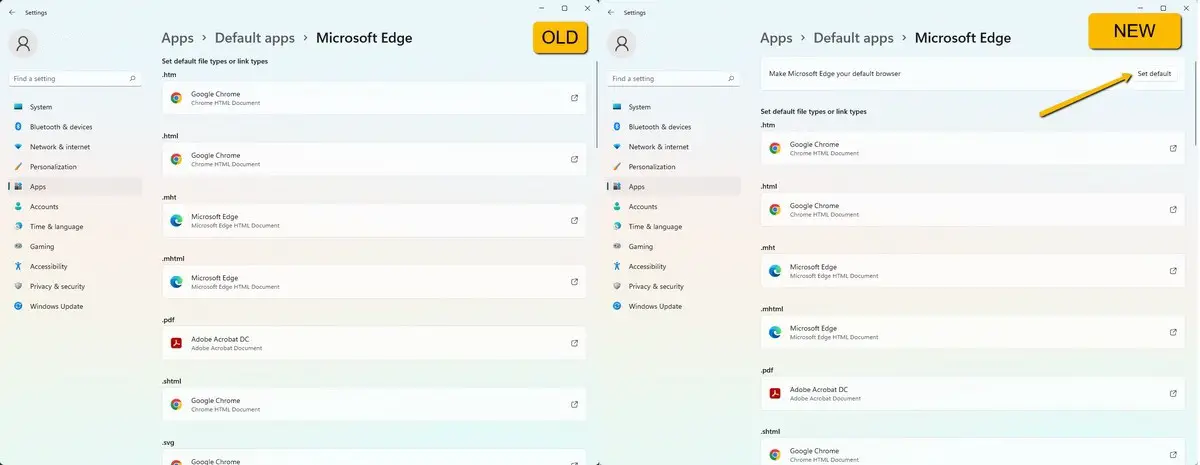
- You should now see a “Set default” button at the top next to the caption that says “Make <browser> your default browser”
- Click on it and you should see a tick next to the button that indicates your preferences have changed

What Microsoft seems to have done here is when you click the “Set default” button, it just changes all the file associations for you, so instead of users having to change it one by one, this button does all the work for you. In a way it’s good that Microsoft has retained the feature because for some users who want a bit more granular control, you can still make individual adjustments easily.
Oddly enough Microsoft has not included a confirmation button to make sure that users know what they are doing, but thankfully since the entire process is so easy and straightforward, you can switch between default apps really quickly in case you made a mistake before.