HTC One M9 teardown shows how difficult it is to repair a broken display [VIDEO]

HTC’s “Uh Oh” protection policy for the HTC One M9 is just another way the manufacturer is giving you peace of mind during your first 12 months of ownerships. Should you crack the display, drop the device in the toilet, or run over it with a car — HTC’s got you covered. The problem? They’ll only do it once.
Those who are little more accident prone — or perhaps just have really bad luck — you may be wondering what happens if you break your HTC One M9 again during this 12-month time frame. Well, you can always pay out the nose to have someone repair it, or you can save a few ducats by attempting to do it yourself.
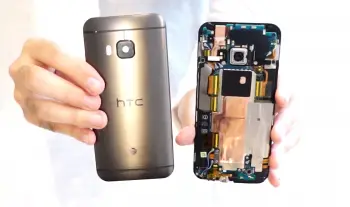
For anyone thinking about going the DIY route, you may find repairing something as common as the display on the HTC One M9 is a lot more trouble than it’s worth. At least that’s what this handy teardown video brought to us by the folks at pwrdbykyank is showing us.

The lengthy 35-minute video shows that while removing the back of the HTC One M9 is easy peasy, it’s getting at the the display that’s much more difficult. First, you’ll have to remove a variety of screws and tabs, then the main board, and then the battery. It’s only after that you’ll be able to remove the display connector connecting the LCD display. Once that’s been disconnected, you’ll need to heat up the screen (to loosen the adhesive) and use a standard plunger tool to pop out the display from the frame (18:50).
Exhausted yet? We sure are. To be fair, the Samsung Galaxy S6 was no cakewalk either. We have to admit, we’re certainly glad HTC is willing to repair the device completely free of charge during the first year. Whether or not that’s incentive enough to choose the HTC One M9 over the Samsung Galaxy S6 Edge is up to you.