
How to create your own version of Android with Xposed
Just over two months ago I made the switch to Android. At first I told myself I wasn’t going to get into the rooting and modding. For a while I succeeded at keeping my phone completely stock, but eventually the bug bit me. First I downloaded a few launchers, then some icon packs, and before long I found myself rooting my device. The reason I decided to take the plunge was an extremely cool tool called Xposed.
What is it?
Xposed allows you to customize things all the way down to the system level without the need of a custom ROM. It uses “modules,” which are essentially plug-ins or extensions, to add features directly to Android. The best part about Xposed is how easy it is to use. The things that you can do with Xposed used to require serious know-how and tinkering skill. Now with just a few taps you can create your own personalized version of Android (and still get OTA updates). Let’s get started!
Install Xposed
First of all, in order to use Xposed you need to root your phone. Almost every Android device has a different way of gaining root access. If you need to root your phone head on over to Android Forums, locate your device forum, and check out the “All Things Root” sub-forum. Come back to this guide when you’re done!
- Download the Xposed Installer APK and install it.
- Launch the Xposed Installer, go to the “Framework” section and click on “Install/Update”
- If you get a Segmentation Fault error, install this additional app (skip this step if you don’t get an error).
- Reboot your device
Now you are ready to download some modules and start customizing your Android device!
Download Modules
Developer support for Xposed is very good. There are hundreds of modules to choose from in the Xposed Installer app. Open the app that you just installed and go to the “Download” section. Here you will find a list of modules. Most modules will work on any device unless they say otherwise. To download a module and get it working follow these steps:
- Tap the module you want.
- Read the description and then swipe over to the “Versions” page.
- Tap the “Download” button on the most recent version (preferably one that says “Stable”).
- After the module downloads you will be brought to the installer. Tap “Install.”
- A notification should appear telling you that the module is not activated. Tap it.
- Click the check box next to the module you just installed.
- Reboot your device.
Some modules will add a feature with no configuration required. Others will come with an app that allows you to set it up and adjust settings. After rebooting your device you can open the companion app and fiddle with it until you have everything set up the way you want. Another reboot will most likely be required before the changes take effect. Now that you know how to download modules, which ones should you try? Here are some of our favorites.
5 Xposed Modules To Try
Let apps choose UI theme with Tinted Status Bar
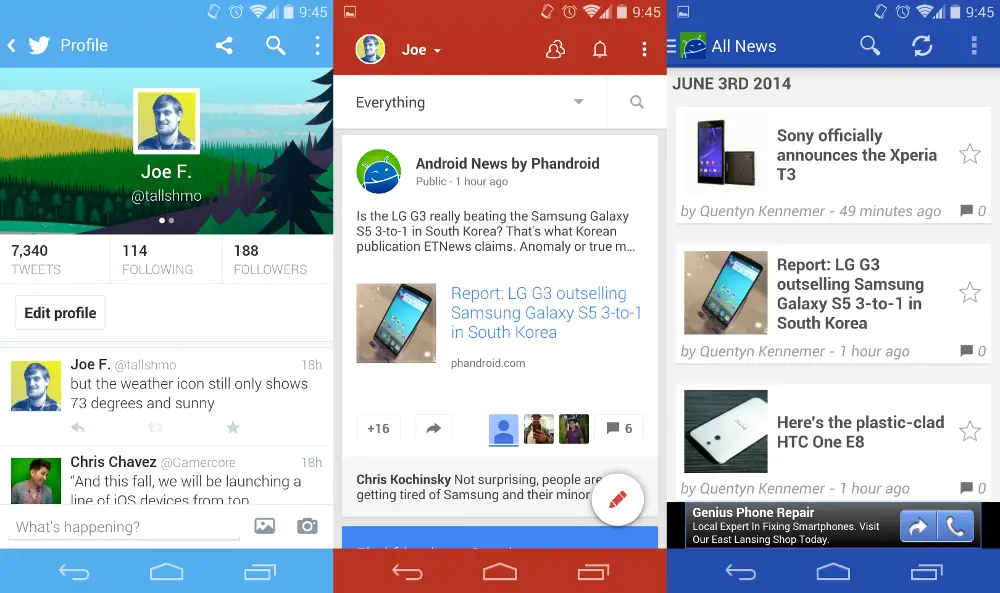
Every time I share a screenshot or make a video I get asked the same question: how did you make your phone look like that?! What they are referring to is the colored status and nav bars on my Nexus 5. This is done with a module called “Tinted Status Bar,” and it’s the original reason why I rooted my phone. This module will automatically change the status and nav bar colors to match the app you’re currently using. It’s also possible to manually change the colors for every app. You can see a few examples in the screenshots above.
Use apps in floating windows with XHaloFloatingWindows
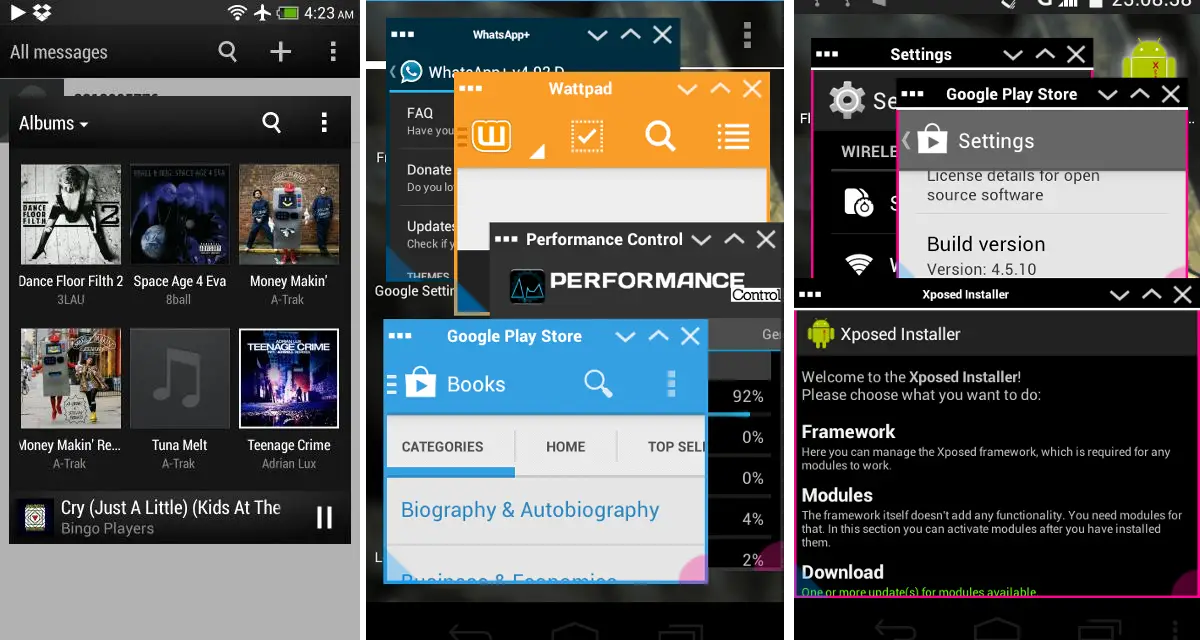
One of the most popular custom ROMs available today is Paranoid Android. It has an awesome feature called “Halo” that puts apps in floating windows. XHaloFloatingWindows is an Xposed module that brings the same feature to any ROM. This module is especially useful on Android devices with large screens, like the Note series or tablets.
Download location-restricted apps with MoDaCo Toolkit
MoDaCo Toolkit is a module that can do a bunch of things, but the most useful is the location-restriction removal. Once installed you will be able to do things like make Amazon MP3 behave like you live in the U.S., and download apps from the Play Store that aren’t available in your region. Other things you can do with the Toolkit include the ability to rotate all apps in all directions, and some special tweaks for HTC One users.
Tweak everything with GravityBox
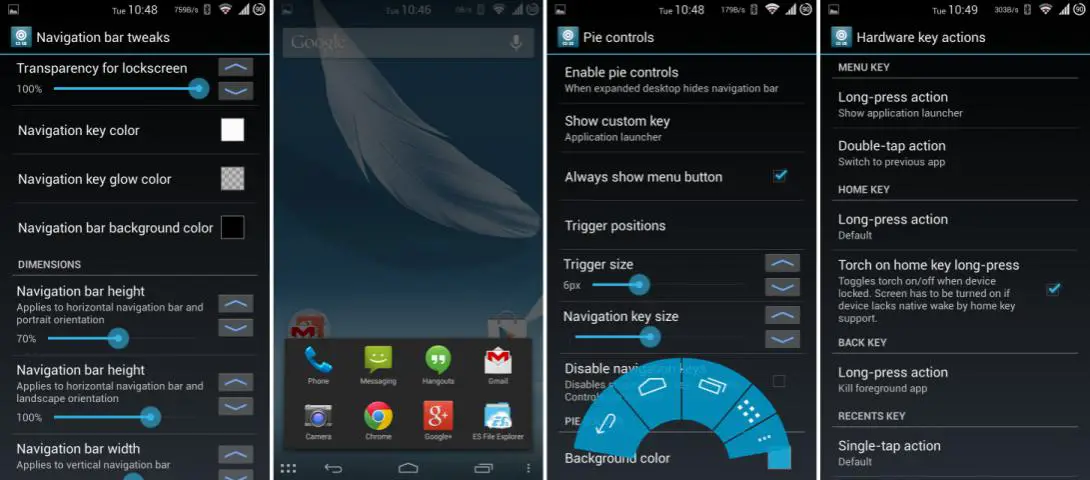
Our last recommended module is for KitKat AOSP devices. GravityBox is full of tweaks for almost every area of your phone. Add QuickSettings tiles, lockscreen shortcuts, status bar and navigation bar tweaks, power settings, hardware key settings, and much more. It’s a catch-all for practically anything you would want to customize. This module should only be used with vanilla Android 4.4 ROMs.
Control app permissions with XPrivacy
Have you ever downloaded an app and thought “why does it need this permission?” Or have you ever wished you could just disable on specific permission? With XPrivacy you get complete control over all of your app permissions. You can sort apps by what permissions they require and spoof permissions you don’t want. For example, if you don’t want an app to know your location, XPrivacy will give it a fake one. It can also give an empty list if the app asks for your contacts. This is a very handy module for the paranoid user.
***
Xposed is one of the best reasons to root your Android device. If you love customizing your device this is an easy way to make some powerful changes. Are you using Xposed? What modules do you use? Have we convinced you to give it a try?