
Scheduling text messages can be helpful in various situations. It could be that you have to send a reminder to someone at a particular time or you want to wish someone a birthday or anniversary. The good thing is iPhone lets you schedule text messages in more than one way.
In this tutorial, we will explain how you can schedule text messages on your iPhone using the Send Later option and Shortcuts app.
How to Schedule Text Messages Using Send Later in iOS 18
- Open an existing conversation or start a new one in the Messages app on your iPhone.
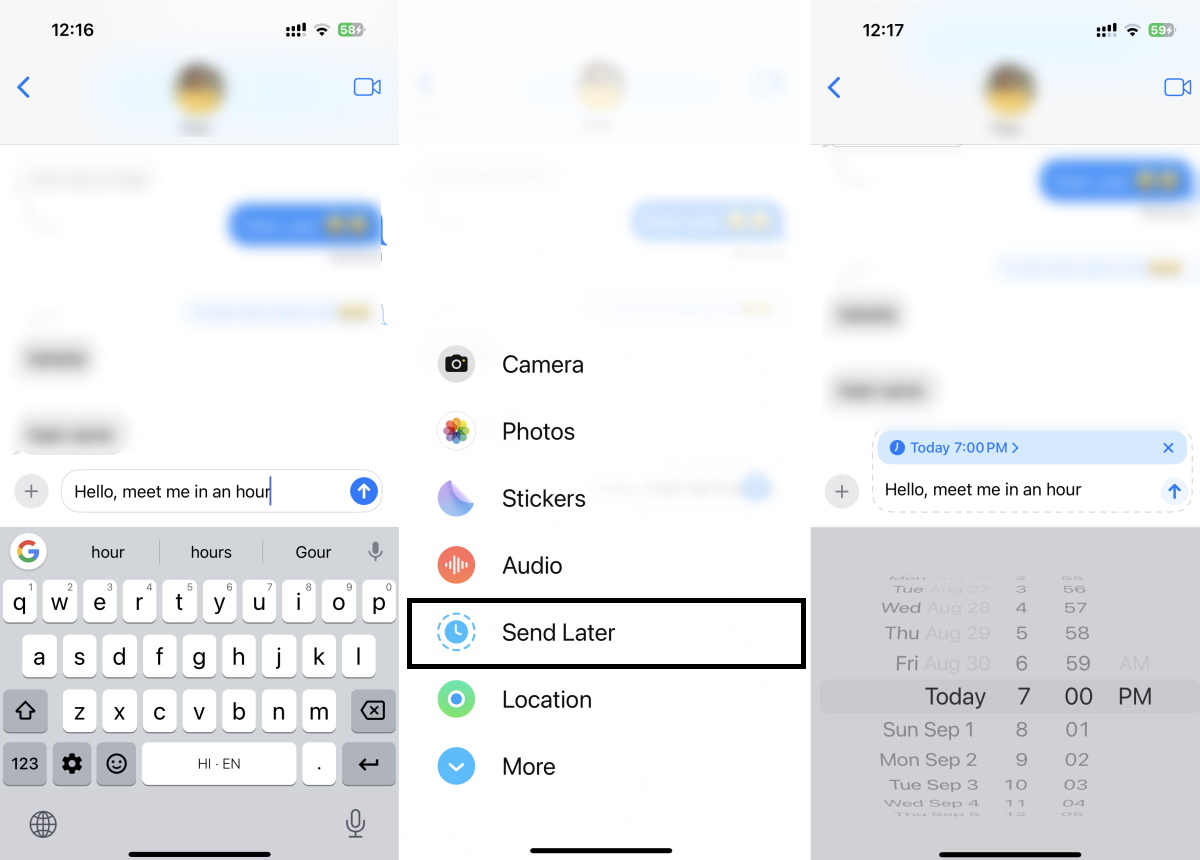
- Type your message and tap the + icon in the left corner.
- Tap Send Later from the list of available options.
- Choose your preferred time and day for scheduling the text.
- Tap the up arrow icon in the right corner to confirm your scheduled time and date.
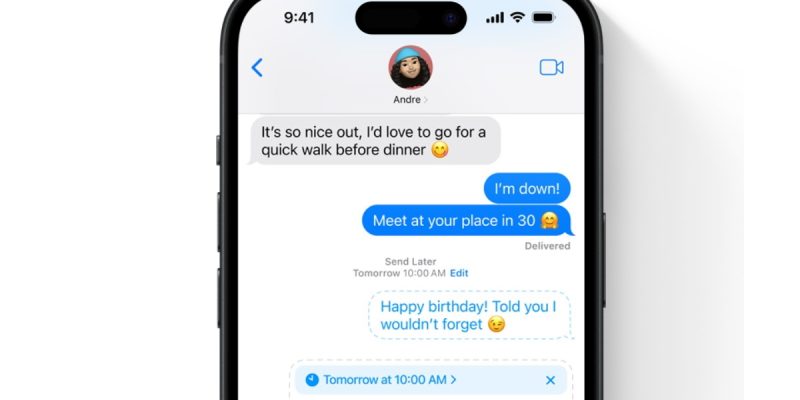
If you want to change the scheduled time, send the message instantly, or delete the text, you can do so by tapping the Edit option above the scheduled text.
Send Later option was previously limited to scheduling emails but with iOS 18, Apple has expanded it to text messages. One thing to note is that this feature works only for iMessage texts. iOS 18 is currently in the beta stage but as the next Apple event is scheduled for September 9, the public release is right around the corner.
How to Schedule Text Messages Using Shortcuts App on iPhone
- Open the Shortcuts app on your iPhone. If it is not available, install it via the App Store.
- Tap the Automation option in the bottom navigation bar.
- If this is your first time creating an automation, there will be a dedicated button with text like New Automation. Otherwise, you will see your existing automation and the + icon in the top right corner to create a new one.

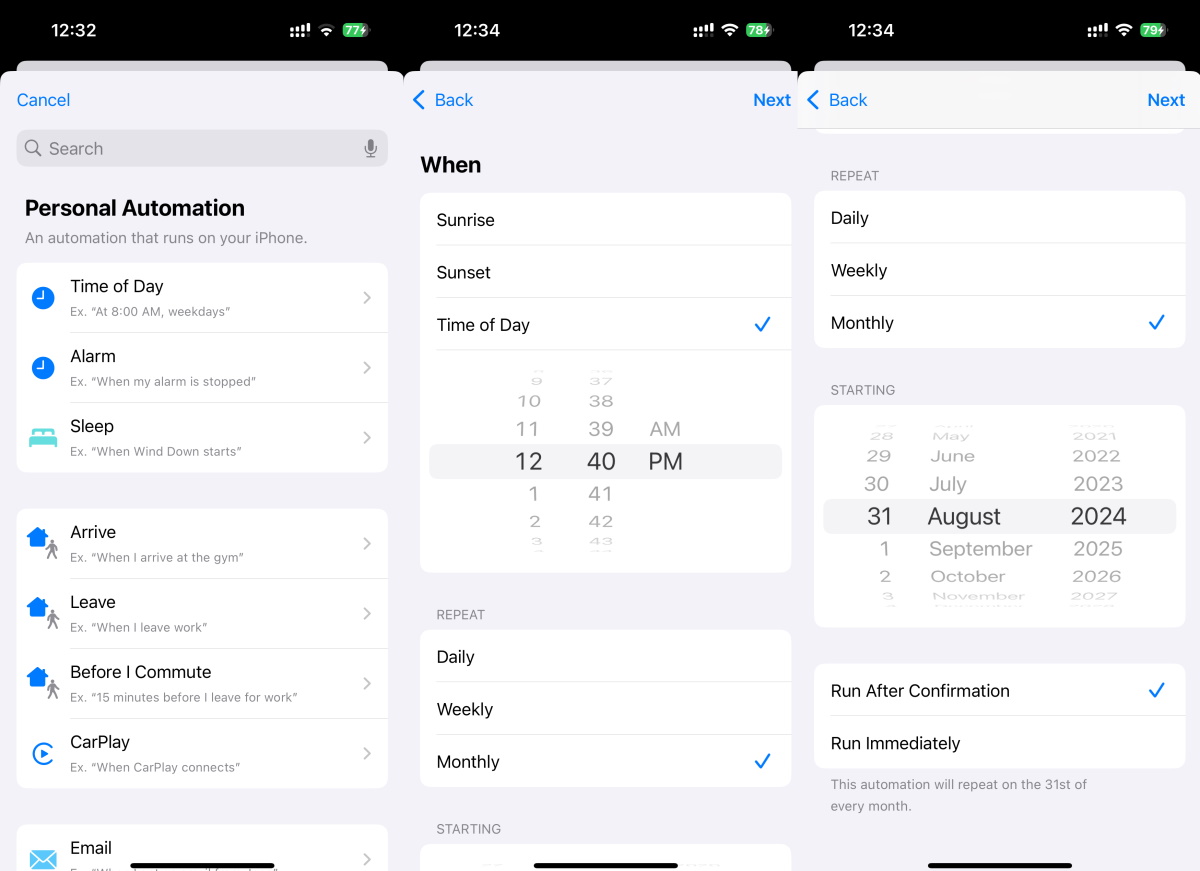
- Choose the Time of Day option to proceed.
- Select your preferred time for sending the text you want to schedule. Set the Repeat option to Monthly and choose the desired date. Tap Next once you have set all the details.
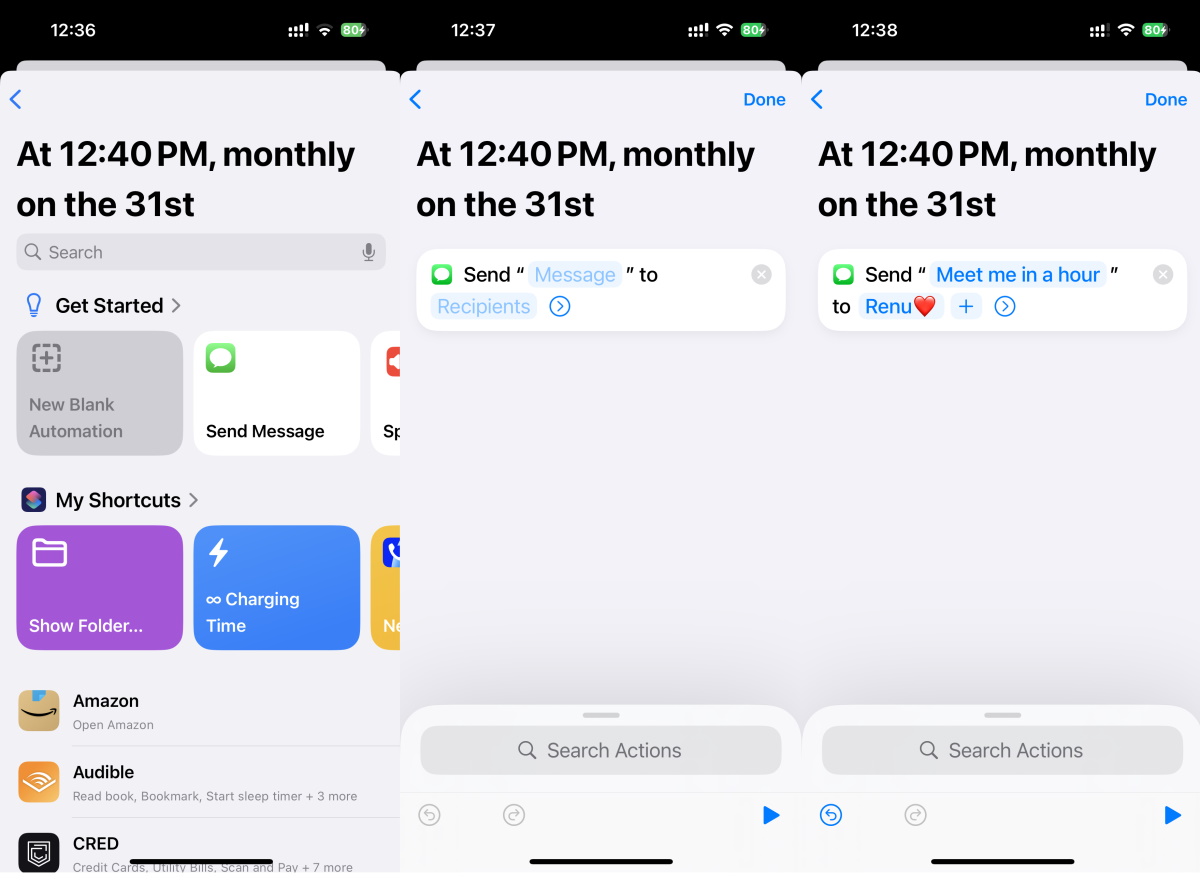
- On this page, tap Send Message action.
- Fill details like the message you want to send and the recipient of the message. Tap Done to proceed.
This is how you can schedule text messages on your iPhone. Do note that the Shortcuts app will show you a pop-up asking for your confirmation before sending the text. If you do not want this pop-up, choose Run Immediately while setting the scheduled date and time in step 5.
Another thing to note is that this method schedules the text message to be sent every month. If you want the message to be sent only once, you will need to delete the automation once the message has been sent. This is certainly not an ideal user experience but that’s how things are on iPhone.


Comments