

The Meta Quest 3 is an affordable way of getting into the modern virtual reality (VR) space. It is a standalone virtual reality headset where you do not have to worry about having a beefed-up PC and messing with the wires.
It can deliver immersive VR experiences across a wide range of genres including games. It offers 3D sound, better graphics, and faster loading times than before. If it is your first time using a VR headset or a Meta VR device, we are here to help you get started with the setup process.
This tutorial explains how you can set up your Meta Quest 3 and get immersed in the VR world.
Unboxing Meta Quest 3
The first step is to unbox the Meta Quest 3 to ensure you have received all the in-box contents. It should have a VR headset, Meta Quest Touch Plus controllers, a power adapter, a charging cable, and paperwork. There should also be two AA batteries included with the controllers.
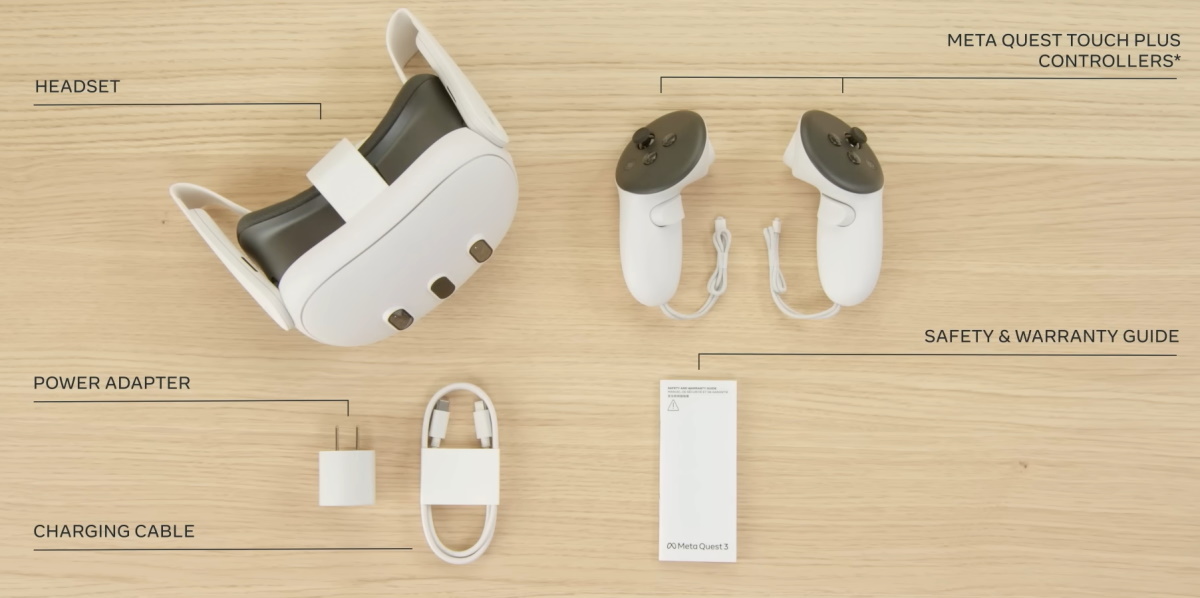
Source: Meta
Finding the Right Meta Quest 3 Fit
Put on the Meta Quest 3 VR headset by placing it over your eyes and head. Use the top and back straps to find the right fit for yourself. Adjust the straps until you find a comfortable fit and the headset is not wiggling either. It may take some time and multiple attempts but it will be worth it in the end.
Setting Up Meta Quest 3
Source: Meta
- Download the Meta Quest companion app on your Android or iOS device.
- Sign in with your Facebook or Instagram account. You can also create a new Meta account if needed.
- Once you have logged in successfully, the app will show you a message to pair a new device.
- Power on the Meta Quest 3 VR headset by pressing and holding the power button on the left side for about three seconds. You should hear a chime sound and see the Meta logo appearing on your headset.
- Remove the plastic tabs from your controllers and power them on. They should pair automatically with the headset.
- The headset will show you on-screen instructions to proceed with the setup process. It includes multiple steps like selecting your preferred language and connecting to WiFi.
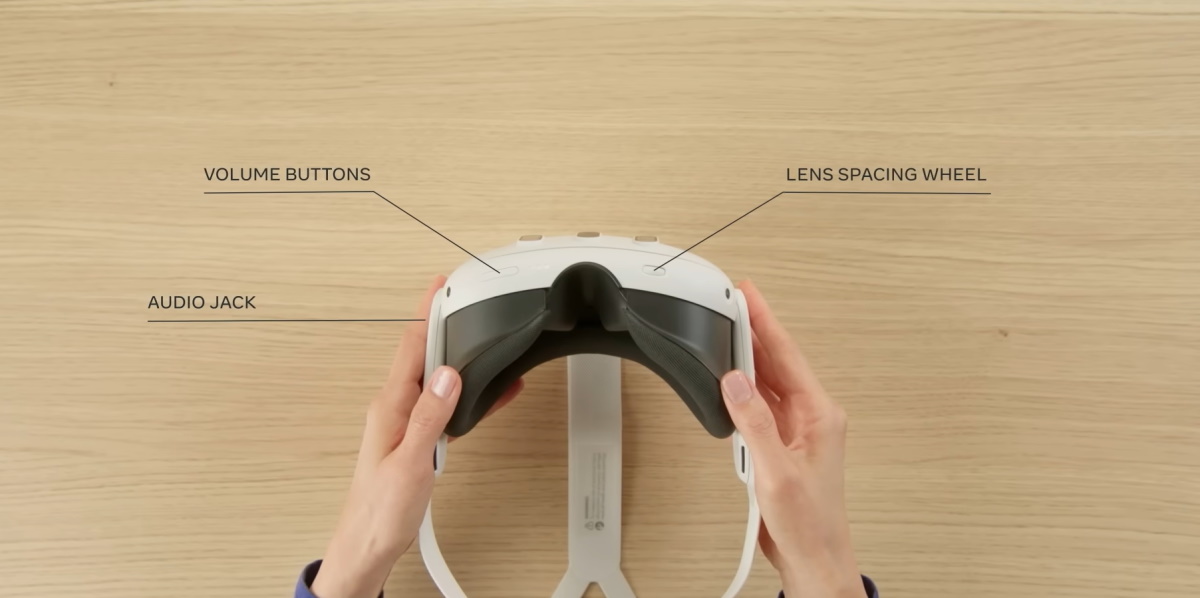
- The headset has a lens adjustment wheel on the bottom left side. You can use it to adjust lens distance. It helps make sure VR visuals are clear and comfortable to see.
- You can then go to the Meta Quest app on your Android/iOS device to complete the device pairing step. Choose Connect New Device > Meta Quest 3 and follow the on-screen steps.
- If there are any pending updates, make sure to download and install them.
Creating Meta Quest 3 Safe Space Boundary
The Meta Quest 3 comes with a safe space boundary feature to help you avoid getting hurt while you are immersed in the VR world. The headset will ask you to create a virtual boundary during the initial setup.
All you need to do is to go to the area where you intend to use the Meta Quest 3. Look around the area with your headset on and it will automatically create a safe space boundary. There will be an option to create the boundary manually if you are not happy with the automatic creation.


Comments