

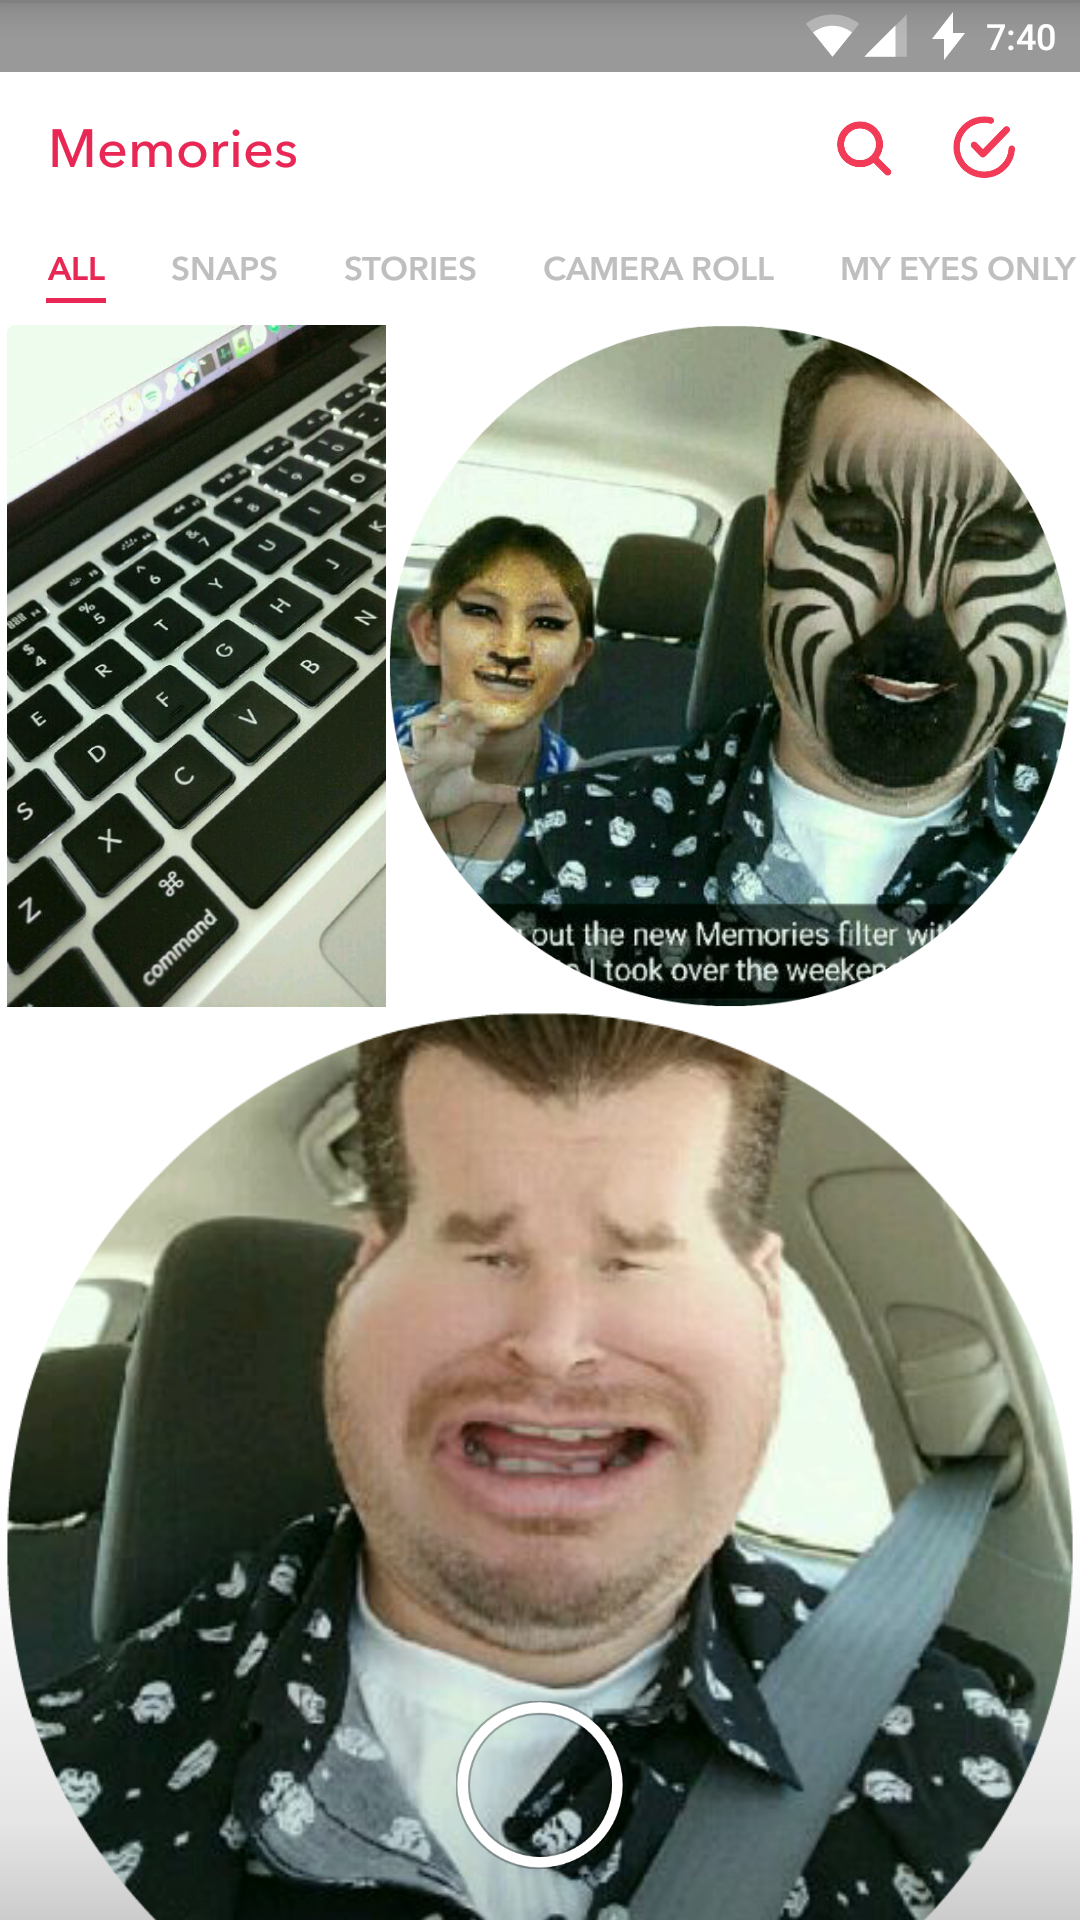
Memories is a convenient new feature more or less geared toward those who hate having to remind themselves to backup the awesome Snaps and Stories they’ve created for later viewing or sharing. Simply put, it’s a way to back up your favorite Snaps and Stories to your Snapchat account.
What are Memories?
Memories is a convenient new feature more or less geared toward those who hate having to remind themselves to backup the awesome Snaps and Stories they’ve created for later viewing or sharing. Simply put, it’s a way to back up your favorite Snaps and Stories to your Snapchat account.
Because your Memories are backed up to the cloud, they’ll follow you around wherever you log into the app — no matter which device you’re using. Pretty helpful in the event your phone gets lost or stolen. It’s a lot like Google Photos only exclusively for Snaps.
While Snapchat doesn’t force you to use Memories, choosing to save your Snaps to Memories does offer other benefits outside of cloud backup. For instance, being able to re-upload old Snaps or create new Stories by mix and matching old Snaps or even media you already have saved on your device. You can also compile and send entire Stories directly to your friends, something you couldn’t do before.
Although Snapchat doesn’t penalize users from posting old content from Memories, they do make it obvious that it’s not a true Snap by displaying them with a thick white border along with the relative date/time. This applies to photos/videos taken with your regular camera app that are only a few seconds old.
Saving Snaps and Stories to Memories
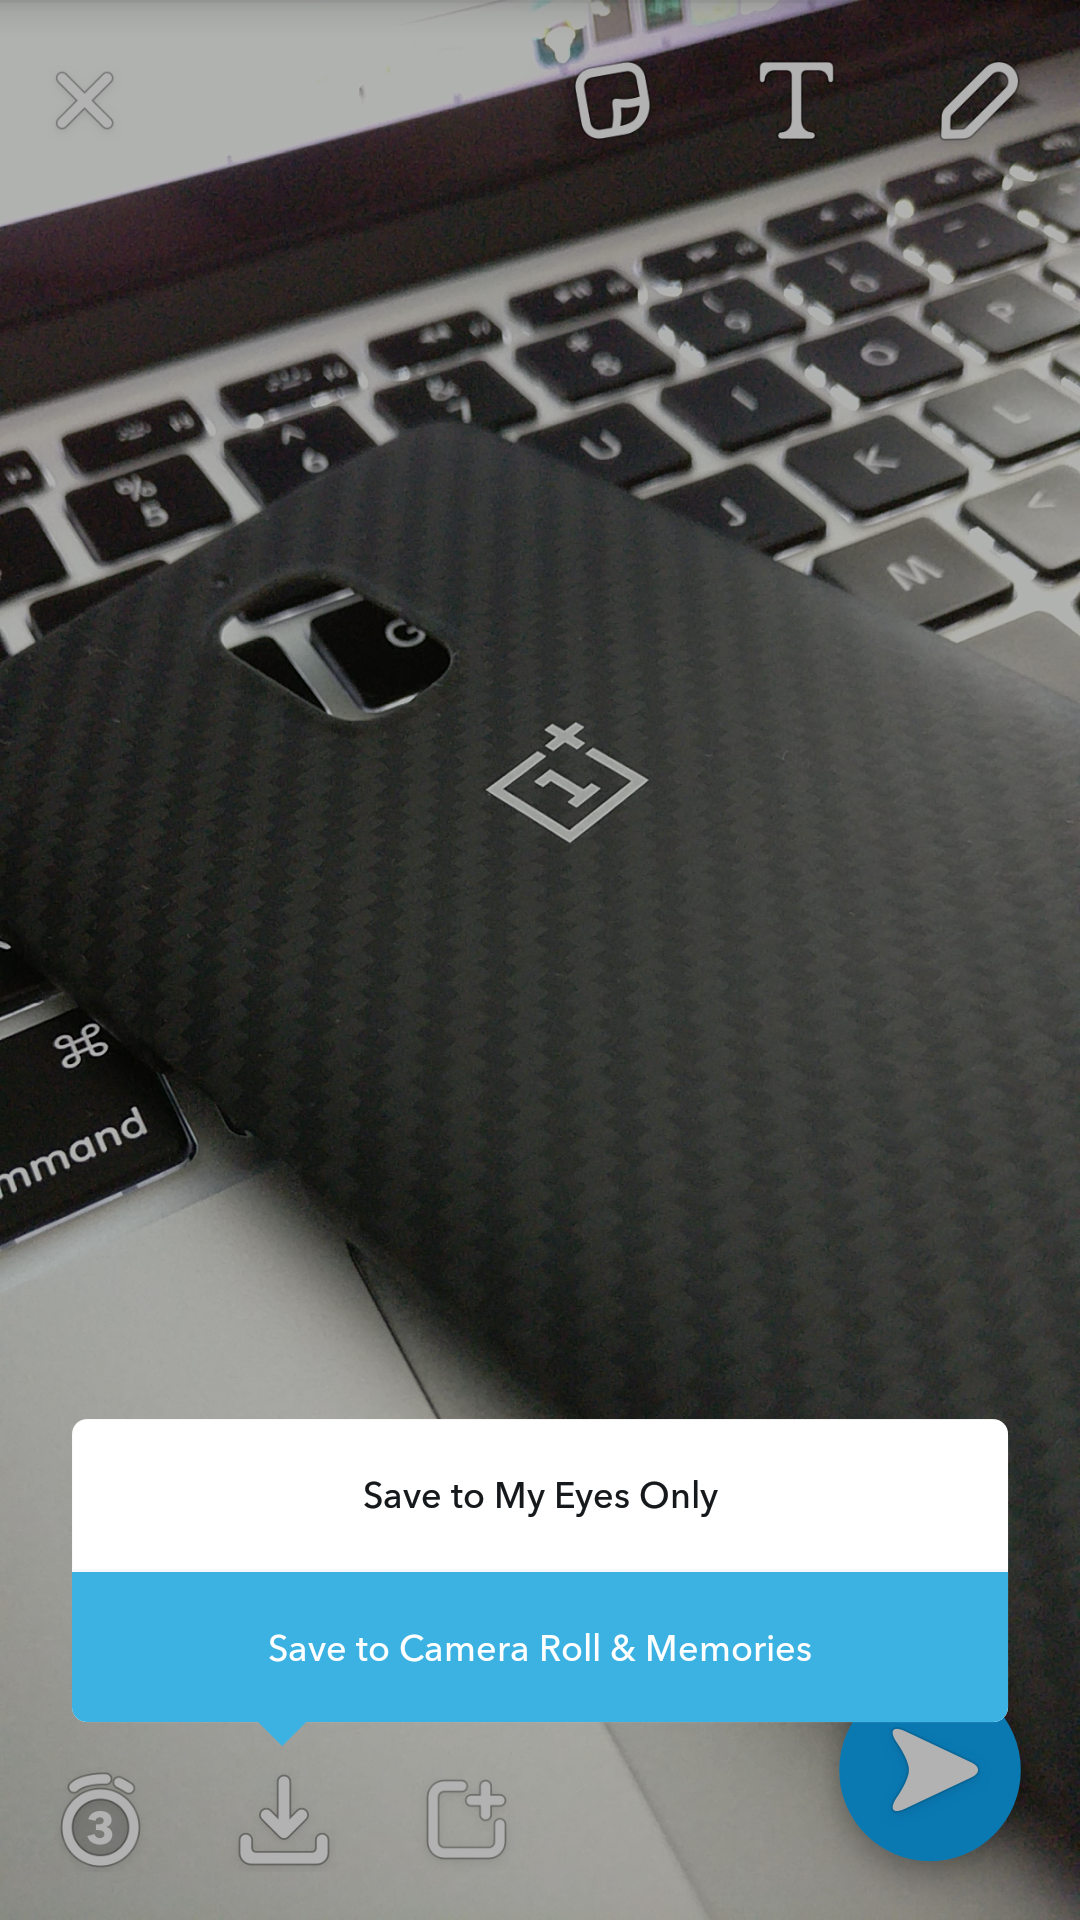
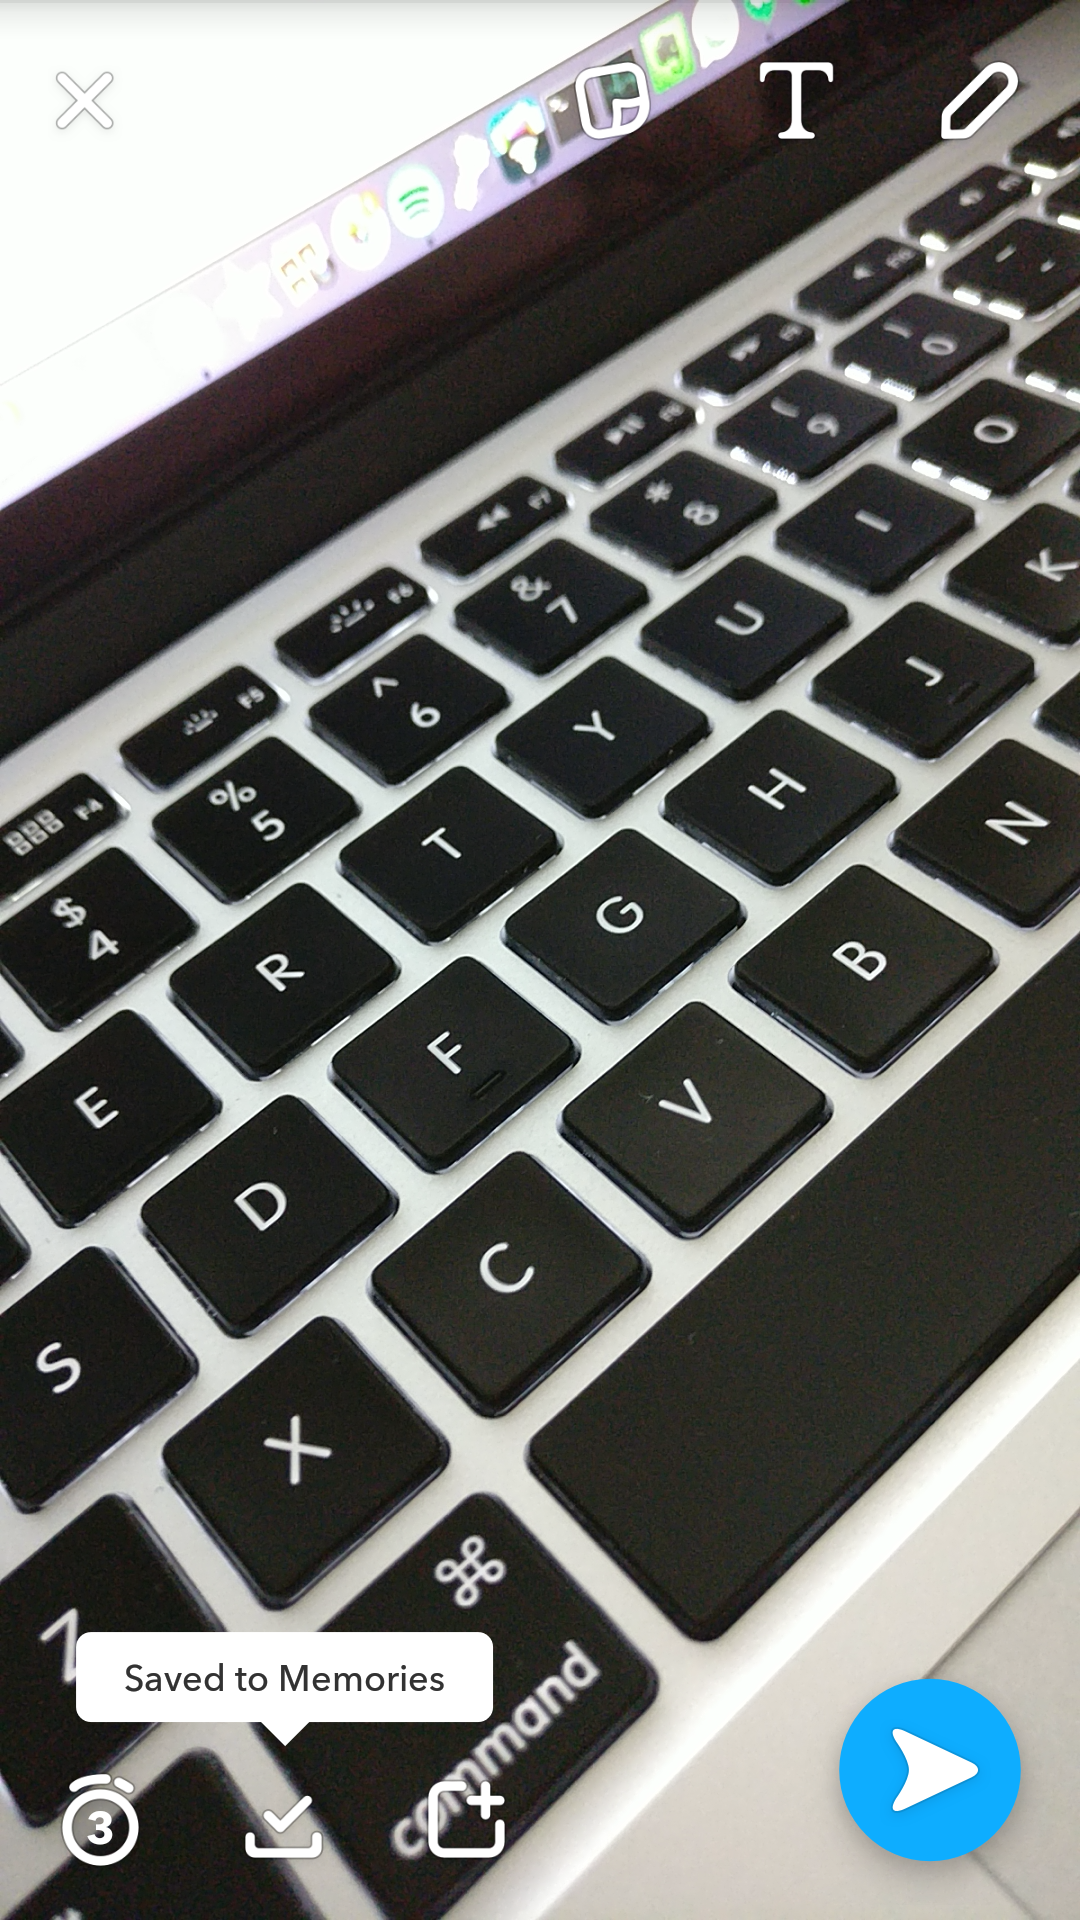

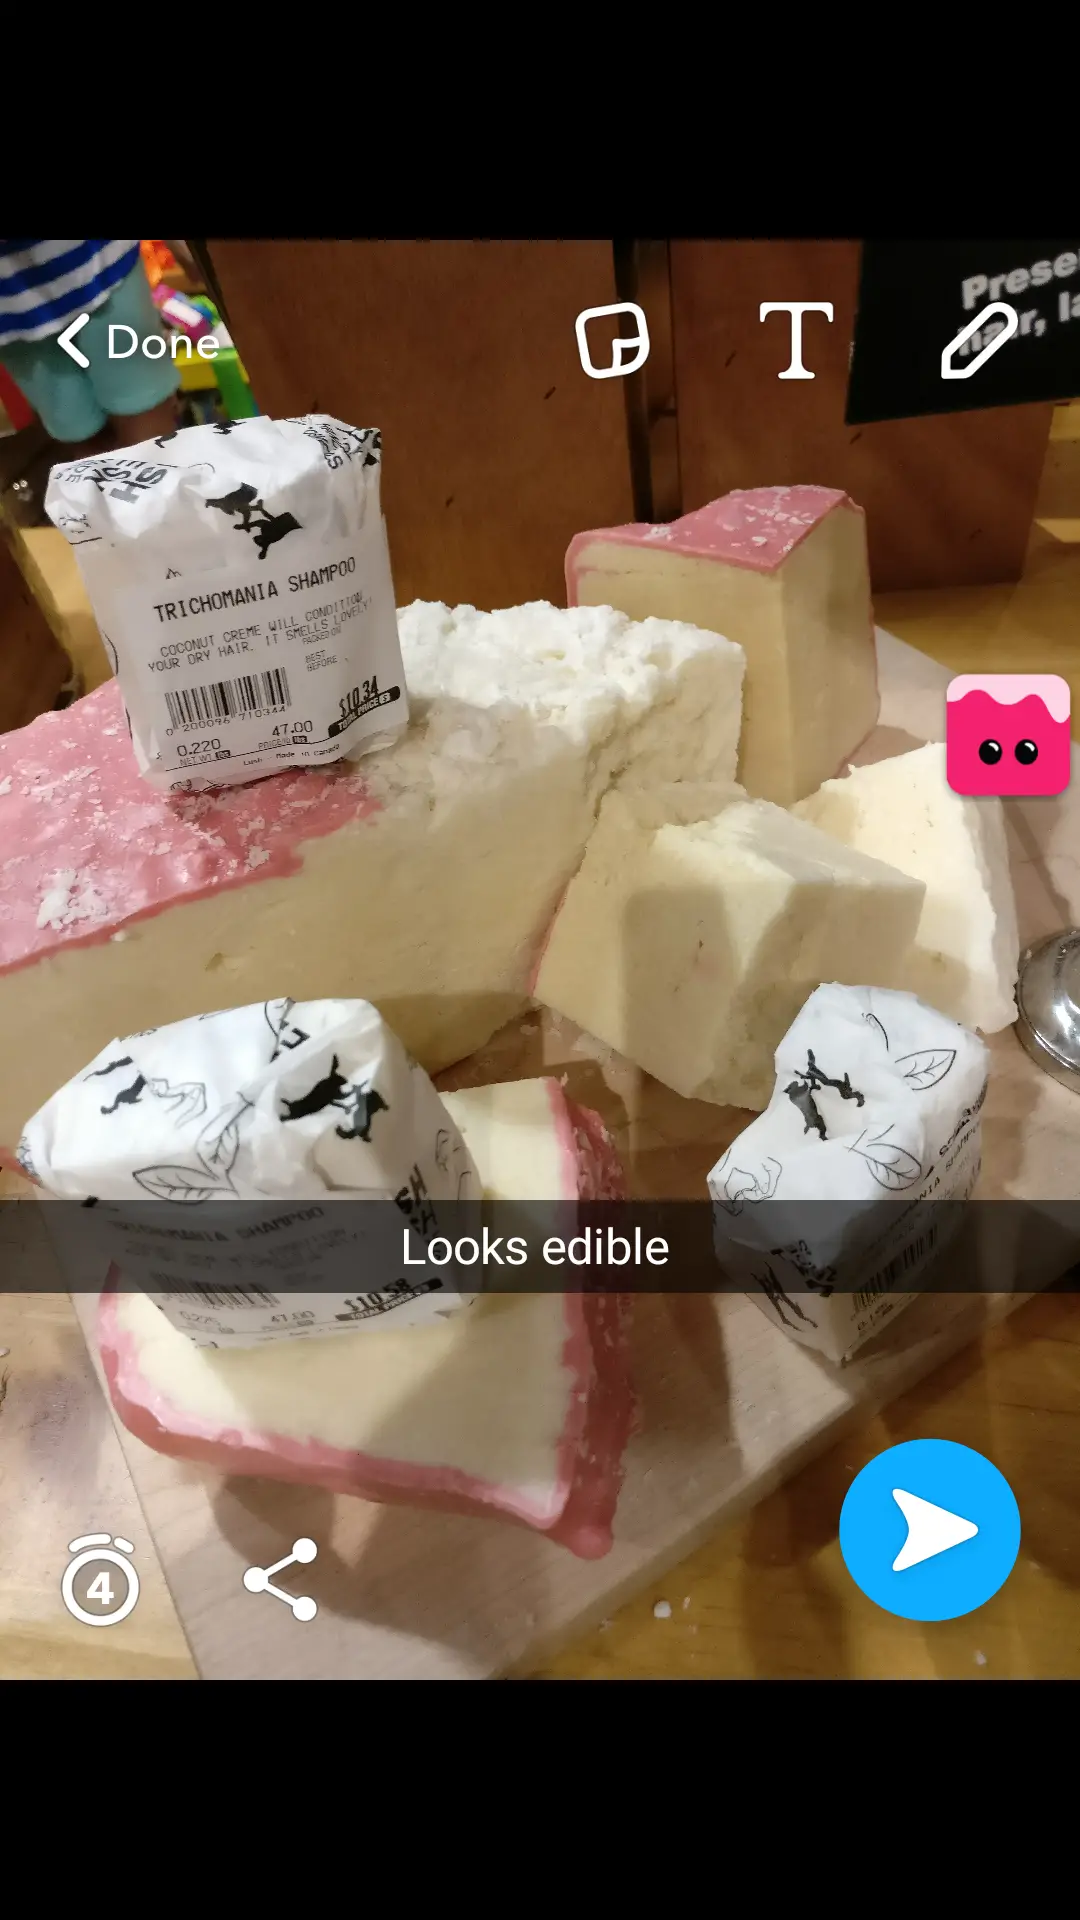
Adding or “saving” Snaps/Stories to Memories works the same way as downloading to your device used to. Just take a Snap and before posting to your Story or sending directly to someone, tap on the download button. You can also slide up on the button to choose between Save to My Eyes Only and Save to Camera Roll & Memories.
Alternatively, you can save entire Stories to Memories by selecting the 3-dot menu (or long pressing your Story) and tapping on the large download button. This will save all the Snaps you’ve posted to your Story from throughout the day up until then.
By default, the download button will save Snaps in Memories, but there’s a setting to have it save to both Memories and Camera Roll (your device), or even the Camera Roll only (just like it used to be before Memories was available). As we mentioned above, you can also access these options by swiping up on the save button.
Using Memories to re-post your old Snaps and Stories


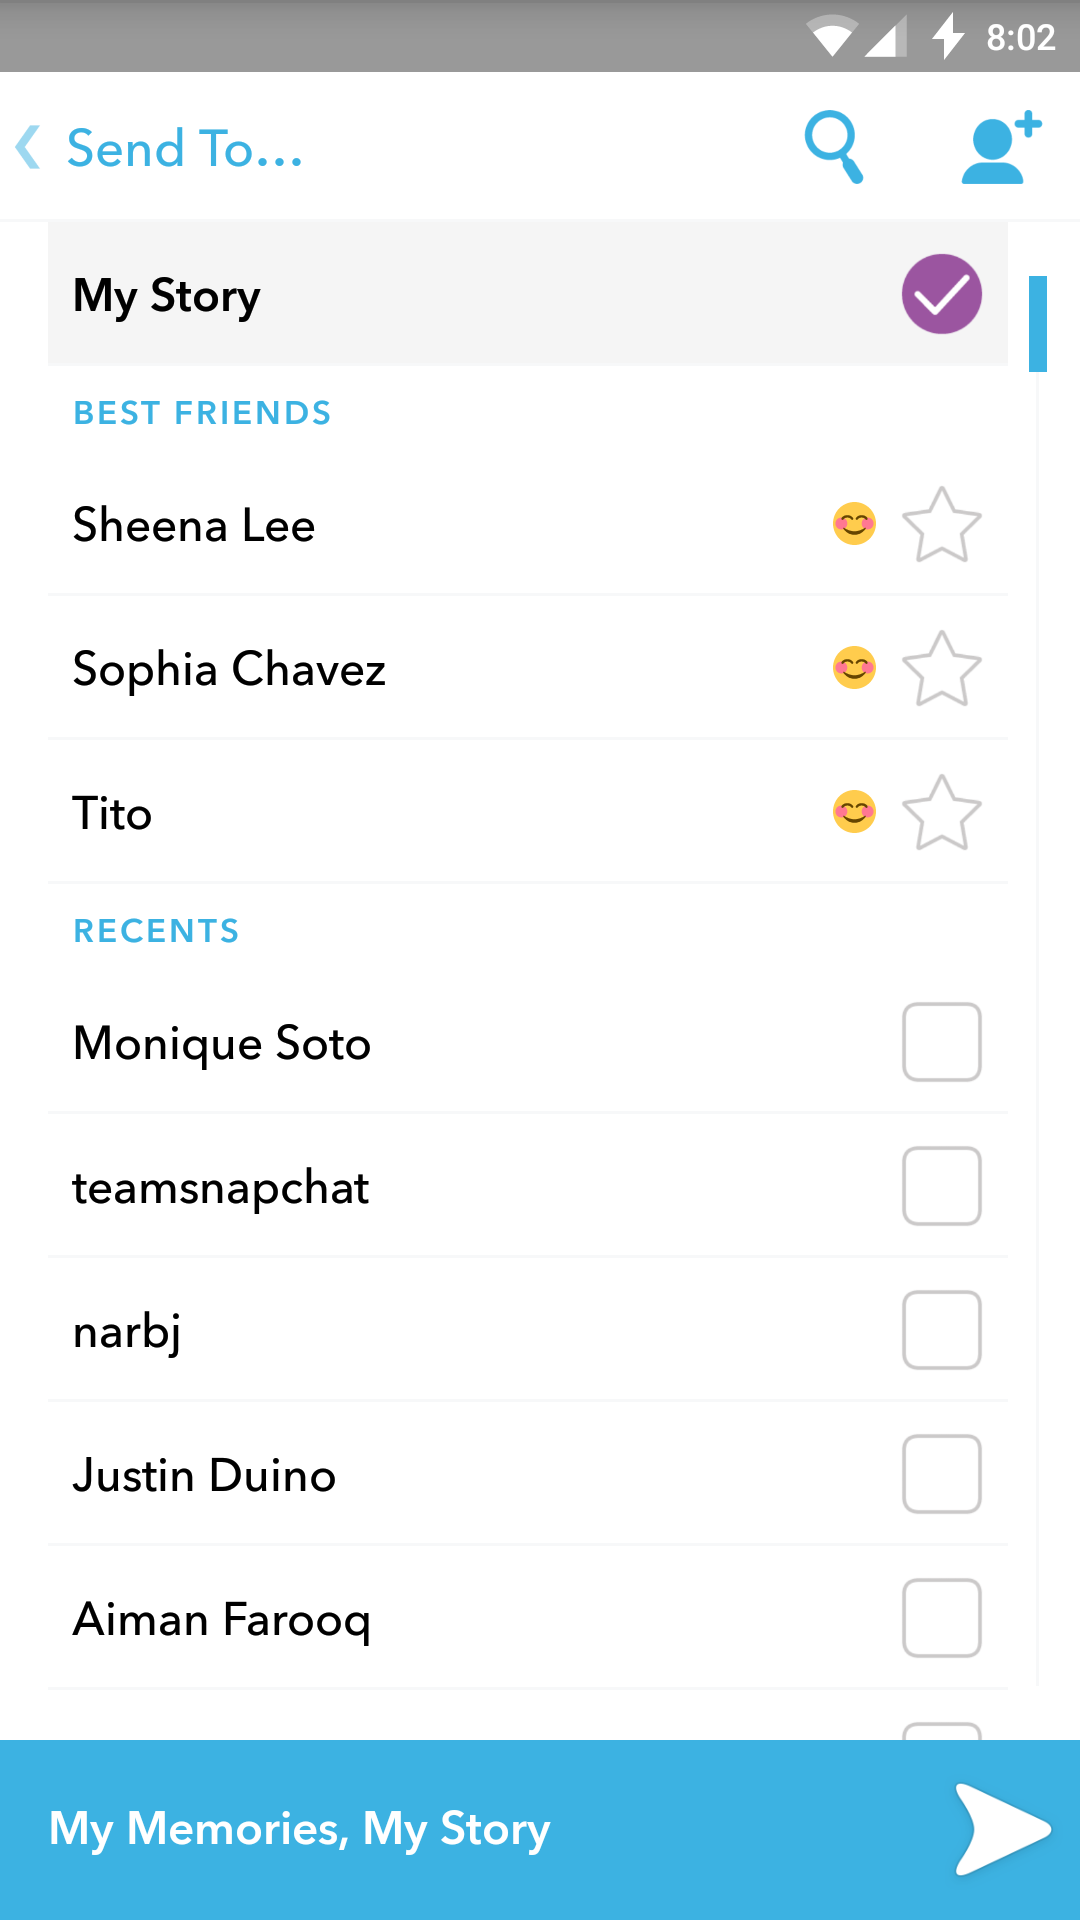
Snaps and Stories you’ve saved to Memories can be re-posted your Story or sent individually to friends whenever you like. For Snaps, just long press on the Snap to pull up the My Snap screen. From there, you can edit the Snap with the usual filters, emoji, and text options, then send it to your Story or individual friends.
Whether you compiled a new Story, or you just wanted to re-post an old one, long press on the Story in Memories and select Send Story in the upper right corner to send directly to a friend or post to publicly to your Story.
Using Memories to create new Stories from old Snaps
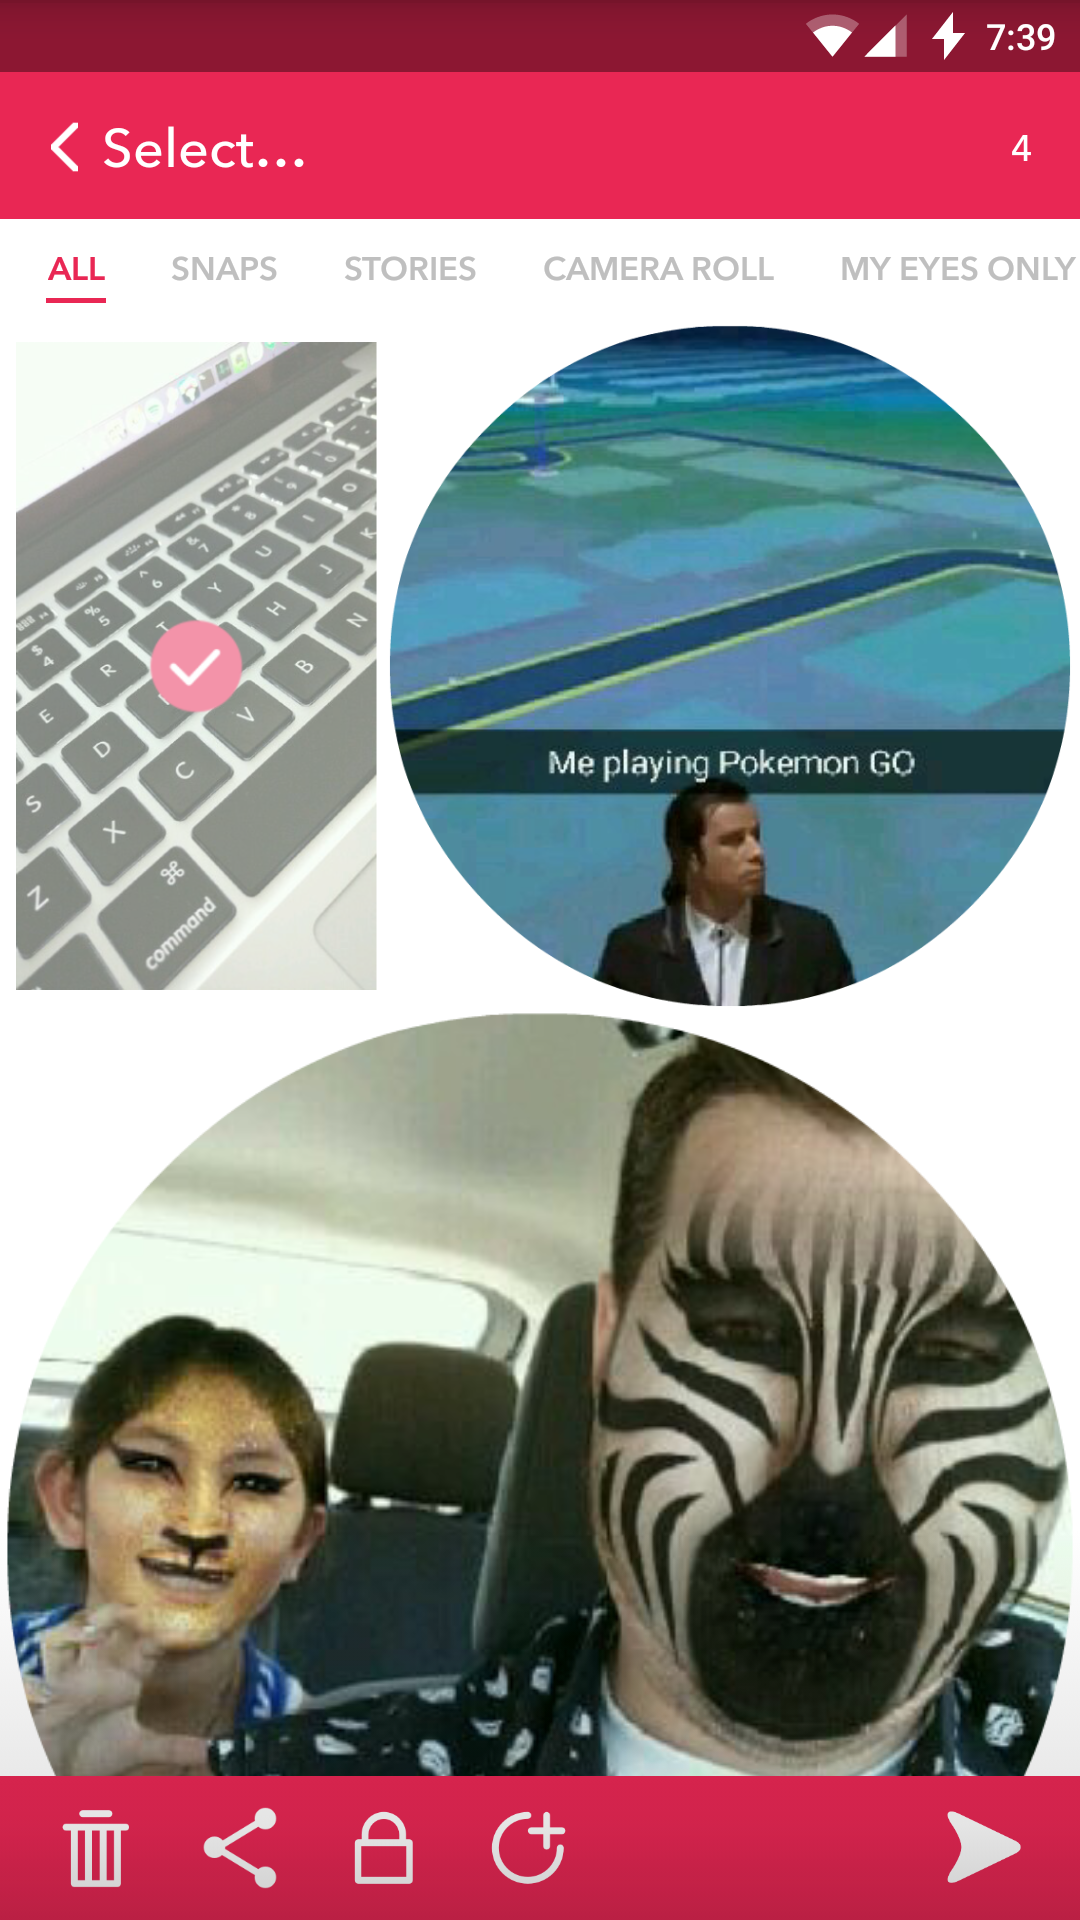
Memories also allows you to create entirely new Stories from old Snaps and Stories. To get started, just tap on the check button in the upper right corner of the Memories screen and choose the individual Snaps or Stories (with all the Snaps therein) you’d like to compile into an all new Story.
Pressing the “circle +” icon from the bottom bar will compile it into a new Story that stays inside of Memories, while pressing the arrow icon will post publicly to your Story or allow you to share with individual friends.

You can also send an individual Snap from inside a saved Story. All you have to do is long press on the Story and scroll left/right to locate the desired Snap. From there, you can tap the pencil icon to edit the Snap with the usual options and once everything is looking good, press the blue arrow button to re-post it to your Story, or send directly to a friend.
You can even add more Snaps to a saved Story inside of Memories by long pressing on the Story, tapping the menu button in the top left corner (3 lines next to “My Story”), and choosing Add Snaps to this Story. From there, tap on saved Snaps to select them, then hit the Add to Story button at the bottom. At that point you can re-post the newly edited Story or send it directly to a friend as usual.
Posting photos/video from Camera Roll to your Story
Your “Camera Roll” — a tab located inside Memories — is where you’ll find all the photos and videos already stored on your phone, whether it’s random images you’ve downloaded from the internet or something you’ve taken using your regular camera app.
When you first open Memories, you’ll be asked to add/import old Snaps you’ve saved to your device (Camera Roll) to help get your started. You don’t have to. You could also take a Snap and save it to Memories by pressing the familiar download button before sharing or posting to your Story.
Since, Memories only saves your Snaps and Stories — not the random stuff you’ve downloaded online — there’s no direct way to move media from your Camera Roll to your Memories. You could, however, post something from your camera roll to your Story, then save it to your Memories as usual. More on that below…

To post a saved photo or video from your Camera Roll to your Story, just long press it and you’ll find the option to edit it with the usual Snapchat filters, emoji, and text, or just send it off as is. You can also select multiple images/video, but they’ll be added to your Story directly (no editing). For video, same rules apply when recording using the Snapchat camera. Videos can only be up to 15 seconds in length although you’re only able to edit them (add filters, emoji, text) if they’re under 10 seconds.
If a photo or video is edited, you have the option to either Save Changes to the original (Save & Replace), save as a separate copy, or discard the changes and leave the original as it was after sharing. Keep in mind that Camera Roll photos and video posted to your Story wont be added to Memories automatically (not unless you enable this in the settings).
My Eyes Only
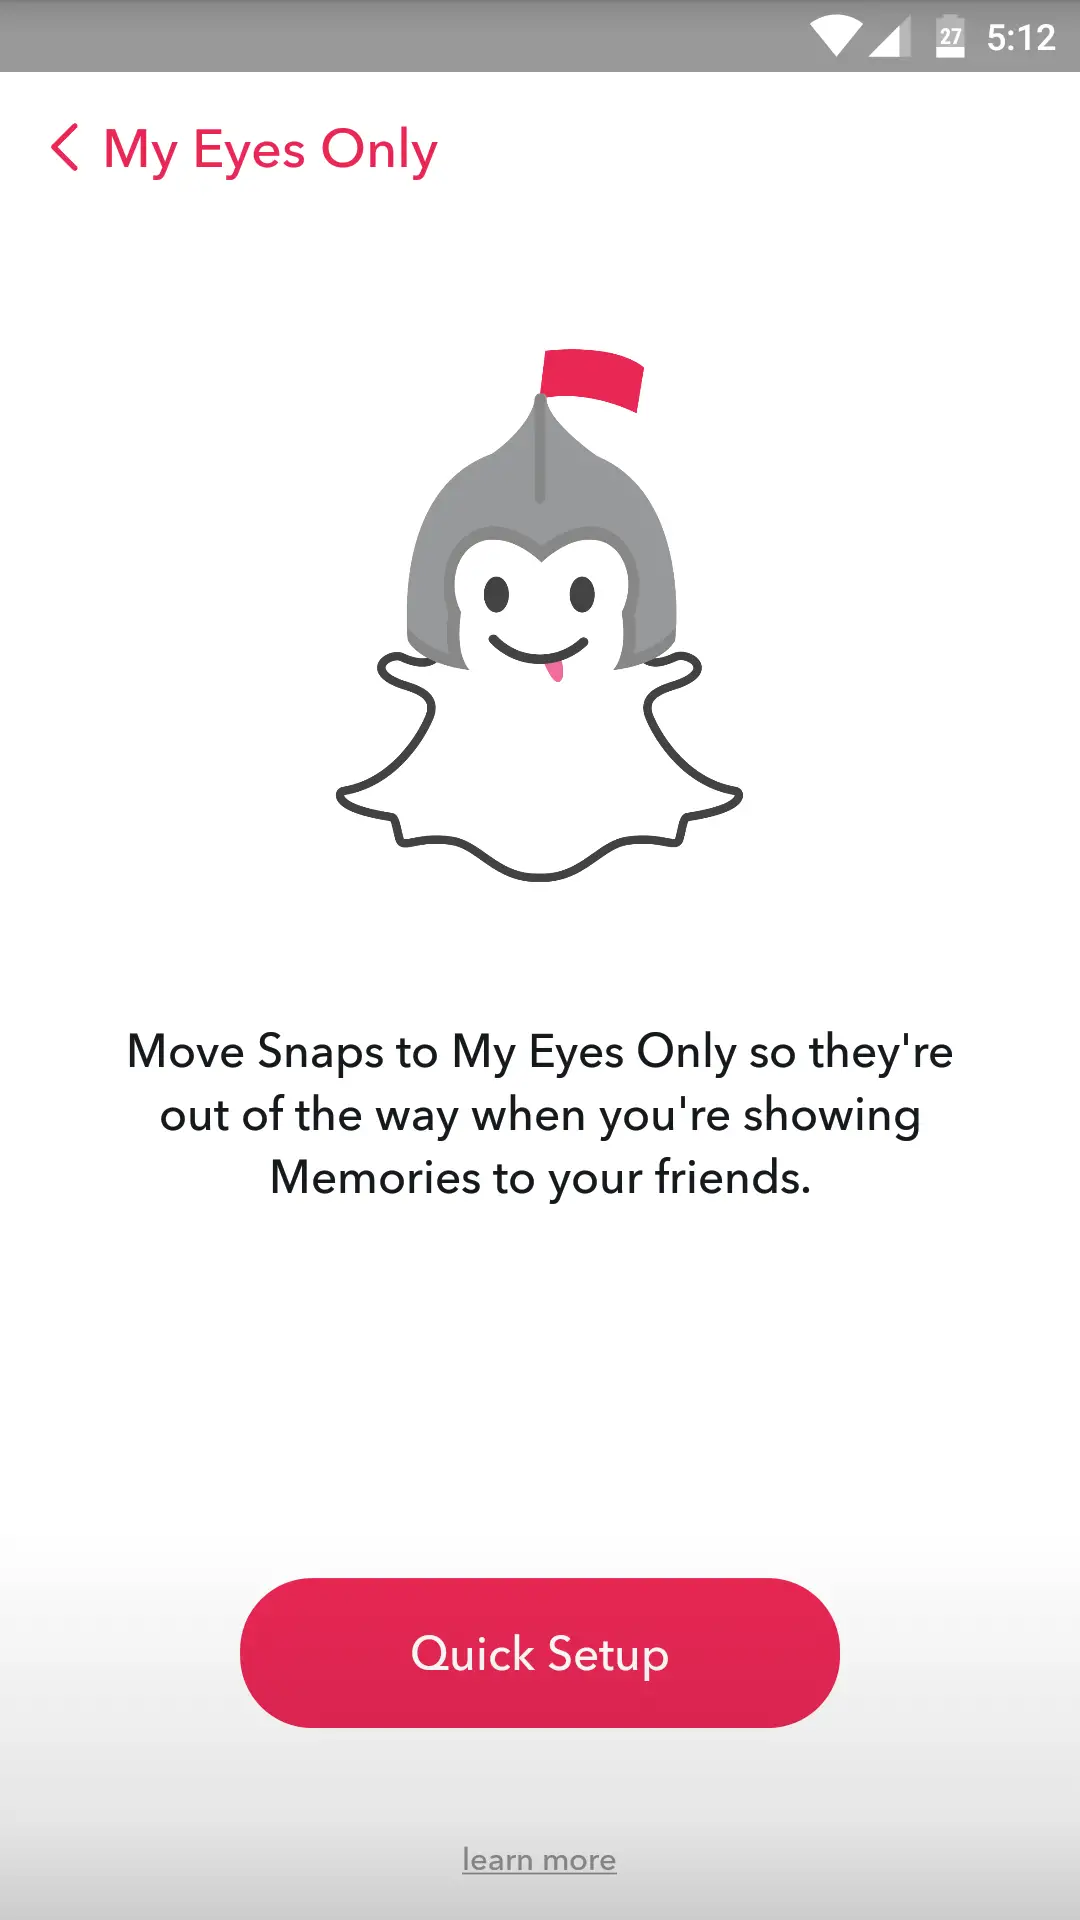

Because you’ll likely be using Memories to store all of your favorite Snaps and Stories, you may find yourself wanting to keep more “private” Snaps under wraps. In the event you’d like to share your Memories with somebody in person, you can hide Snaps and Stories inside a password protected tab called My Eyes Only. Only you’d have to access to this special tab, so you wont have to sweat if someone decides to go through your saved Snaps and Stories. Here’s how you enable it:
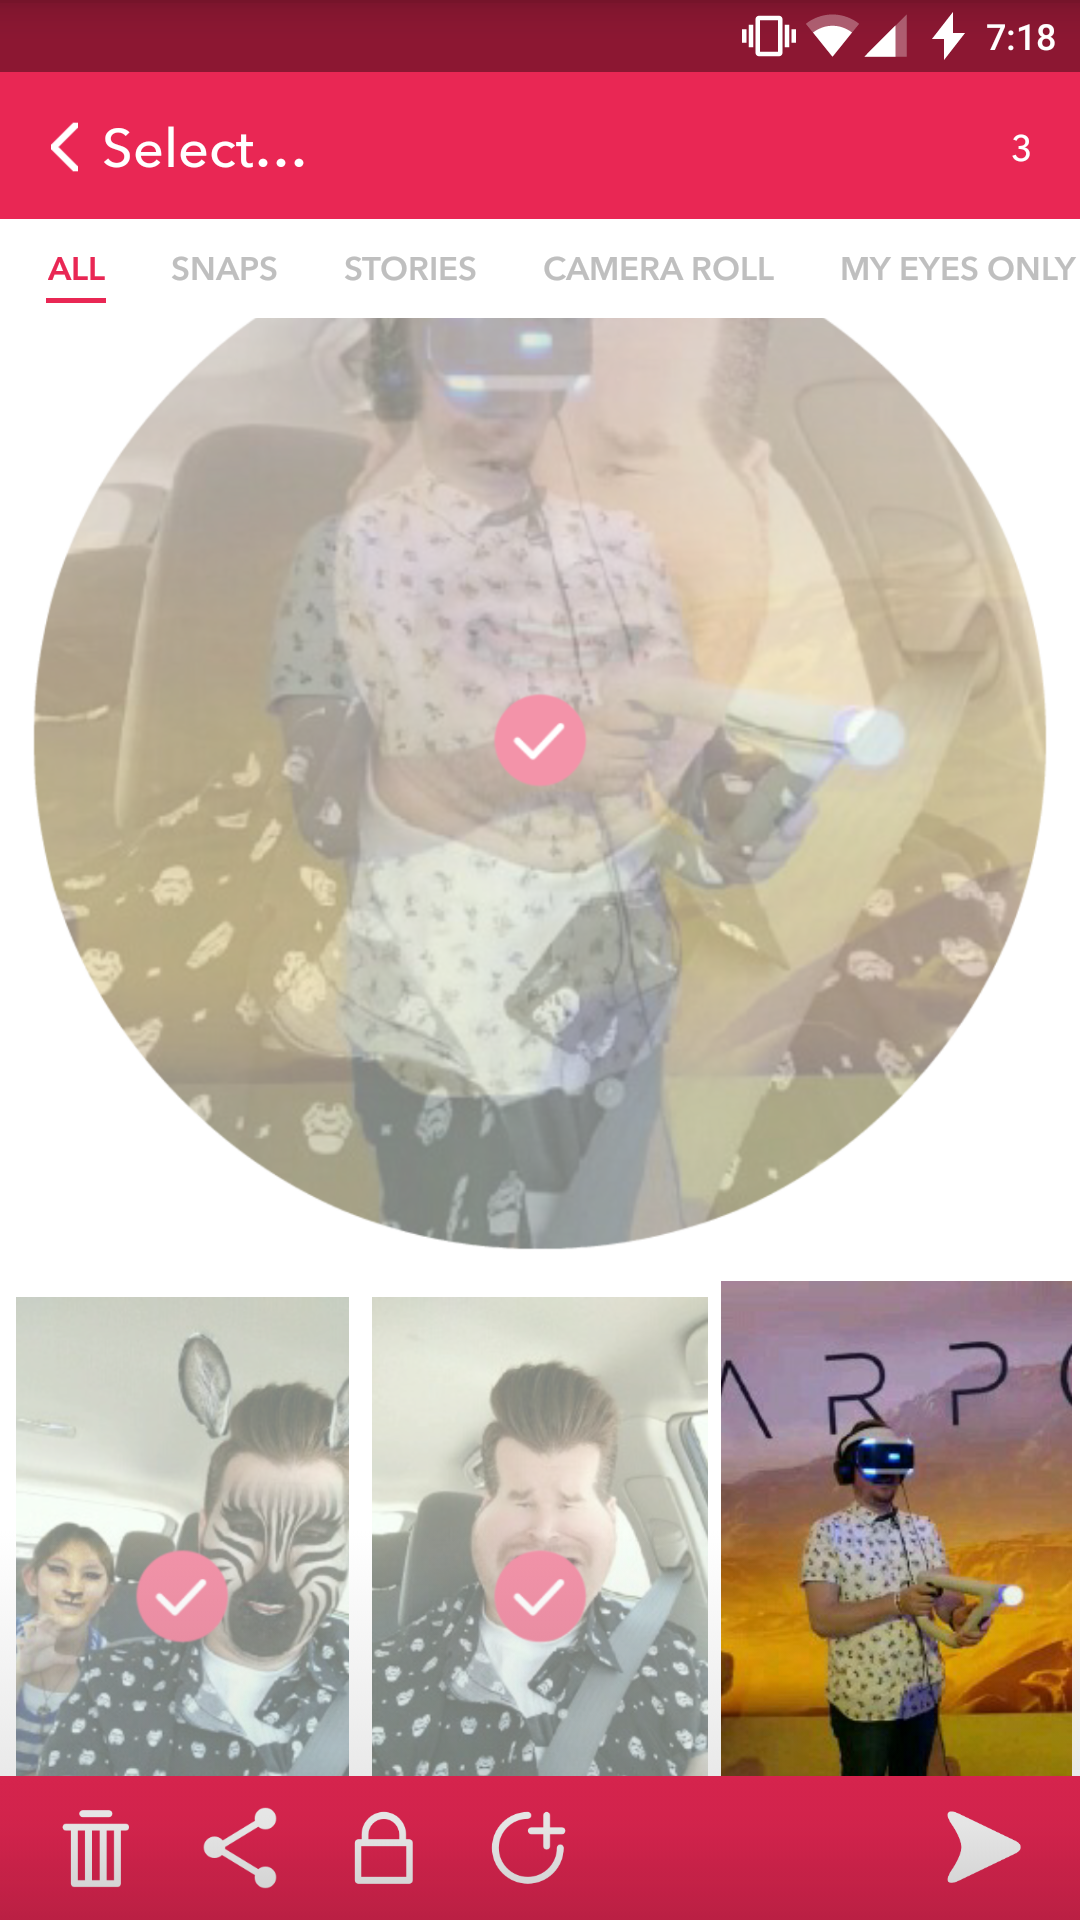
- Tap the Select… icon in the upper right corner of the screen
- Tap the Snaps and Stories you’d like to hide
- Tap the lock icon to Move Snaps to My Eyes Only
- Tap Move to confirm
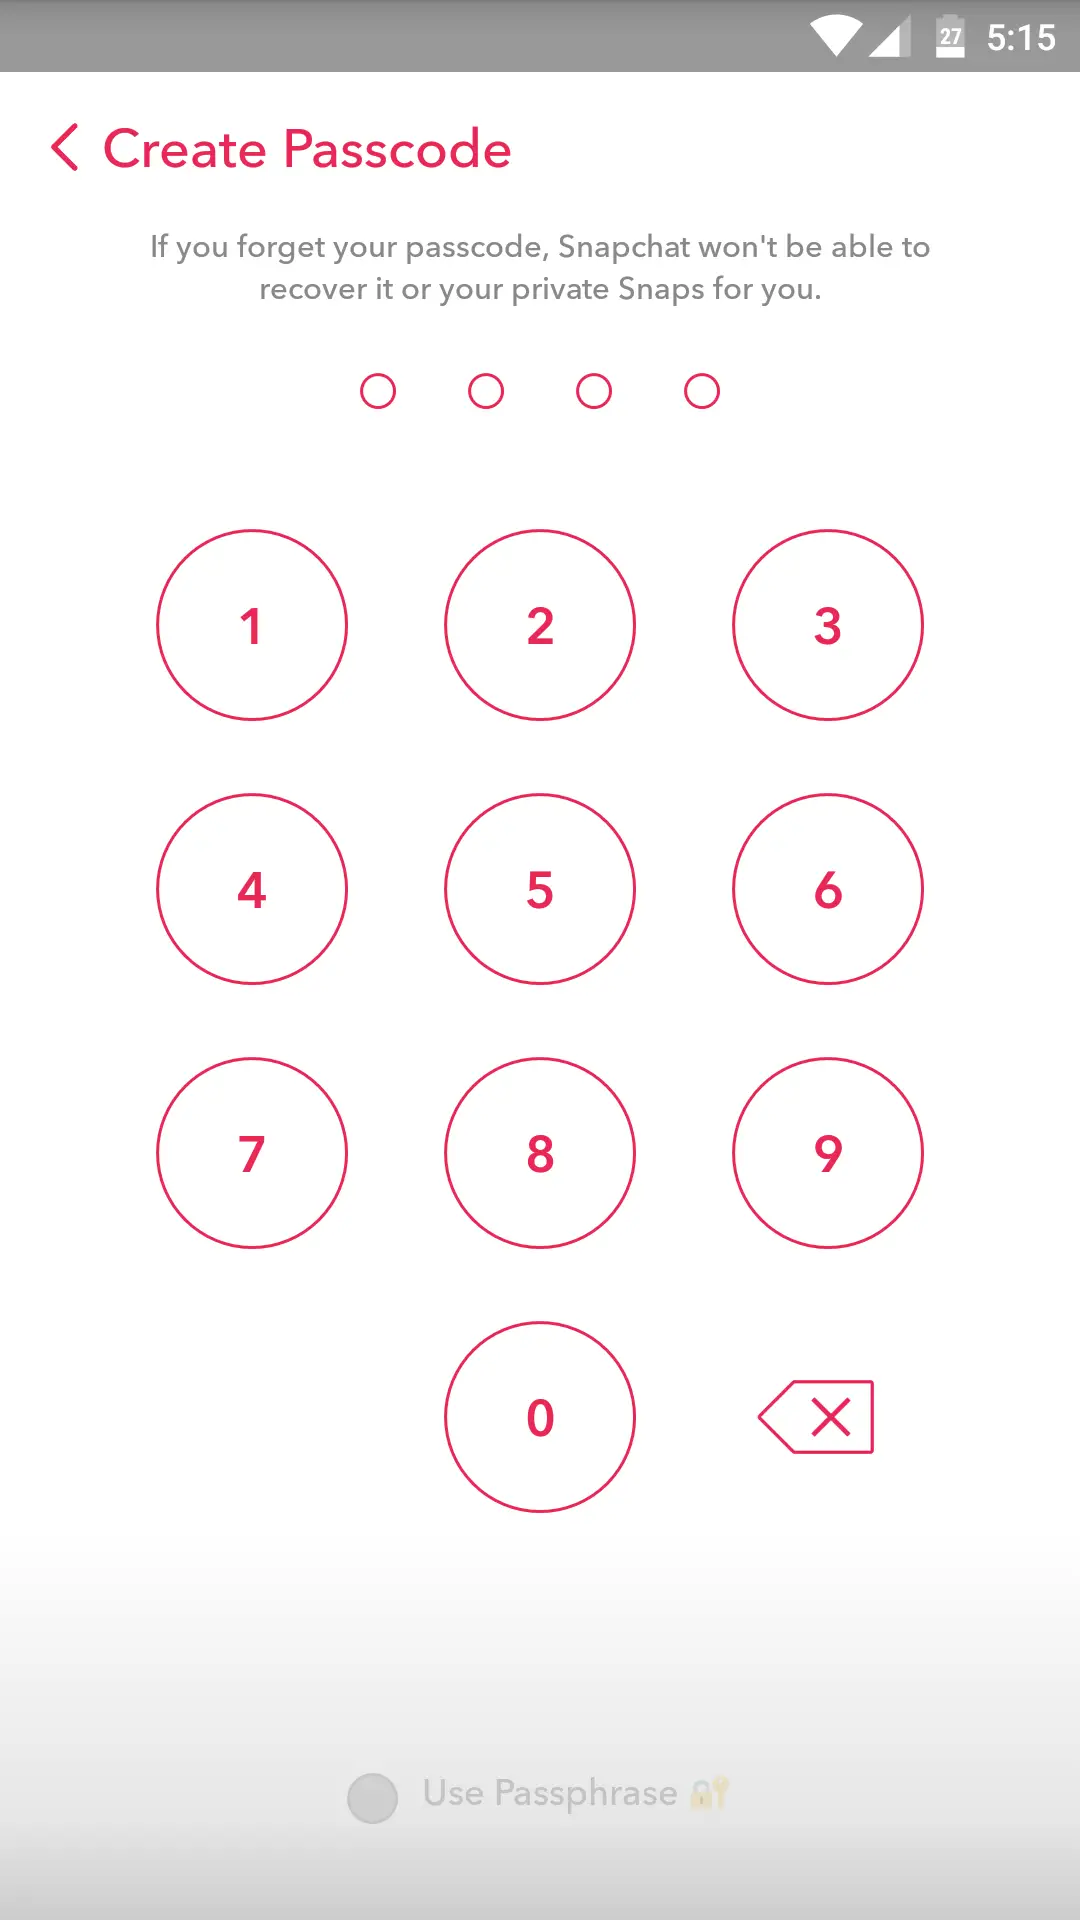
Keep in mind that if you forget your passcode (4 digits) or passphrase (at least 16 characters, 1 letter, 1 number), Snapchat wont be able to recover it and you’ll lose these private Snaps forever. Snapchat not only warns you before creating a password, but makes you physically agree after creating one before continuing. Also worth mentioning, is once My Eyes Only is unlocked, it wont lock again until you leave the Memories screen or the app.
Customize Memories using the available settings
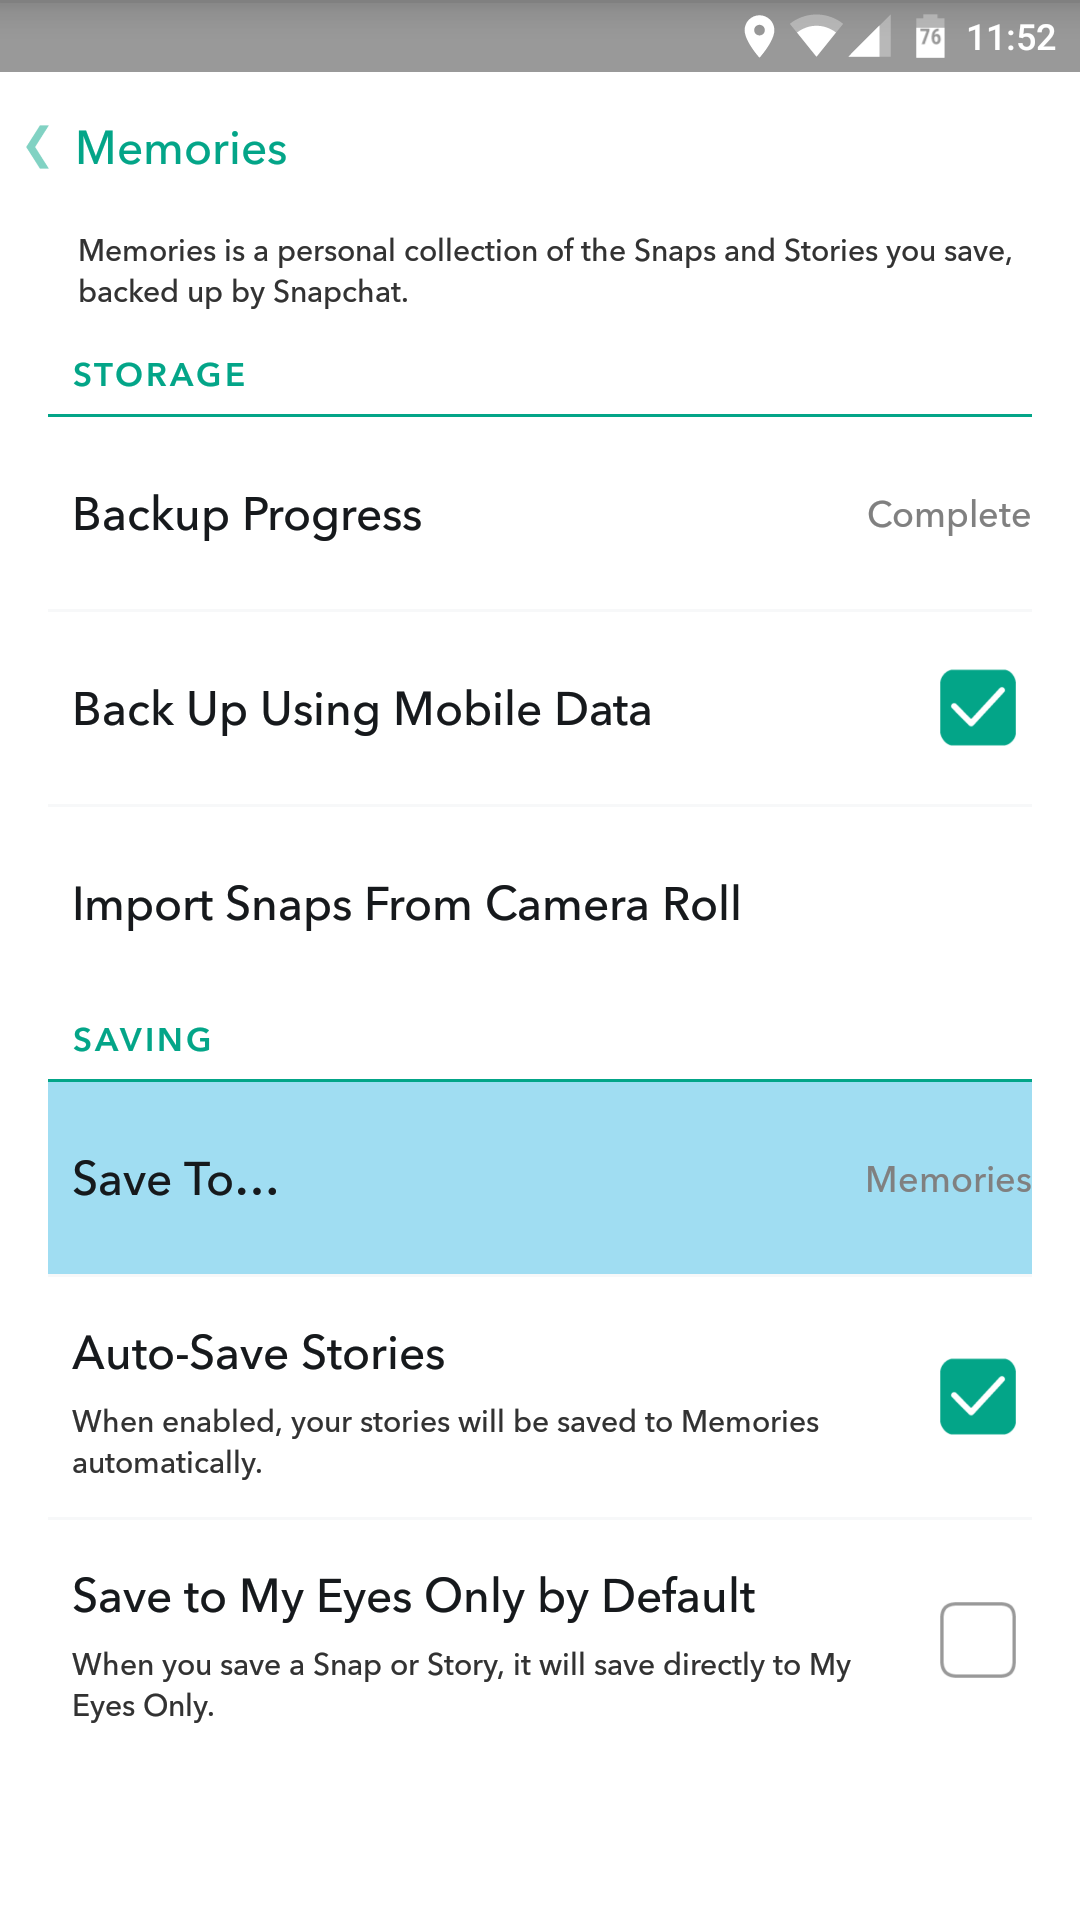

Arguably the most useful features Memories offers are in its settings. By default, Memories doesn’t auto save Snaps and Stories — you’ll have to do it yourself for each individual Snap, or by saving entire Stories. Because that sounds like more of a chore than anything, you can have some peace of mind knowing that all your Snaps are backed up to the cloud by turning on the Auto-Save Stories option in settings.
We also enabled Backup Using Mobile Data because we have an unlimited data plan through our carrier, but if you’re one of those that don’t, we’d recommend leaving it off and Snapchat will only backup your Snaps to Memories when connected to WiFi.
If you like having locally saved copies of your Snaps (like how it was before), there’s the option to Save To… Memories, Memories & Camera Roll, or Camera Roll Only when selecting the download button on your Snaps. If you enabled My Eyes Only, there’s an option to keep all saved Snaps and Stories in there, where they’ll be password protected and only accessible by you.
Download Snaps you’ve posted to My Story

One of the benefits of posting to Snaps to My Story is being able to download photos/videos after the fact. That means, if for whatever reason you post a Snap to your Story and decide you’d like to save it onto your device, don’t worry — you can. The best part is you can download all the Snaps you’ve posted at once, or individually one-by-one. Here’s how:
- Swipe over to the Stories page.
- Select the 3-dot menu next to My Story – this will expand My Story and show all the individual Snaps you’ve posted in a handy list.
- Select the big down arrow with a circle around it to download all the Snaps you’ve posted to your Story.
Or… - Select a Snap to view it and click the downward arrow to download a Snap individually.
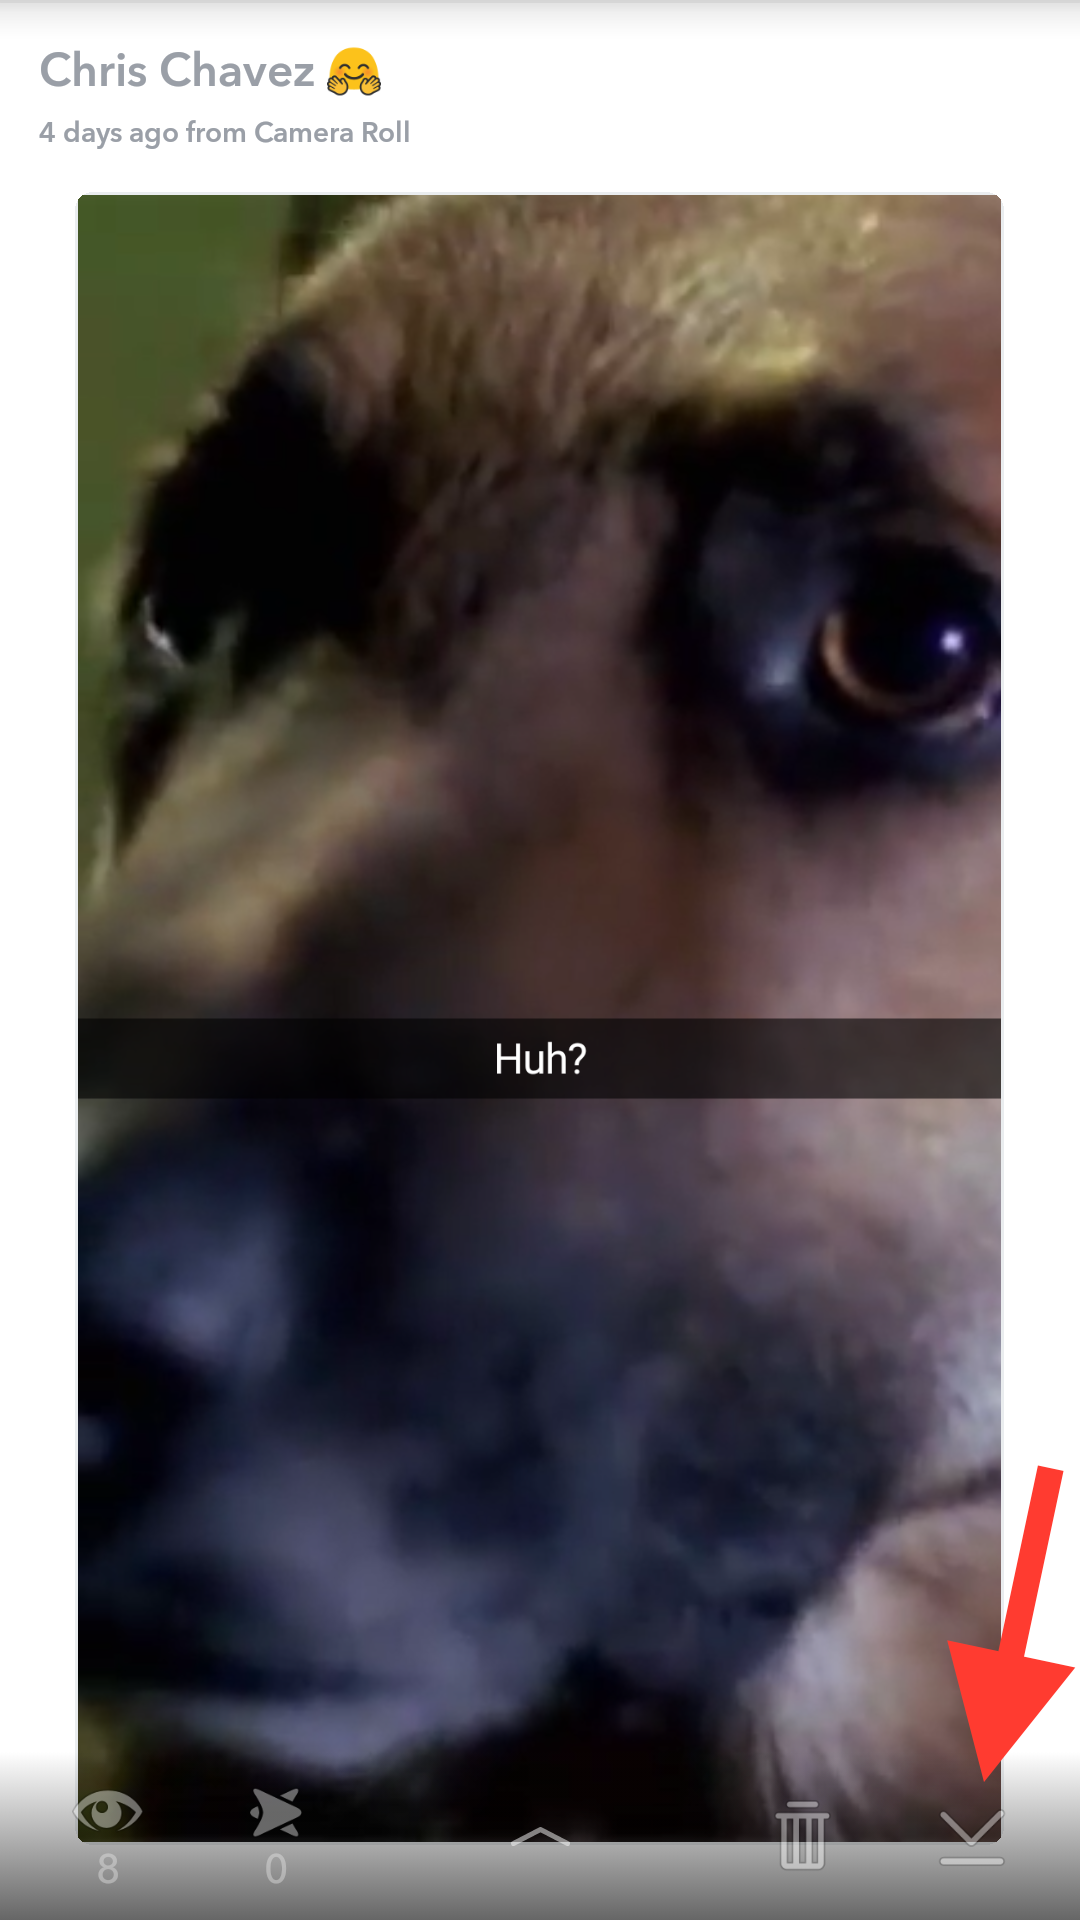
Once expanded, you can see the full list of Snaps you posted from throughout the say. Selecting one of them will allow you to view it for as long as you like. From there, an eye icon shows you how many views your Snap has received (along with who viewed it by clicking the icon), if anyone took a screenshot of your snap (the overlapping arrow icon), or the option to delete the Snap by clicking the trashcan icon. Once again, clicking the down arrow icon will also download that particular Snap.
Deleting Snaps


You’ve just posted something to My Story and now you decide you want to delete it. Don’t worry, we’ve all been there and luckily, deleting Snaps on My Story are easy. Here’s how to do it:
- Open the Stories page
- To the right of My Story, tap the 3 dots
- Tap on the Snap you want to delete
- Tap on the trash can icon
- Confirm Delete
Unfortunately, if you’re looking for a way to delete a Snap you’ve sent directly to someone — you’re out of luck. They’ll receive them no matter what.
Deleting Conversations
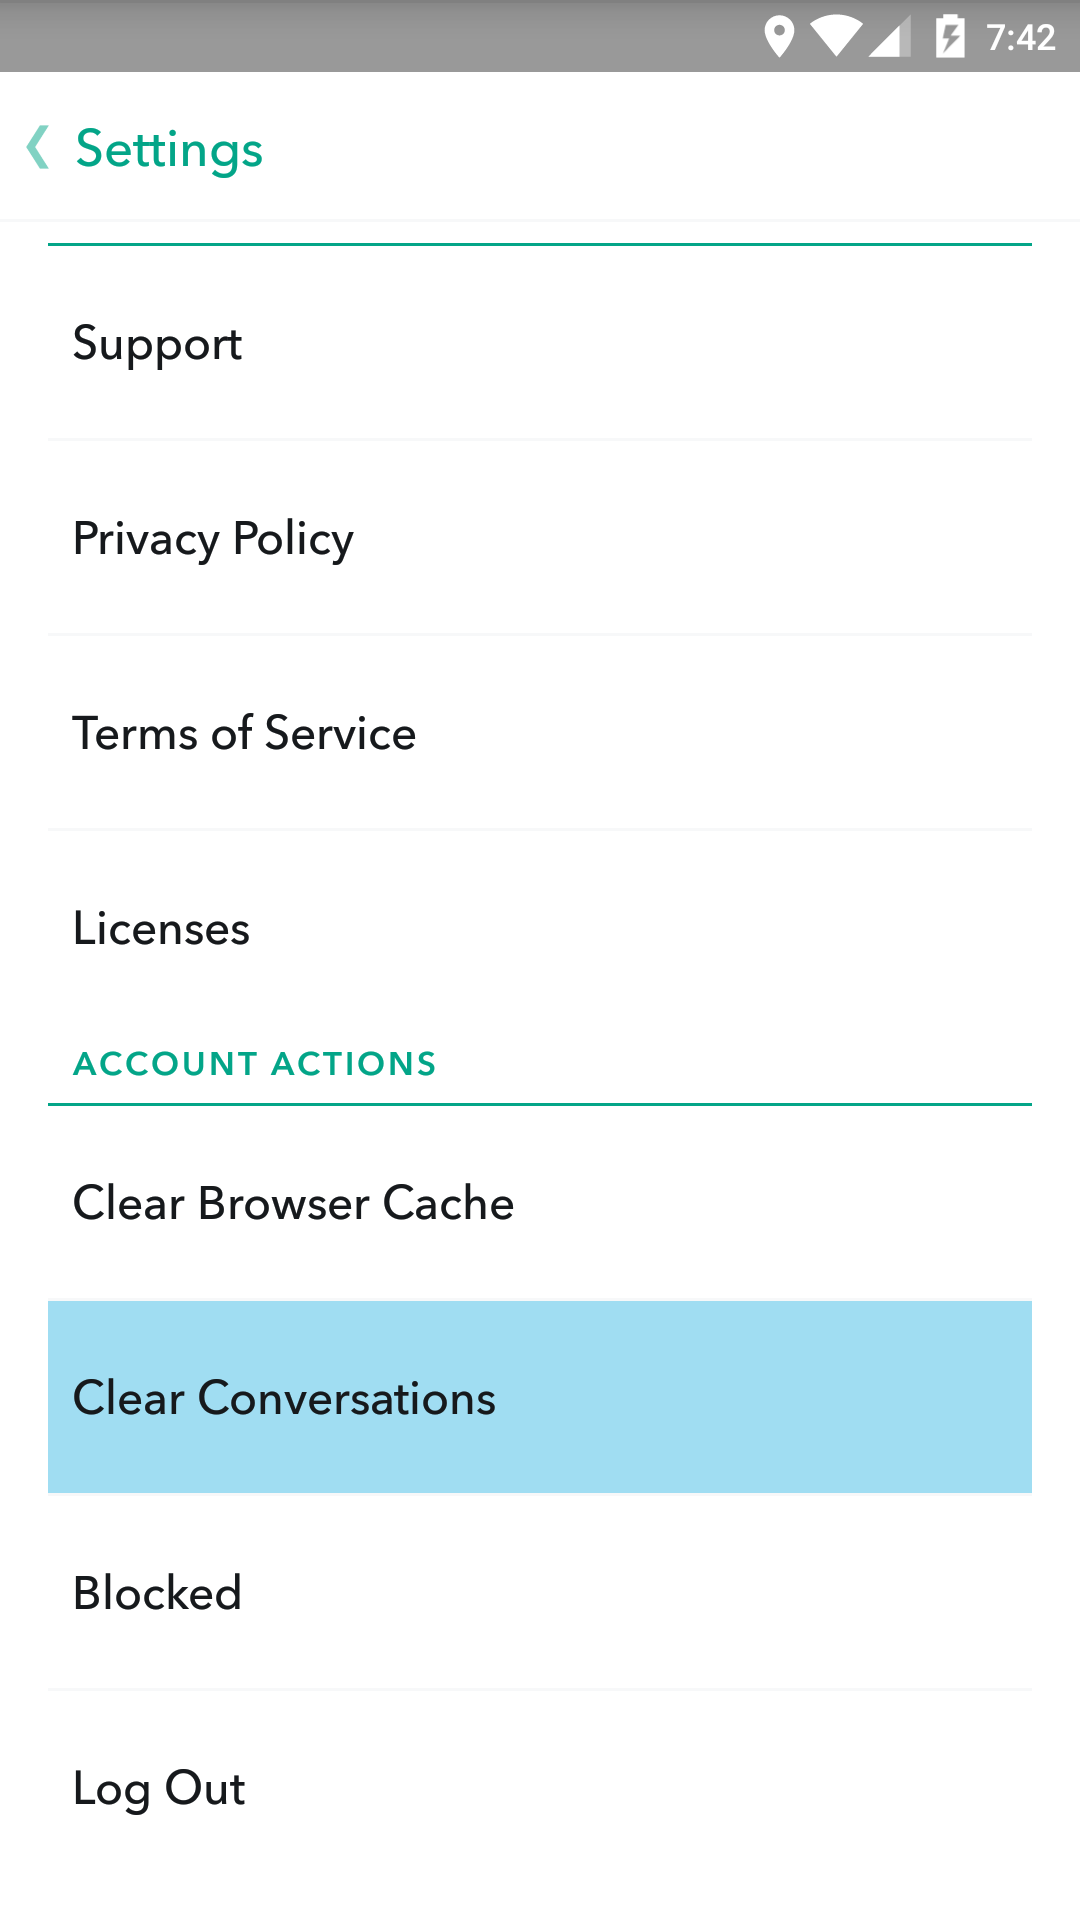
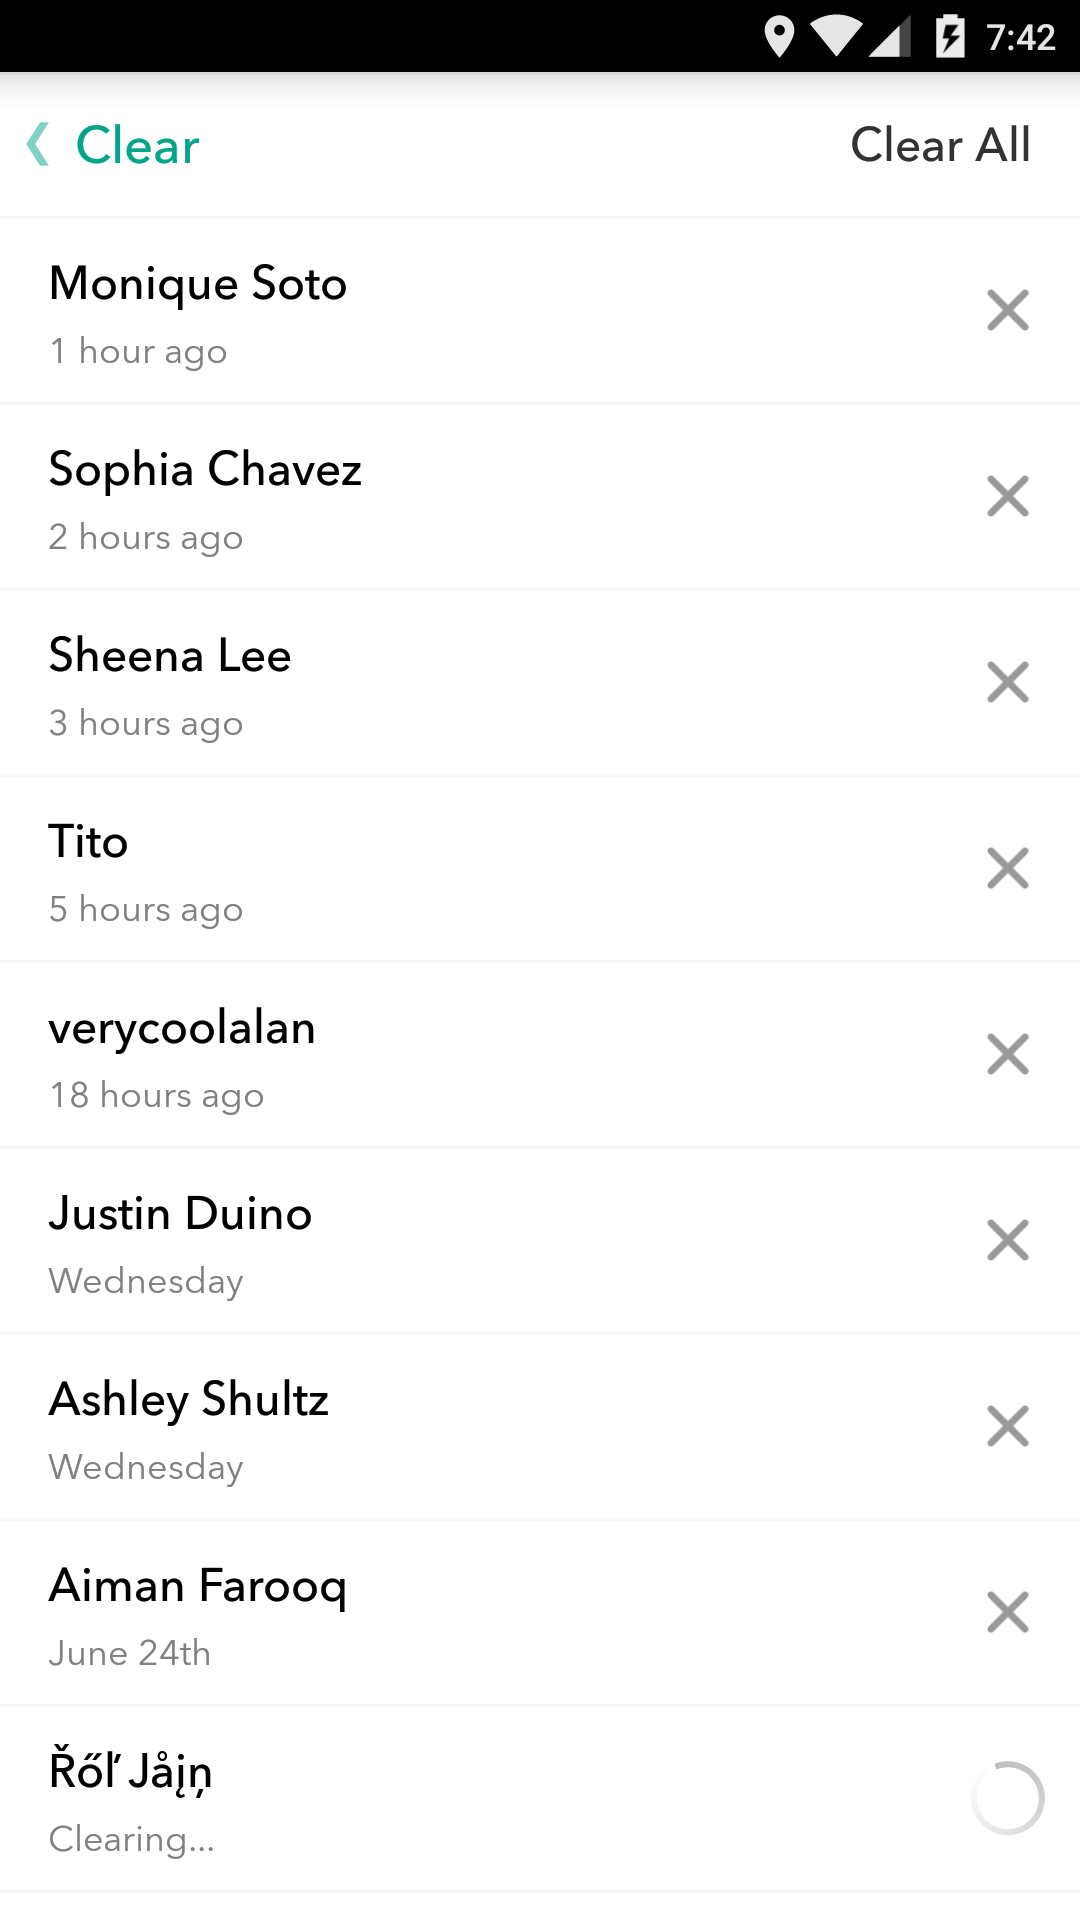
Conversations you have clear out whenever you leave the chat, but the main conversation list — including all the people you’ve recently been chatting with — stays intact. To clear all your entire conversations list, follow these steps:
- Open the Profile screen
- Tap the Settings icon
- Select Clear Conversations
- Tap the X of the person’s name you want to clear from your conversation list
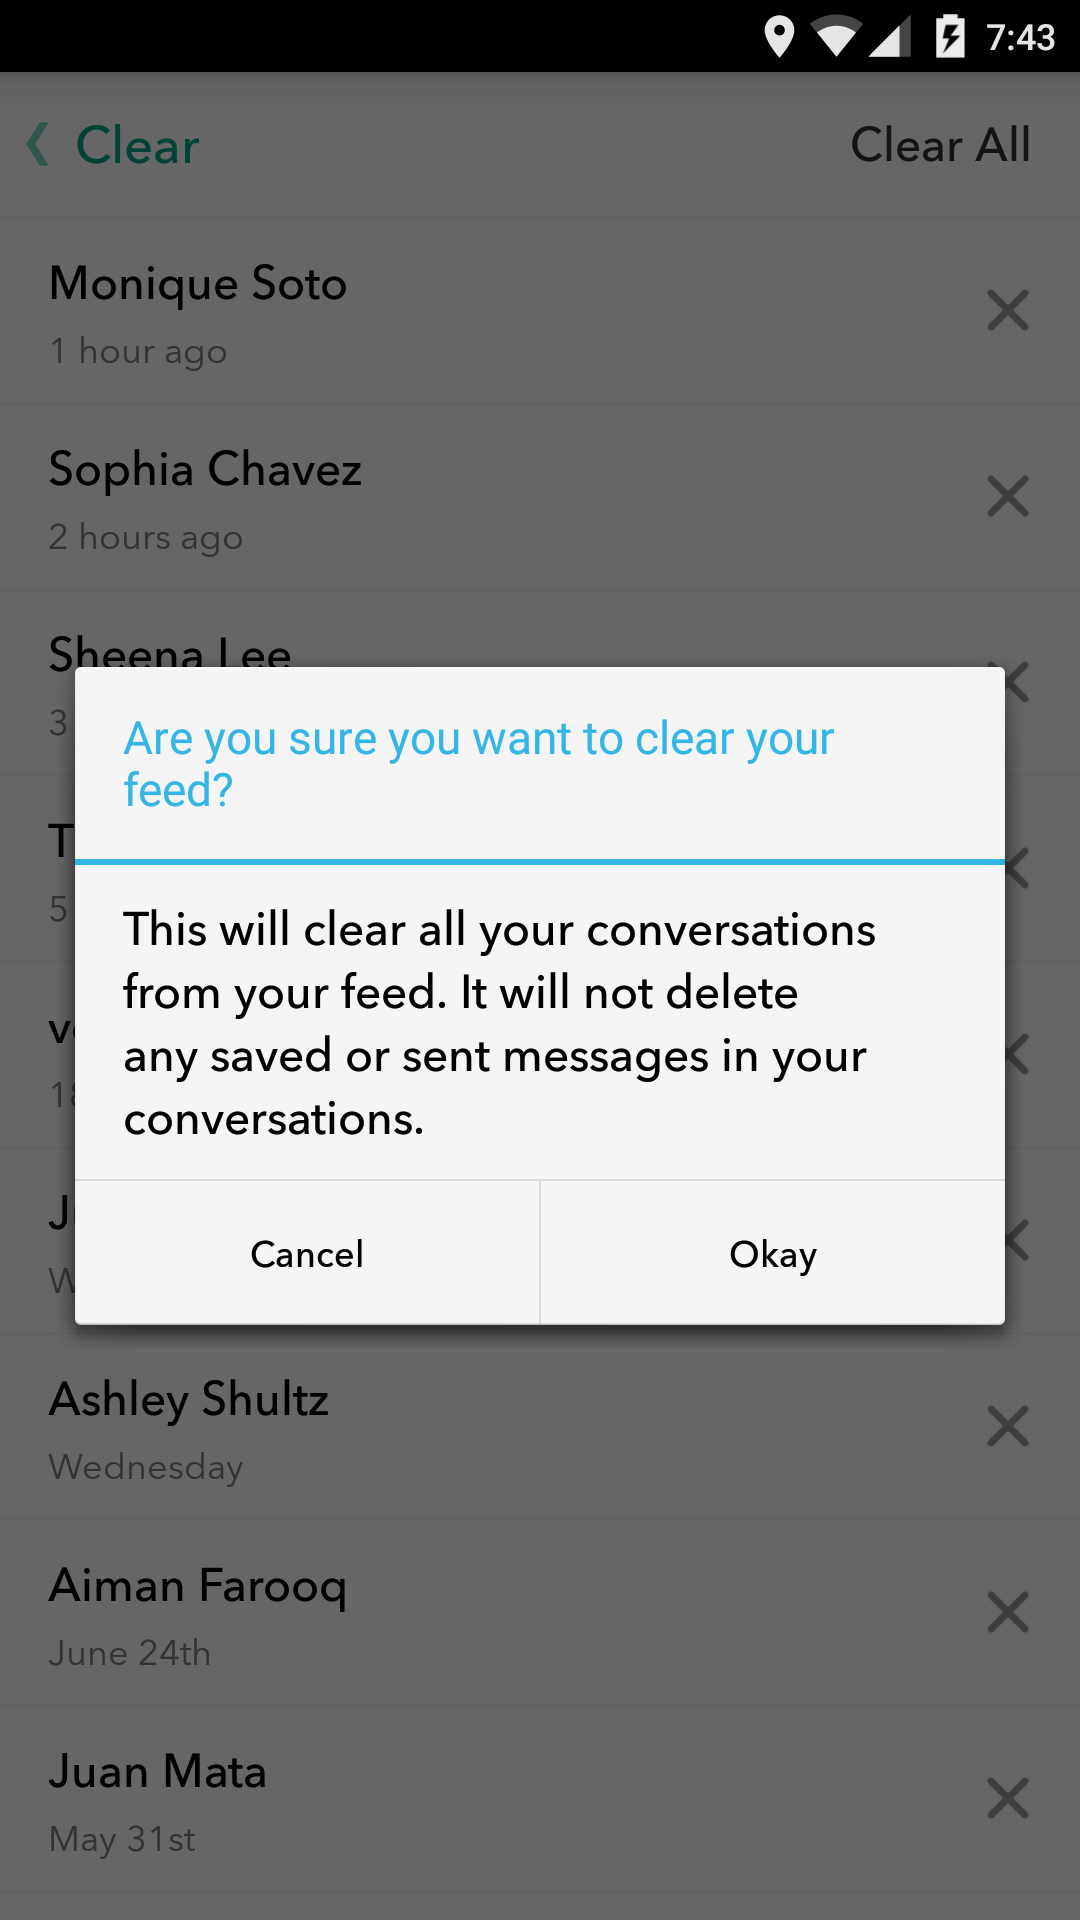
Or… - Tap Clear All to clear out the entire conversation list
Warning: Clearing the list of conversations will not delete any saved or sent content, it only clears them from appearing on your device.
Previous:
Getting started and adding friends on Snapchat
Using the Snapchat camera, filters, 3D Lenses & Face Swap
Every Chat 2.0 feature including, Snapcash, Blocking users, and more
Everything to know about My Story, Live Stories, and Discover
Next:
