
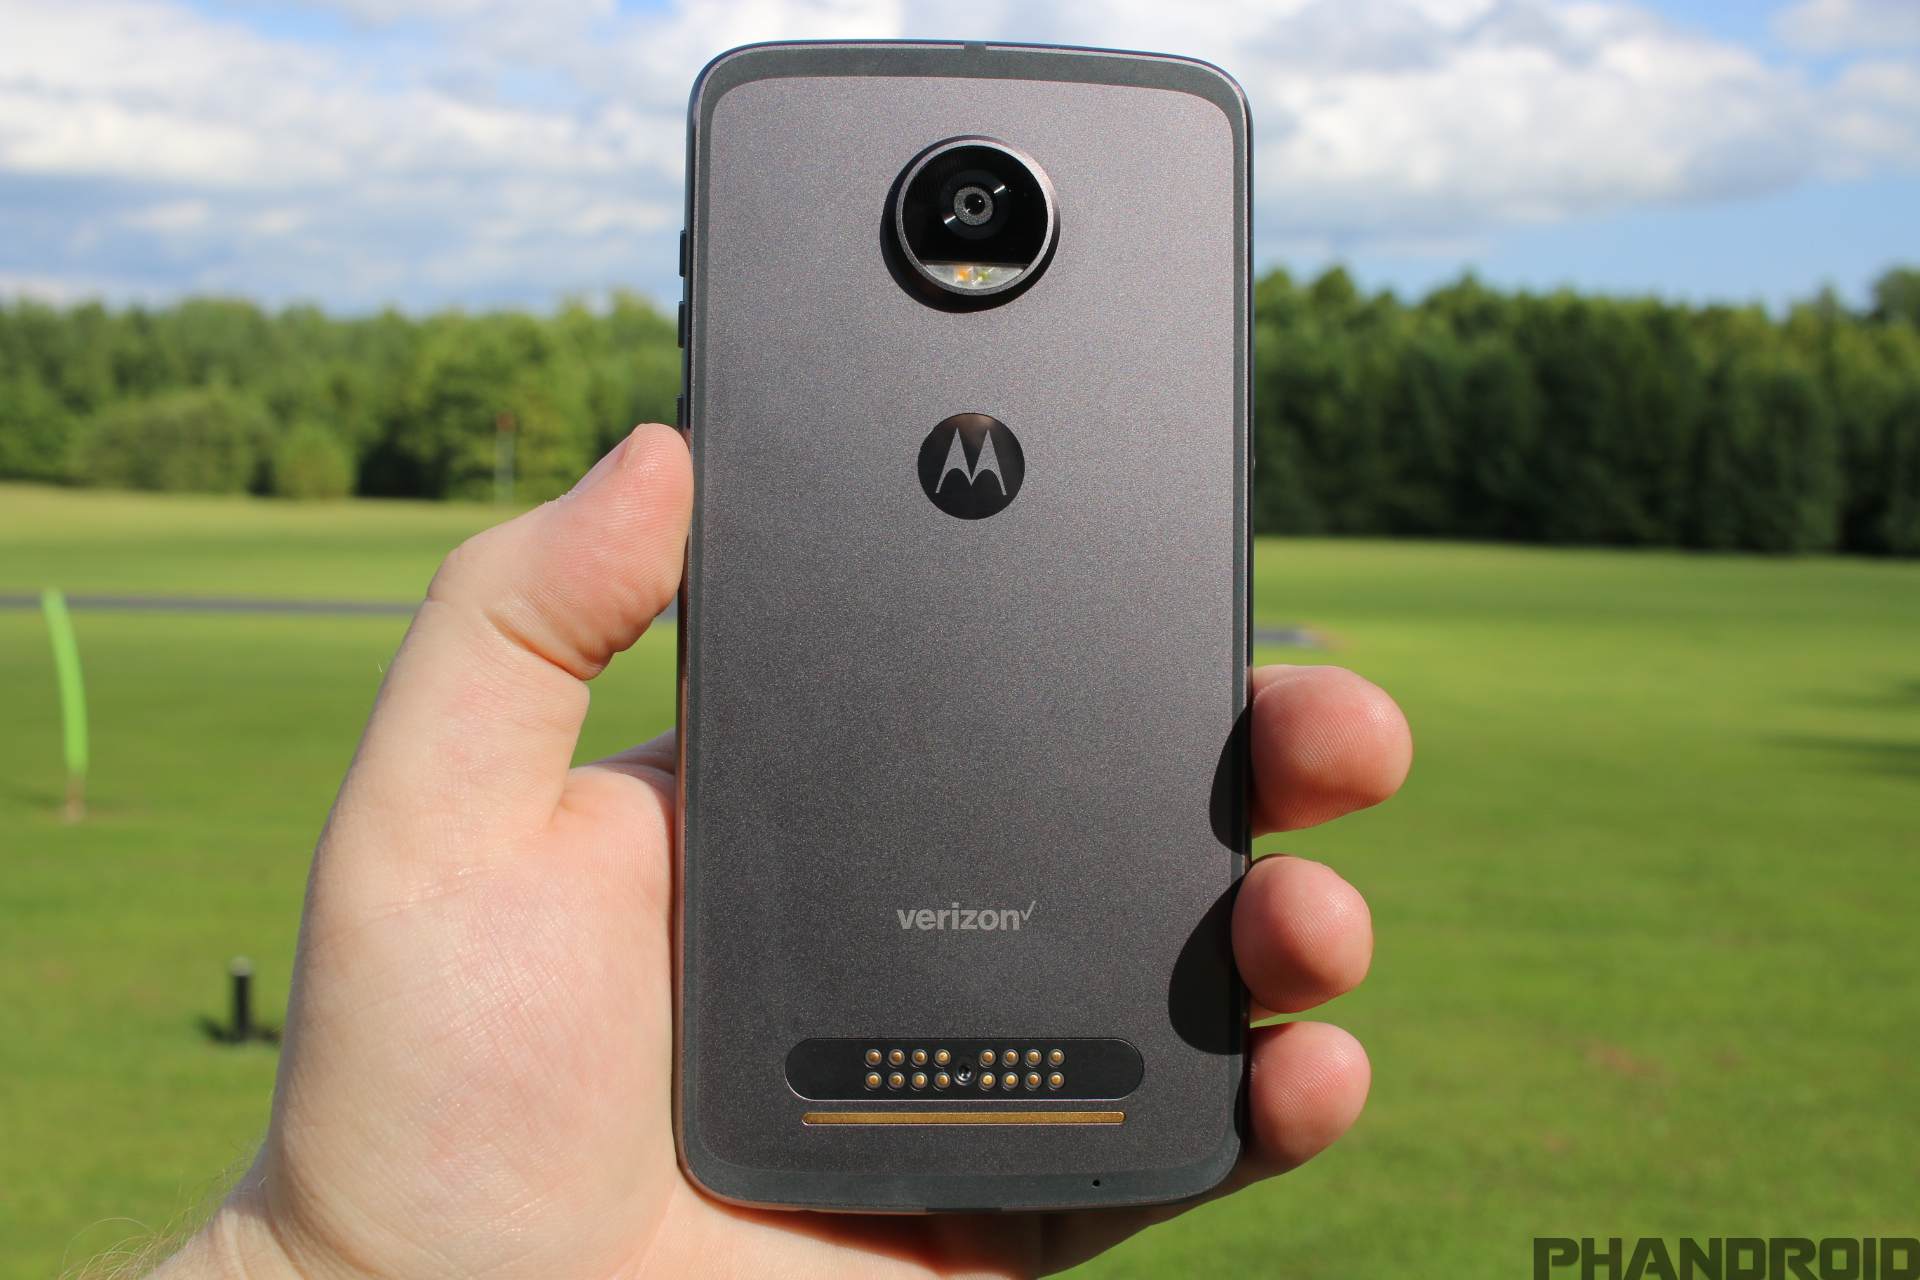
2017 has been the year of the bezel-less phones, but Motorola and Lenovo have opted to change its lineup in other ways. The Moto Z2 Play is one of these devices as it has been slimmed down quite a bit, but is still a viable option today. The Moto Z2 Play has been out for some time, but considering the fact that the device is still one of the more popular options, we’re going to take a look at some of the first things every owner should do.
Download Forums for Android – it will auto-detect your Moto Z2 Play and connect you with our official users Z2 Play Forum for help, tips, and tricks!
Transfer data
![]()
When starting up your new Moto Z2 Play for the first time, you’ll be presented with a screen that says “Welcome”. From here, there are two options to consider, the first of which is to copy your data from your previous device, while the second option gives you the ability to start with a clean slate.
If you want to transfer your data from your old phone to the new one, you’ll want to select “Copy your data”. After logging into your home Wi-Fi, you’ll be presented with another screen which will ask you where your data is currently housed. Here are the three options presented:
- A backup from an Android phone
- A backup from the cloud
- An iPhone device
You’ll need to select the option that works best for you, but it’s important to recognize that if you choose to backup from an Android phone directly, this process takes place via NFC. If selected, you’ll need to ensure that the NFC capabilities of your old phone are turned on, and then follow these steps:
- Make sure your other device is on and unlocked
- Place the two devices back-to-back until you hear a tone, then set aside
Once you hear the tone, you’ll be prompted to log in with your Google account and the transfer will begin. Once completed, you’ll have to wait for a little while, depending upon how much information was stored on your old device, and then you’ll be ready to go!
Stay protected

It’s something nobody thinks about until it happens, but one of the worst things that could happen to you is losing your smartphone or having it stolen. In the event that your device does go missing, you need to know exactly how to recover your device or erase any personal information stored therein.
Android’s built-in feature — “Android Device Manager” — is the perfect way to track down a lost device, you just need to know where to find it.
- Go to google.com/android/devicemanager
- Select your phone from the drop-down menu.
- You’ll see the device on a map and a few options for finding it (ring), locking it (if it wasn’t locked already), or erasing all of its contents with a full factory reset.
Set up fingerprint scanner
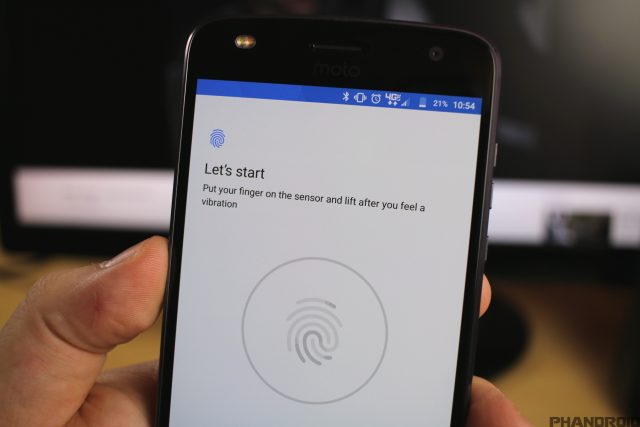
One of the most important and convenient features you’ll find on modern day smartphones is the ability to secure and unlock your device using your fingerprints. With a fingerprint button located on the front chin of the device, registering your fingerprints is extremely easy on the Moto Z2 Play. You can either set up your fingerprints during the setup process, but if you skipped over that section for whatever reason, here’s how you can set it up from inside the Settings app:
- Open the Settings app
- Scroll down to Security
- Tap on the Fingerprint option (confirm lock method if you already set one)
- Tap Add fingerprint
- Follow instructions to scan your prints
- Rinse and repeat
Take advantage of Google Photos
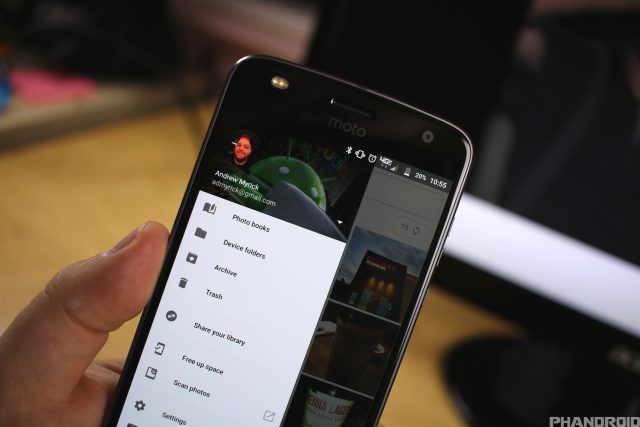
In the event your phone gets ever becomes lost or stolen, it’s important that you have all your photos and videos backed up safely online. Google provides everyone with unlimited high-quality backups (and 1080p videos) for absolutely free.
All you have to do is open the app and agree to the terms and you’ll be all set. You can further tweak your backup settings (for instance, to only backup while your device is connected to WiFi) by opening Google Photos > menu > Settings > Back up & sync. There you can fine tune and customize your backups:
- Choose between High-quality photo/video backups (unlimited), or original quality (will use up your Google/Gmail/Drive storage)
- Back up photos Over Cellular (unlimited data plan recommended) or only when connected to WiFi.
- If you choose to back up photos over cellular, you can also choose whether to back up videos separately over cellular or WiFi.
- Select Backup device folders to pick specific folders you want to also back up (your camera roll photos/videos are already backed up by default).
Once backed up to Google Photos, all your photos will be stored in the cloud and immediately accessible from all your devices, computers, or other web connected devices.
MicroSD Card

Unlike other offerings on the market, the Moto Z2 Play features a higher base storage, making it easier to store your favorite music, videos, and other content. However, if you’re looking to bring a bunch of your files over to your new Z2 Play from your old device, a microSD card is definitely the best way to do so.
Thankfully, Motorola has kept the microSD card slot, making for an easy way to expand your storage up to 2TB if you absolutely needed to. This would be helpful if you end up shooting videos in 4K on a regular basis. Here are some of our recommendations for a solid microSD card:
- SanDisk Ultra 32GB microSD Card – $13.95
- SanDisk Ultra 64GB microSD Card – $22.99
- SanDisk Ultra 128GB microSD Card – $44.99
Disable and uninstall bloatware
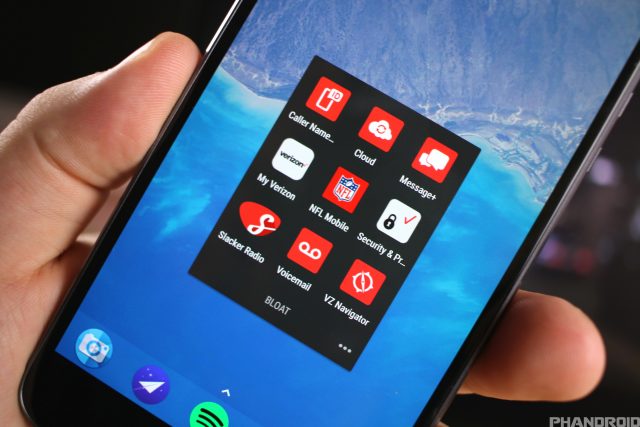
This step won’t be necessary for everyone, but considering the fact that Verizon is selling this model directly, you’ll definitely see a few (more than a few) pre-installed apps. Luckily, there’s an easy way to get rid of these in some type of capacity, and here are the steps:
- Go to Settings > Apps
- Select an app from the list
- Tap the Disable or Uninstall button
This may not work for every application, as some applications are required for the device to function regularly. However, if you notice that something’s acting a bit wonky, simple tap the disabled application and select Enable.
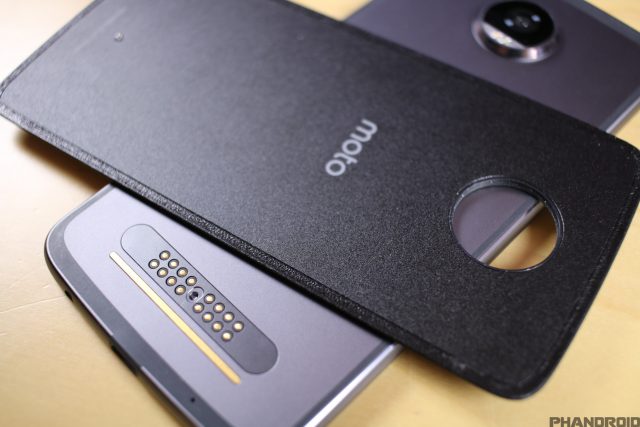
Check out some of the best Moto Mods and Style Covers

Introduced last year along with the original Moto Z and Moto Z Force, Moto Mods offer an interesting take on modularity. Some of these Moto Mods make it possible to add a 360-degree camera, extend your battery, or be the life of the party with the JBL SoundBoost Moto Mod.
Best of all, any of the Moto Mods released last year, are compatible with the new Moto Z2 Play, so it’s just a matter of seeing what’s best for you. If you want to check out Motorola’s current offerings, you can simply hit the “Moto Mods” app icon and you’ll be taken to Motorola’s store to check everything out.
Here are some of our favorite options:
Moto Style Mods and Cases
- Herringbone Nylon Style Mod – $19.99
- Spigen Rugged Armor Case – $11.99
- TUDIA Heavy Duty Case – $10.99
- OMOTON Case with Kickstand – $7.81
Set up Do Not Disturb

There’s no reason your phone’s notifications should ever interrupt a good night’s sleep. While you can always manually set your phone to silent every night (providing you remember), you could also automate this entire process by setting up automatic Do Not Disturb schedules. This will mute your phone, but still allow some high priority notifications to come through (calls from specific contacts for instance). The best part? You’ll never again have to remember to mute your phone before bed. Here’s how you can set it up:
- Open the Settings app
- Scroll down and select Sound
- Tap on Do not disturb (Make sure your ringtone volume is on)
From here, you can choose between always having it on every day, setting specific times and days you want DnD to activate (Automatic rules), and what notifications you would still like to come through (Priority only allows). For instance, you may want to only allow calls from your contacts, your favorite contacts, or repeat callers to come through in the event of an emergency.
Dev Options

The Moto Z2 Play feels pretty snappy out of the box, but things can definitely be turned up a notch. To speed things up and make the UI feel more snappy, you can increase the speed of the animations. But you’ll first need to activate the hidden Developer Options by following these steps:
- Go to Settings > About phone
- Select Software info
- Tap Build Number 7 times until you see “You are now a developer” message
- Go back to the main settings and you’ll see Developer Options
To speed up animations:
- Go to Settings > Developer options
- Scroll down select Window animation and choose .5x
- Select Transition animation and choose .5x
- Select Animator duration scale and choose .5x
Get acquainted with Moto features

A feature that has been present on Motorola devices since the birth of the original Moto X has been its Moto Active Display. This feature returns, and is better than ever in our early testing period. There are new things to check out and features to enable to get an experience that isn’t found anywhere else.
In order to get started, you’ll need to tap the Moto app icon on your home screen and you’ll be presented with three different sections:
Moto Actions

Moto Actions provides an array of different settings, including “One Button nav”. When enabled, this will allow you to navigate your device from the luxury of your home button. Additionally, when enabling this, you will be able to save a few precious pixels and get some more screen real-estate.
Moto Display
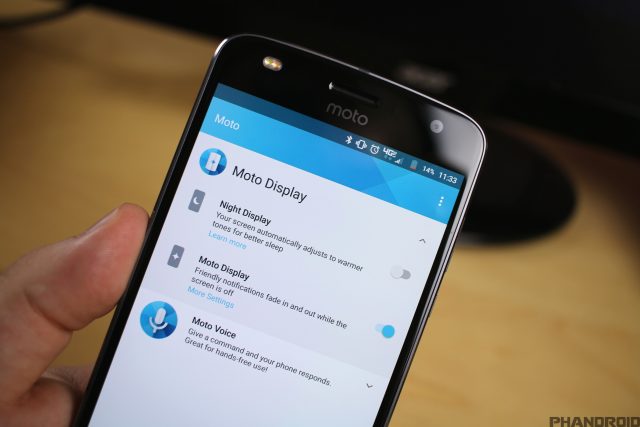
The Moto Display section provides the settings to your Active Display, while making it possible to quickly reply to messages from your lock screen, without ever unlocking the device. Also found in this section is “Night Display”, which will change the tone of your display to make things easier on your eyes after the sun goes down.
Moto Voice
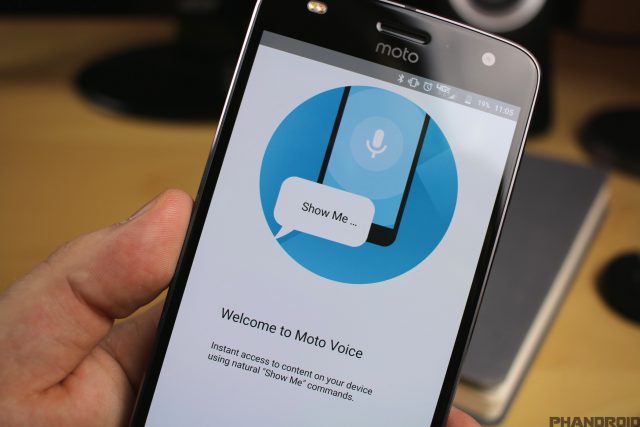
The final section is Moto Voice and this allows you to control your phone while just using your voice. Simple voice commands such as “Show me the calendar” or “Show me Chrome” will make for an excellent hands-free experience. Best of all, none of these voice commands interfere with Google Assistant so you’ll get the best of both worlds.
Get rid of the on-screen nav buttons

This next one is a bit different as it’s for those who want to try using just the home button to navigate their new Moto Z2 Play. By default, Motorola has enabled the standard on-screen navigation bar, but there’s a way to disable this. By disabling the navigation bar, you will be able to use gestures on your home button to navigate throughout the device and get some extra screen real-estate. Here are the steps necessary to take advantage of this feature:
- Open the Moto app
- Tap Moto Actions
- Toggle One button nav
- Profit
Shrink screen

While devices like the Galaxy S8 and LG G6 are featuring larger displays in smaller form factors, the Moto Z2 Play keeps a traditional aspect ratio with its 5.5-inch display. Thankfully, Motorola has included a quick gesture that allows you to shrink the screen, making it much more accessible for one-handed usage.
- Open the Moto app
- Tap Swipe to shrink screen
- Toggle On
Once enabled, you will be able to swipe from the center of your screen to the bottom left or right corner to activate the one-handed mode. This way you can reach the status bar without needing to perform gymnastics with one hand. If you want to go back to the normal view, simply tap the black area surrounding your new home screen and everything will go back to normal.
Best apps & games

As awesome as the Moto Z2 Play is, it’s not much without some great apps and games. We’ve compiled tons of helpful guides for finding the best apps and games in the Play Store. Before you dive in and rummage around, you’ll want to check out these lists first.
- 100 Best Android Apps of 2017
- Best Apps of the Month
- Best Games of the Month
- Weekly Top 5 Apps & Games
- EarlyBird – News for Android
- Best Android Apps for learning languages
- Best Android Games for 2 Players
Z2 Play Forums

These tips will get your feet wet, but this is only the beginning of what the Z2 Play can do. For even more content, we’ve got the Moto Z2 Play Forum at AndroidForums.com! All you have to do is download the Forums app and you’ll automatically be added to the correct forum. You’ll find more helpful tips and other users like you. It’s easy to ask for help and get answers. Here are a few threads to get you started:


Comments